Change owner and signer address
This guide will walk you through the process of changing the owner and signer address for your validator node.
This guide will walk you through the process of changing the owner and signer address for your validator node.
Change the owner address
-
Access StakingNFT smart contract.
-
Click on the Connect to Web3 button and login using the owner address of your validator node.

-
You will see a list of functions appear. Click on
safeTransferFromfunction. This will be 5th function in the list. There will be 3 data fields that you will need to add information.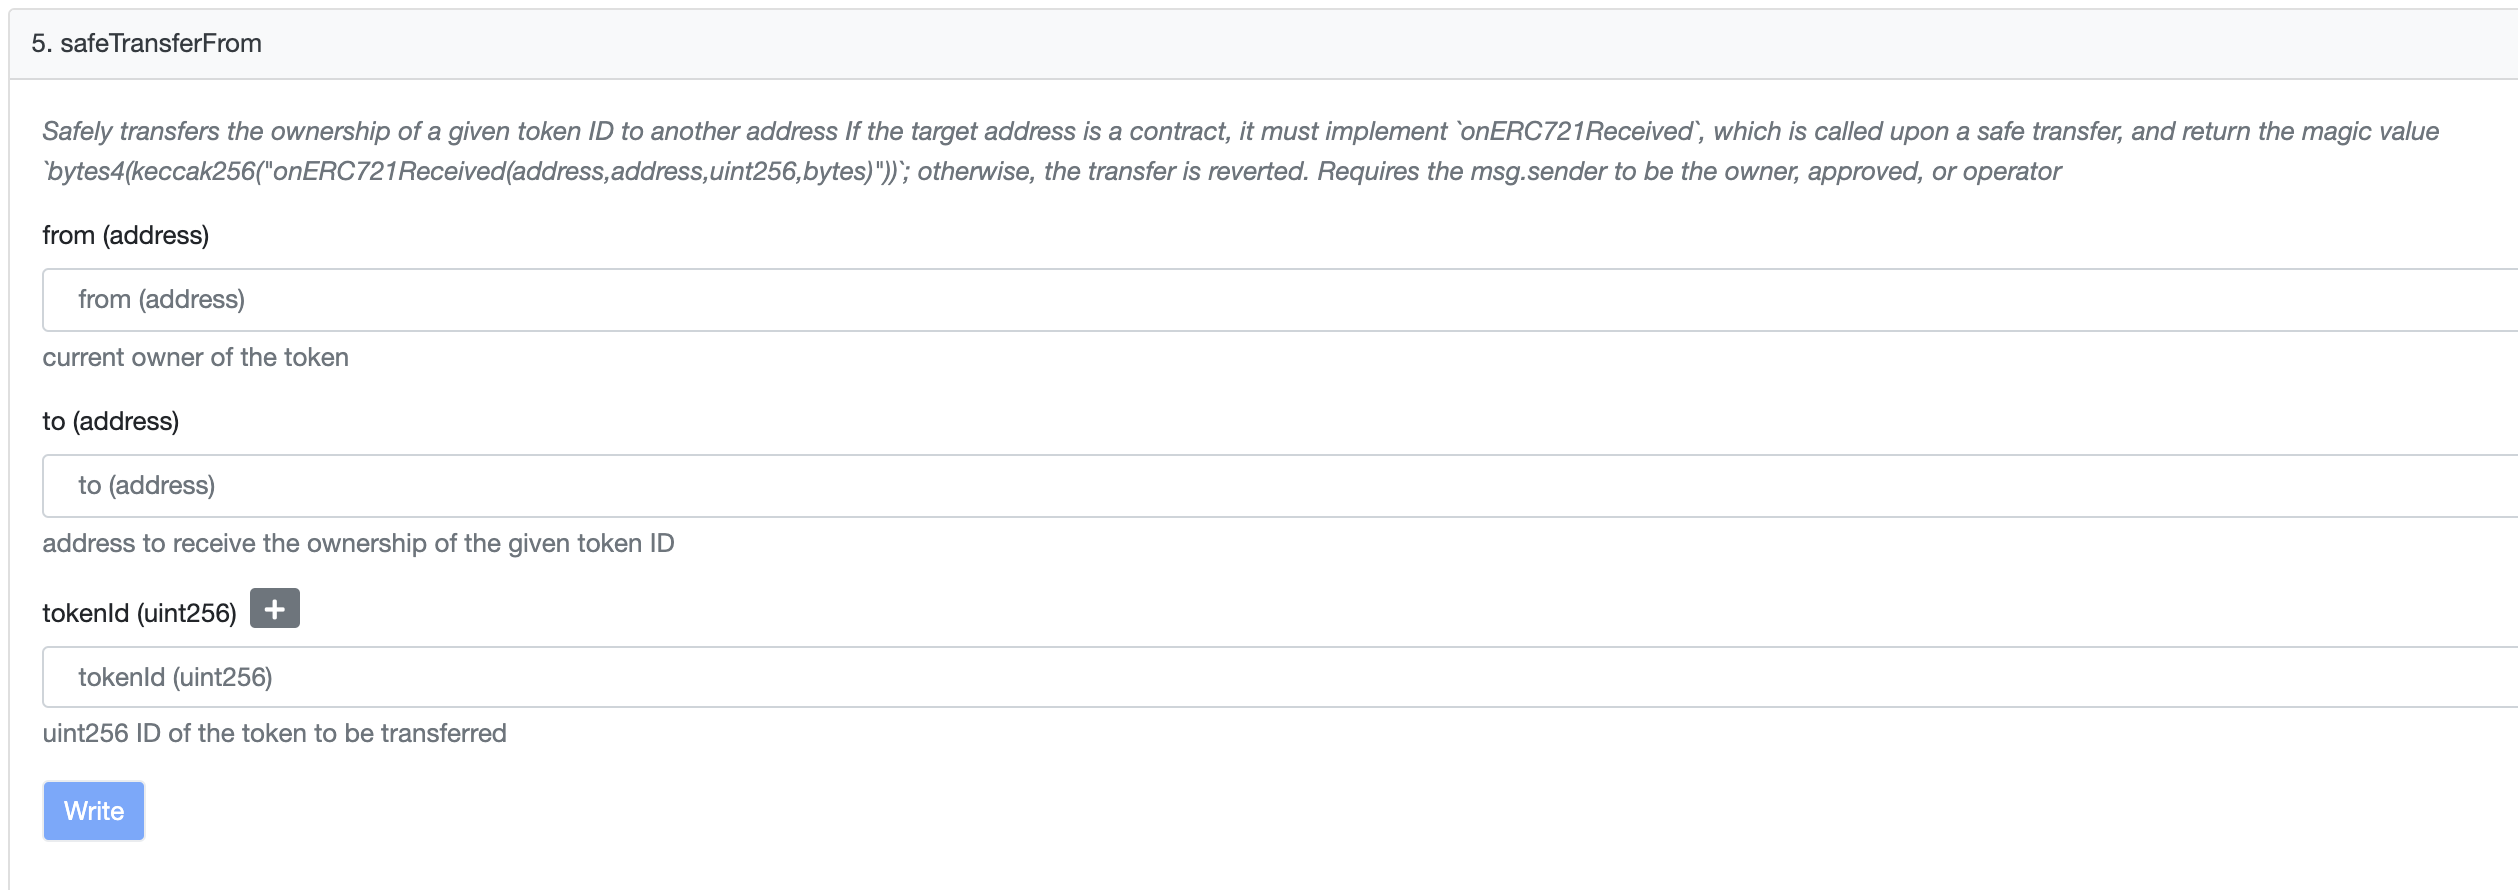
-
Here:
- from (address) is your current owner address
- to (address) is your new owner Address
- tokenId is your validator ID
-
Fill in the relevant information and select Write. You will be prompted to sign a transaction. Ensure that you have sufficient ETH to make the transaction.
-
Upon signing the transaction your validator NFT will be transferred to the new owner address.
-
Log in to the staking dashboard with the new owner address to verify the changes.
Change the signer address
This guide refers to your current validator node as Node 1 and your new validator node as Node 2.
-
Log in to the staking dashboard with the Node 1 address.
-
On your profile, select Edit Profile.
-
In the Signer's address field, enter the Node 2 address.
-
In the Signer's public key field, enter the Node 2 public key.
To get the public key, run the following command on the validator node:
heimdalld show-account
Selecting Save will save your new details for your node. This essentially means that Node 1 will be your address that controls the stake, where the rewards will be sent to, etc. And Node 2 will now be performing activities like signing blocks, signing checkpoints, etc.
Alternatively, the signer address can be updated via contract using the following process:
-
Access StakeManagerProxy smart contract.
-
Click on the Connect to Web3 button and login using the owner address of your validator node.
-
You will see a list of functions appear. Click on
updateSignerfunction. This will be 47th function in the list. There will be 2 data fields that you will need to add information. -
Here:
- validatorId is the associated ID with your validator
- signerPubkey is the signer pubkey for your new signer address.
To get the public key, run the following command on the validator node:
heimdalld show-accountPlease note that the first 2 characters after 0x should be removed when you enter the new signer pubkey in the contract.
- Fill in the relevant information and select Write. You will be prompted to sign a transaction. Ensure that you have sufficient ETH to make the transaction.
Last updated on