Use native token
This document shows you how to set up and test a native token in a CDK stack.
Summary
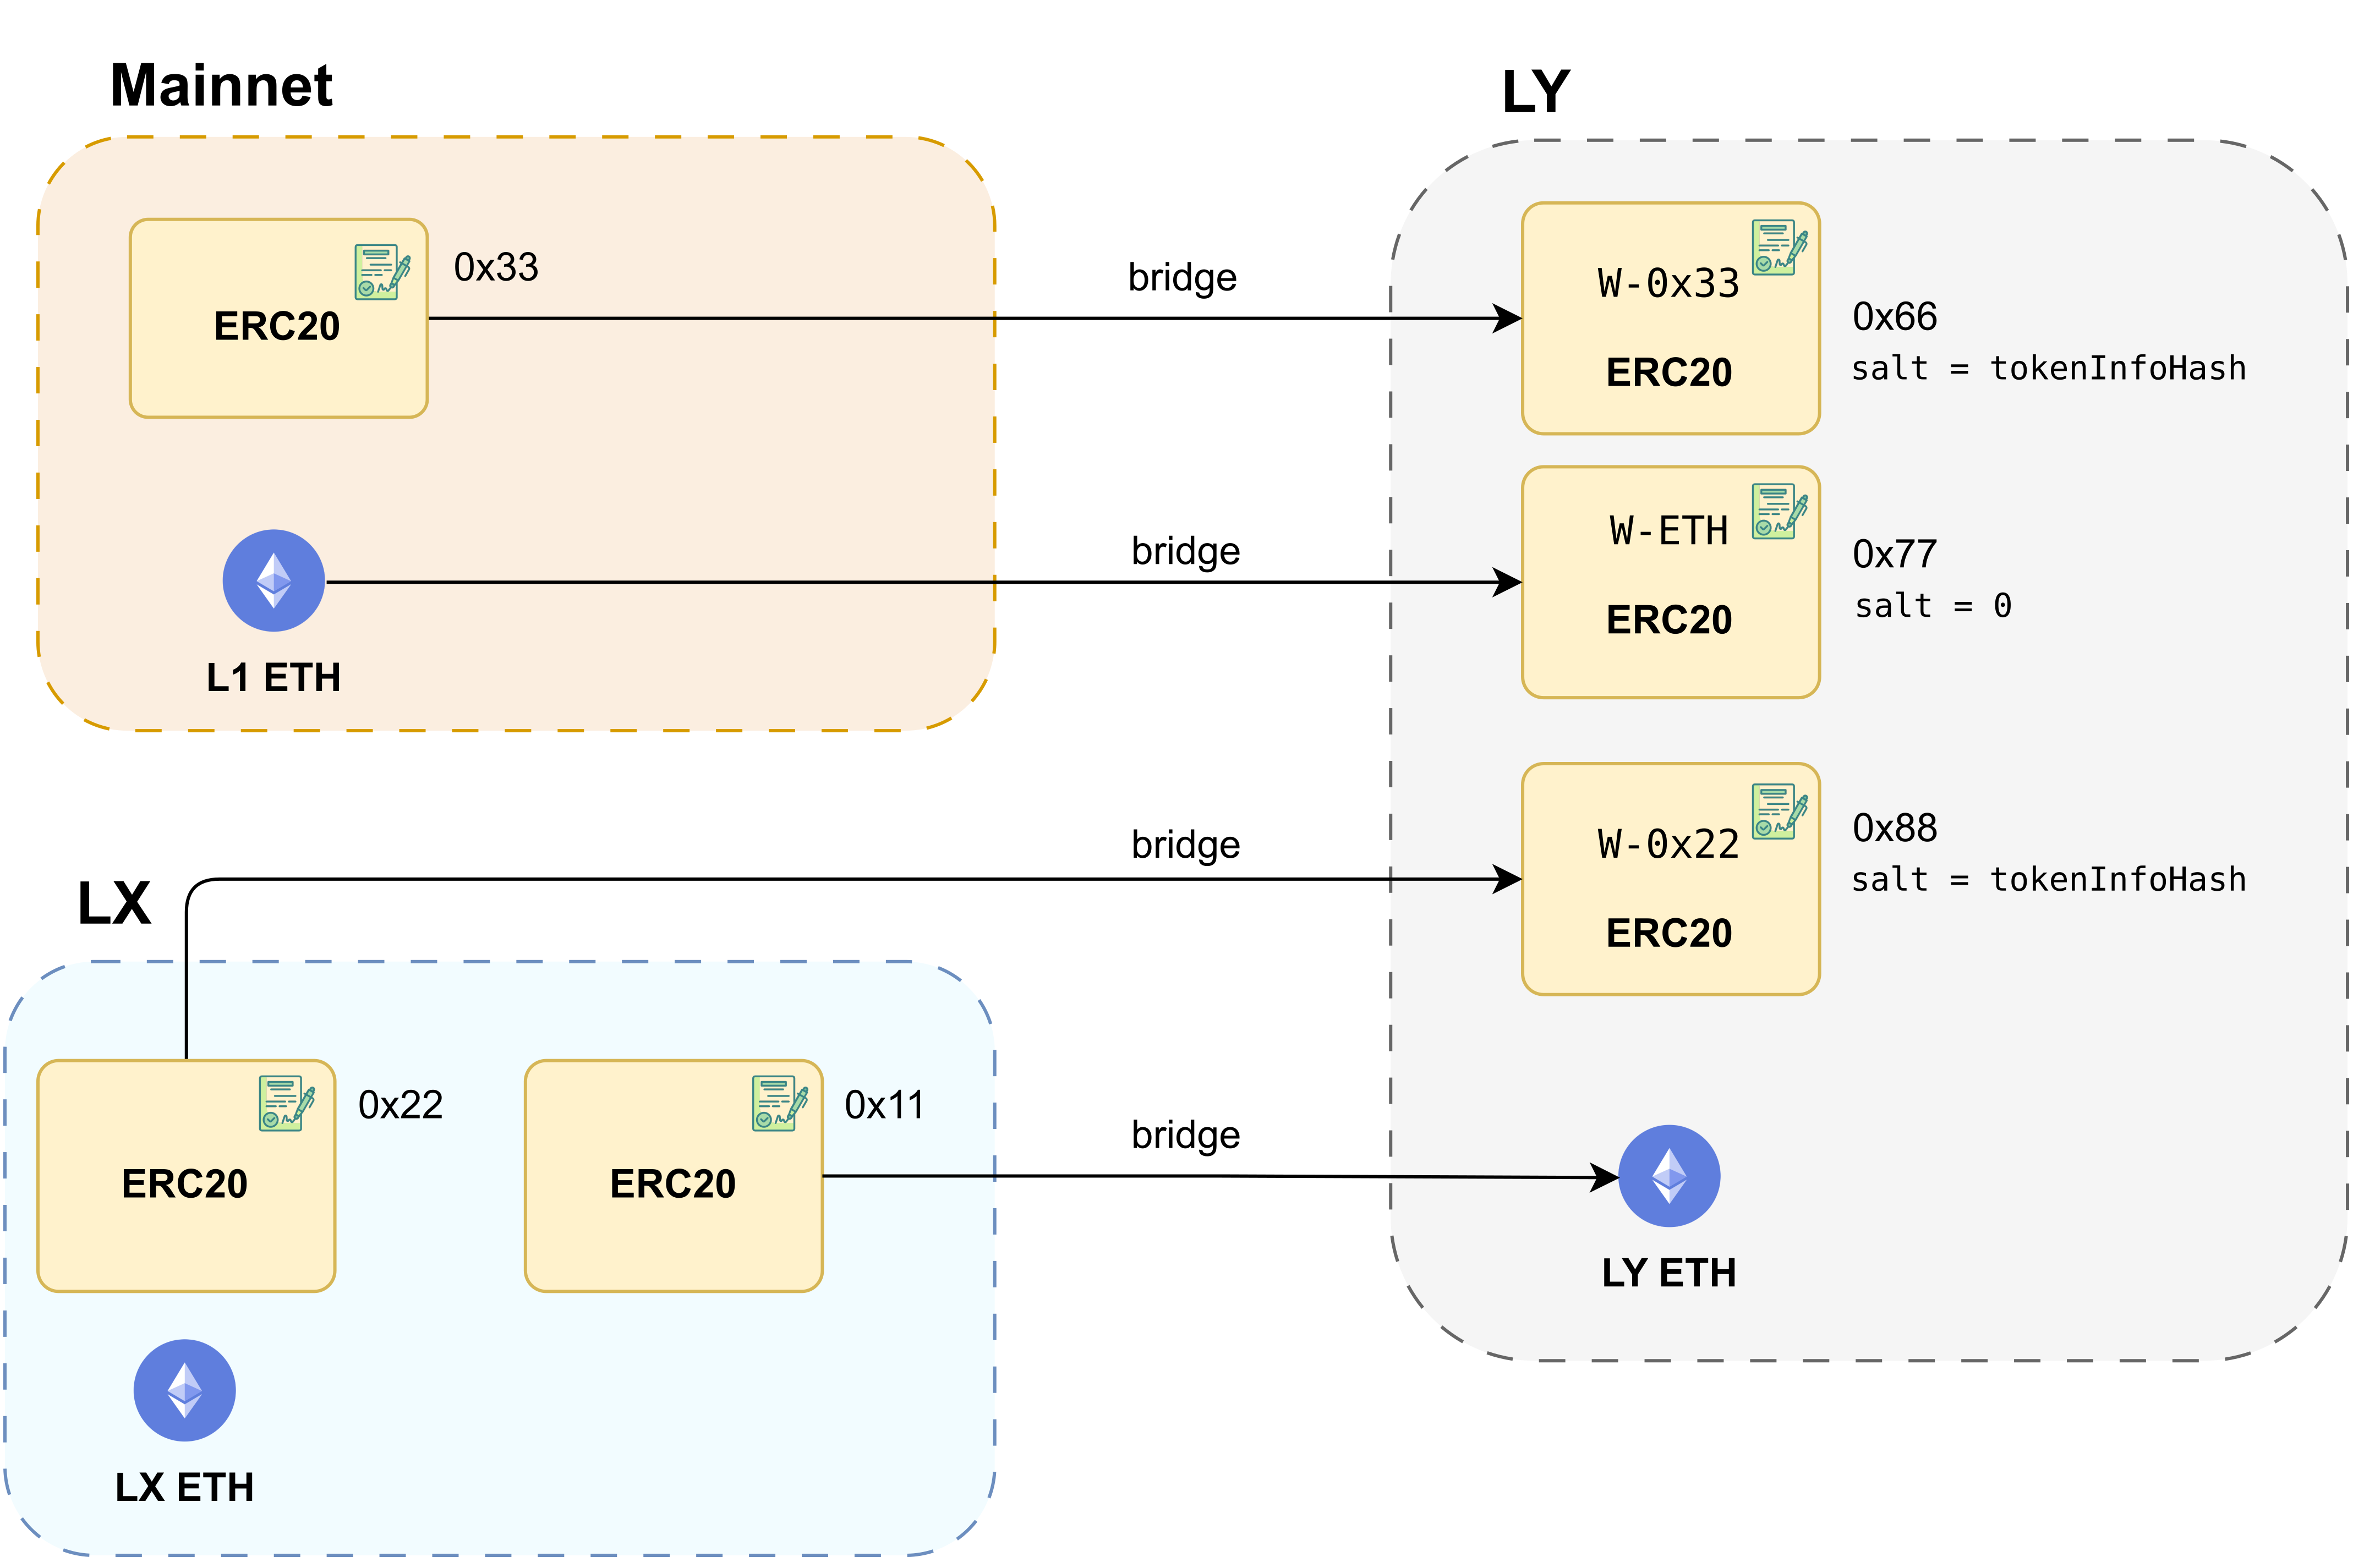
From the Unified bridge documentation
When a token is utilized to cover gas expenses within a layer, we refer to it as the gas token for that specific layer.
Even when employing a gas token within a layer, it remains feasible to transfer L1 ETH to that layer. In such instances, the ETH is recorded within an ERC20 contract known as W-ETH, functioning as another instance of an ERC20 token.
The diagram below illustrates the interchange of assets between layers, focusing on LY as a layer of interest.
It depicts several scenarios, such as bridging an ERC20 token from mainnet to another ERC20 token in LY, bridging L1 ETH to the LY gas token, or bridging a wrapped ERC20 token living on LX to LY ETH.
Set up and prerequisites
-
Edit the params.yml file to set
zkevm_use_gas_token_contracttotrue. This forces a couple of changes at setup time:- During contract deployment, an ERC20 token is deployed on L1.
- The rollup creation parameters file is modified to set the
gasTokenAddressto the address of the L1 ERC20.
-
You can now run the stack:
kurtosis run --enclave cdk-v1 --args-file params.yml --image-download always .It takes a few minutes to compile and deploy the full set of contracts.
The screenshot below shows the full set of deployed services and highlights the bridge UI, L1 RPC, and L2 RPC services which we will focus on throughout this document.

Mint gas token on L1
-
Extract the
gasTokenAddressfrom the generated files:kurtosis service exec cdk-v1 contracts-001 "cat /opt/zkevm/create_rollup_parameters.json" -
Run the following command to mint some L1 tokens.
export gta=$(kurtosis service exec cdk-v1 contracts-001 "cat /opt/zkevm/create_rollup_parameters.json" | tail -n +2 | jq -r .gasTokenAddress) export l1_rpc_url=$(kurtosis port print cdk-v1 el-1-geth-lighthouse rpc) cast send \ --mnemonic "code code code code code code code code code code code quality" \ --rpc-url "$l1_rpc_url" \ "$gta" \ "mint(address,uint256)" \ 0x85dA99c8a7C2C95964c8EfD687E95E632Fc533D6 \ 1000000000000000000000000000 -
Check the balance to make sure it worked.
cast call --rpc-url "$l1_rpc_url" "$gta" "balanceOf(address)(uint256)" 0x85dA99c8a7C2C95964c8EfD687E95E632Fc533D6
Open the bridge UI
Run the following command to get the bridge UI URL and then open the URL in your browser.
kurtosis port print cdk-v1 zkevm-bridge-proxy-001 web-ui
Add L1 and L2 RPCs to your wallet
As the URLs use HTTP, instead of HTTPS, you need to manually add them to MetaMask.
-
Retrieve the L1 RPC config by running the following command:
echo \{\"network_name\": \"kurtosis_cdk_l1\", \"new_rpc_url\": \"$l1_rpc_url\", \"chain_id\": $(yq .args.l1_chain_id params.yml), \"currency_symbol\": \"ETH\"\} | jq -
Do the same for L2:
echo \{\"network_name\": \"kurtosis_cdk_rollup\", \"new_rpc_url\": \"$(kurtosis port print cdk-v1 zkevm-node-rpc-001 http-rpc)\", \"chain_id\": $(yq .args.zkevm_rollup_chain_id params.yml), \"currency_symbol\": \"CDK\"\} | jq
Import an account
If you used the pre-allocated mnemonic, you need to import an account using a private key.
The first derived private key from the code...quality mnemonic is
42b6e34dc21598a807dc19d7784c71b2a7a01f6480dc6f58258f78e539f1a1fa.
Bridging tokens
Add token
-
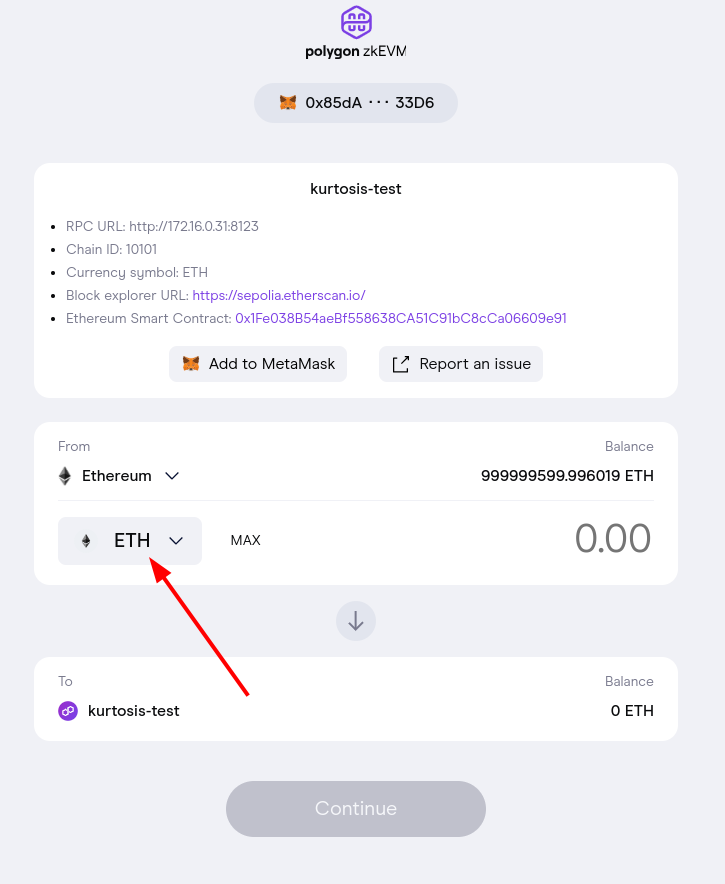
On the bridge UI, click the token dropdown menu:
-
Get the ERC20 gas token address from earlier and paste it in with:
echo "$gta"In my case, the gas token address is
0xBDF337Ae0209B33285034c476f35733BFC890707.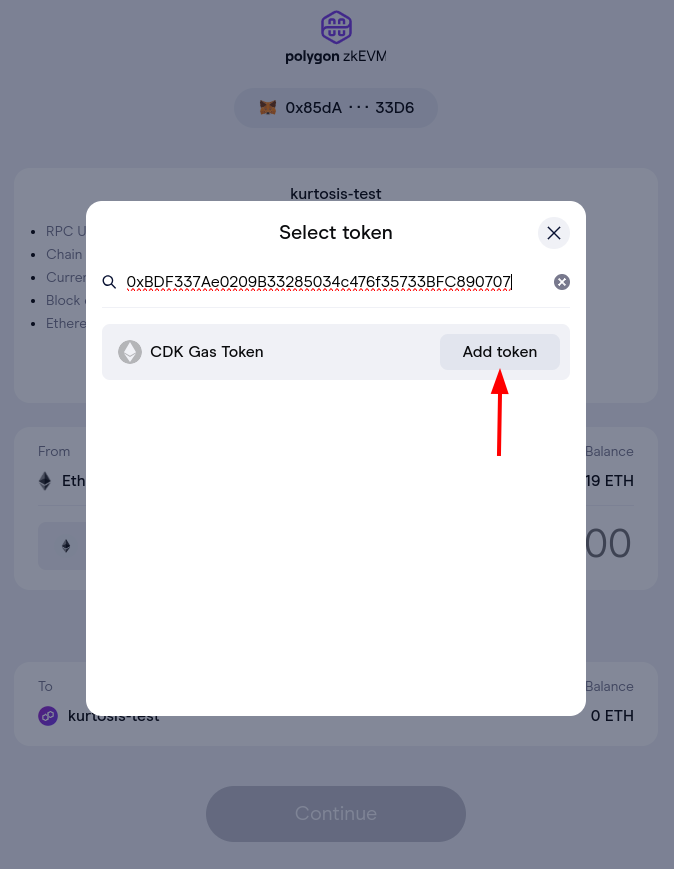
-
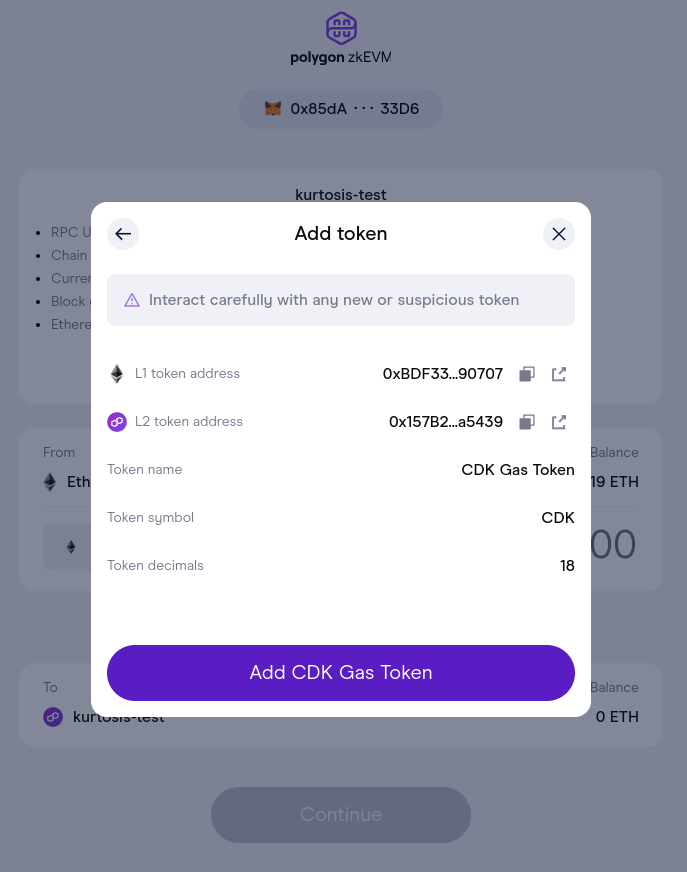
Confirm the details and click the Add CDK Gas Token button.
Bridge tokens
-
Select the token for bridging.
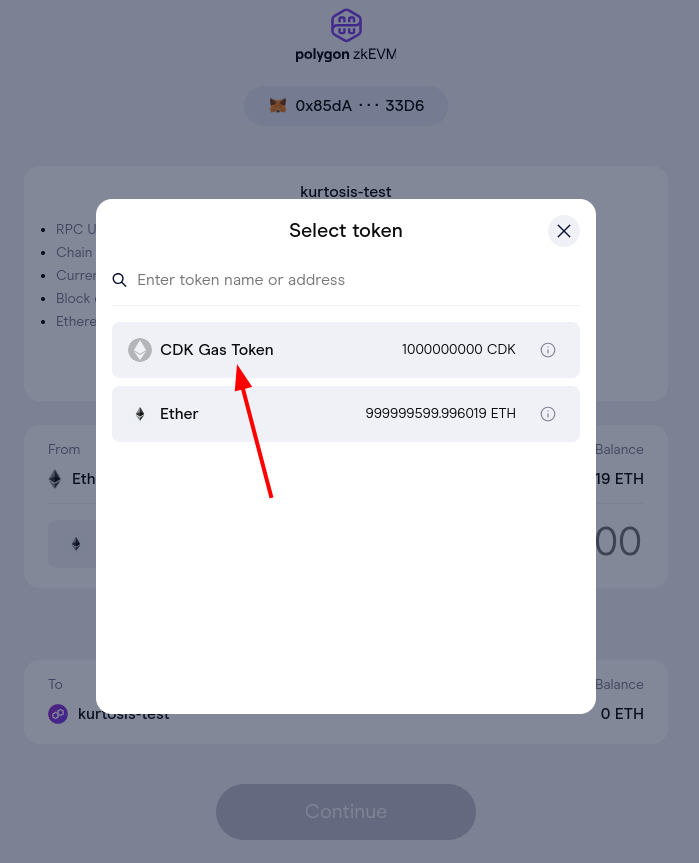
-
Add a value to bridge and click Continue.
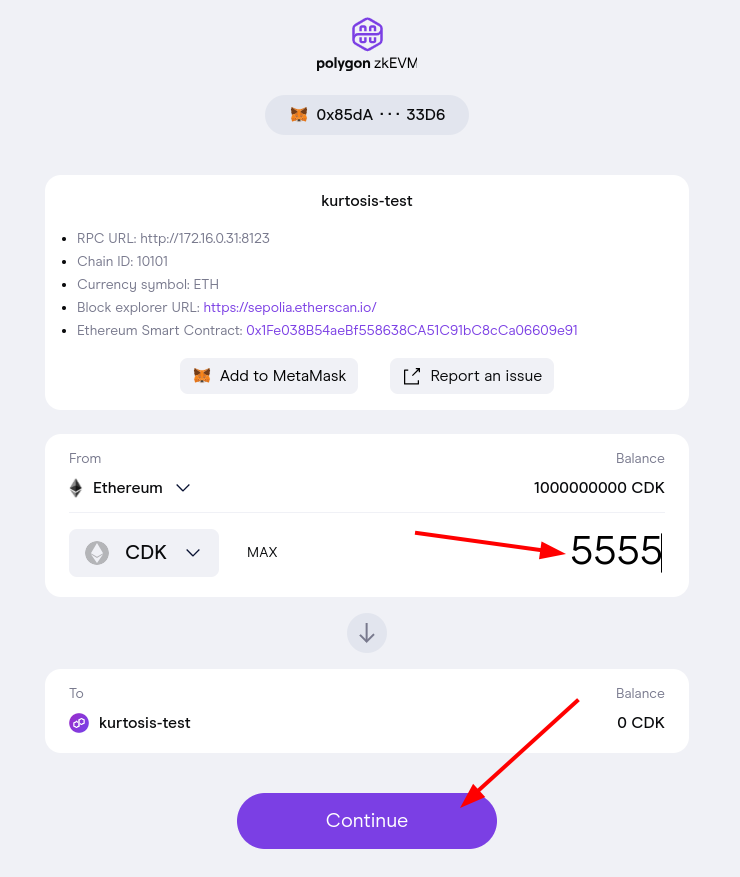
-
Your bridge deposit should be pending.
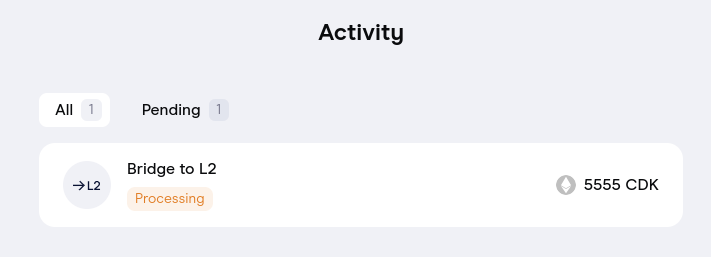
-
After some time, the transaction should complete.
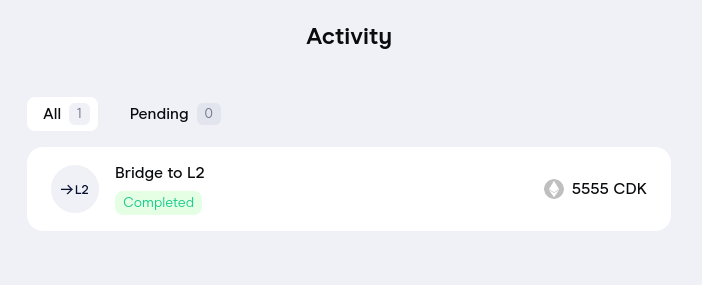
Tip
If that doesn’t happen, it’s possible the auto-claiming service on L2 is not funded. Send it some Ether on L2 by running a command like this:
```sh cast send --legacy \ --value 10ether \ --private-key 0x12d7de8621a77640c9241b2595ba78ce443d05e94090365ab3bb5e19df82c625 \ --rpc-url "$(kurtosis port print cdk-v1 zkevm-node-rpc-001 http-rpc)" \ "$(yq -r .args.zkevm_l2_claimtxmanager_address params.yml)" ``` -
Switch to your L2 network on Metamask to see the bridged value on L2.

Transfer token
-
To complete the test, lets transfer some of the value on L2 to another address.

-
Check the balance in MetaMask after importing the private key
0903a9a721167e2abaa0a33553cbeb209dc9300d28e4e4d6d2fac2452f93e357.
Withdraw the token
-
After initiating a withdraw transaction, wait for the transaction data to be proven on L1.
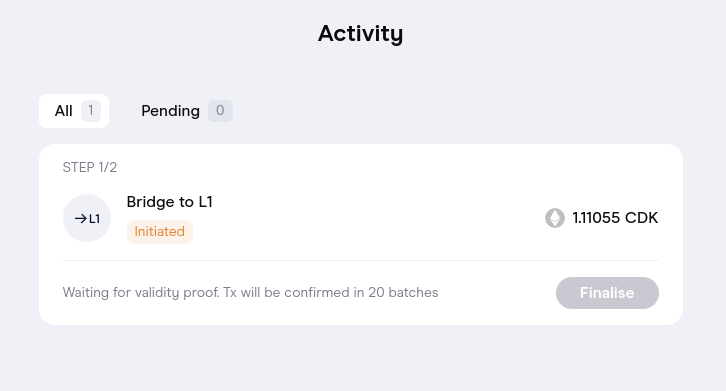
Warning
- As of 2024-03-27, there might be a small bug in the bridge UI which causes the transaction not to be claimable on L1 with the UI.
- Essentially the bridge UI is selecting the wrong destination network so the proof will not validate.
- That being said, it’s possible to claim directly using the smart contracts.
-
Click Finalize.
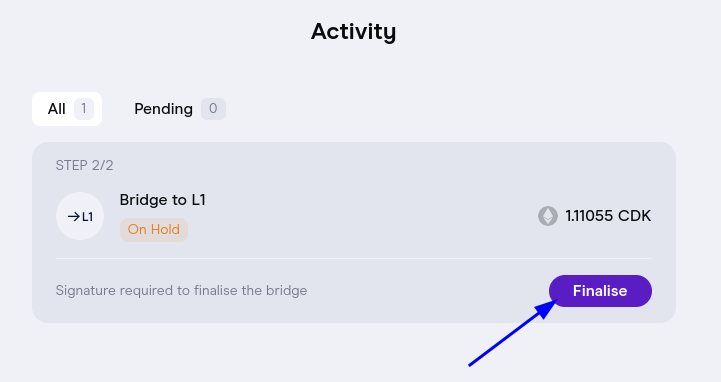
Using cast to withdraw assets from the bridge
The following work-in-progress cast script processes a bridge claim.
Feel free to go through line-by-line and tweak where necessary.
#!/bin/bash
set -e

# Setup some vars for use later on
# The private key used to send transactions
private_key="0903a9a721167e2abaa0a33553cbeb209dc9300d28e4e4d6d2fac2452f93e357"
# The destination network (zero corresponds to L1/Ethereum)
destination_net="0"
# The address of the recipient
destination_addr="0x85dA99c8a7C2C95964c8EfD687E95E632Fc533D6"
# The bridge address
bridge_addr="$(kurtosis service exec cdk-v1 contracts-001 "cat /opt/zkevm/combined.json" | tail -n +2 | jq -r .polygonZkEVMBridgeAddress)"

# Grab the endpoints for l1 and the bridge service
l1_rpc_url=$(kurtosis port print cdk-v1 el-1-geth-lighthouse rpc)
bridge_api_url="$(kurtosis port print cdk-v1 zkevm-bridge-service-001 rpc)"

# The signature for claiming is long - just putting it into a var
claim_sig="claimAsset(bytes32[32],bytes32[32],uint256,bytes32,bytes32,uint32,address,uint32,address,uint256,bytes)"

# Get the list of deposits for the destination address
echo "Getting the list of deposits..."
curl -s "$bridge_api_url/bridges/$destination_addr?limit=100&offset=0" | jq > bridge-deposits.json
cat bridge-deposits.json

# Filter the list of deposits down to the claimable txs that hasn't already been claimed and are destined for L1
echo "Filtering the list of deposits..."
jq '[.deposits[] | select(.ready_for_claim == true and .claim_tx_hash == "" and .dest_net == '$destination_net')]' bridge-deposits.json > claimable-txs.json
cat claimable-txs.json

# Process all the claimable txs
jq -c '.[]' claimable-txs.json | while IFS= read -r tx; do
  echo "Processing claimable tx..."
  echo "$tx"

  # Use the bridge service to get the merkle proof of our deposit
  echo "Getting the merkle proof of our deposit..."
  curr_deposit_cnt="$(echo "$tx" | jq -r '.deposit_cnt')"
  curr_network_id="$(echo "$tx" | jq -r '.network_id')"
  curl -s "$bridge_api_url/merkle-proof?deposit_cnt=$curr_deposit_cnt&net_id=$curr_network_id" | jq '.' > proof.json
  cat proof.json

  # Get our variables organized
  in_merkle_proof="$(jq -r -c '.proof.merkle_proof' proof.json | tr -d '"')"
  in_rollup_merkle_proof="$(jq -r -c '.proof.rollup_merkle_proof' proof.json | tr -d '"')"
  in_global_index="$(echo "$tx" | jq -r '.global_index')"
  in_main_exit_root="$(jq -r '.proof.main_exit_root' proof.json)"
  in_rollup_exit_root="$(jq -r '.proof.rollup_exit_root' proof.json)"
  in_orig_net="$(echo "$tx" | jq -r '.orig_net')"
  in_orig_addr="$(echo "$tx" | jq -r '.orig_addr')"
  in_dest_net="$(echo "$tx" | jq -r '.dest_net')"
  in_dest_addr="$(echo "$tx" | jq -r '.dest_addr')"
  in_amount="$(echo "$tx" | jq -r '.amount')"
  in_metadata="$(echo "$tx" | jq -r '.metadata')"

  # Generate the call data, this is useful just to examine what the call will look like
  echo "Generating the call data for the bridge claim tx..."
  cast calldata "$claim_sig" "$in_merkle_proof" "$in_rollup_merkle_proof" "$in_global_index" "$in_main_exit_root" "$in_rollup_exit_root" "$in_orig_net" "$in_orig_addr" "$in_dest_net" "$in_dest_addr" "$in_amount" "$in_metadata"

  # Perform an eth_call to make sure the tx will work
  echo "Performing an eth call to make sure the bridge claim tx will work..."
  cast call --rpc-url "$l1_rpc_url" "$bridge_addr" "$claim_sig" "$in_merkle_proof" "$in_rollup_merkle_proof" "$in_global_index" "$in_main_exit_root" "$in_rollup_exit_root" "$in_orig_net" "$in_orig_addr" "$in_dest_net" "$in_dest_addr" "$in_amount" "$in_metadata"

  # Publish the actual transaction!
  echo "Publishing the bridge claim tx..."
  cast send --rpc-url "$l1_rpc_url" --private-key "$private_key" "$bridge_addr" "$claim_sig" "$in_merkle_proof" "$in_rollup_merkle_proof" "$in_global_index" "$in_main_exit_root" "$in_rollup_exit_root" "$in_orig_net" "$in_orig_addr" "$in_dest_net" "$in_dest_addr" "$in_amount" "$in_metadata"
done
Run the script with:
sh scripts/bridge-manual-claim.sh
You should see something like this:
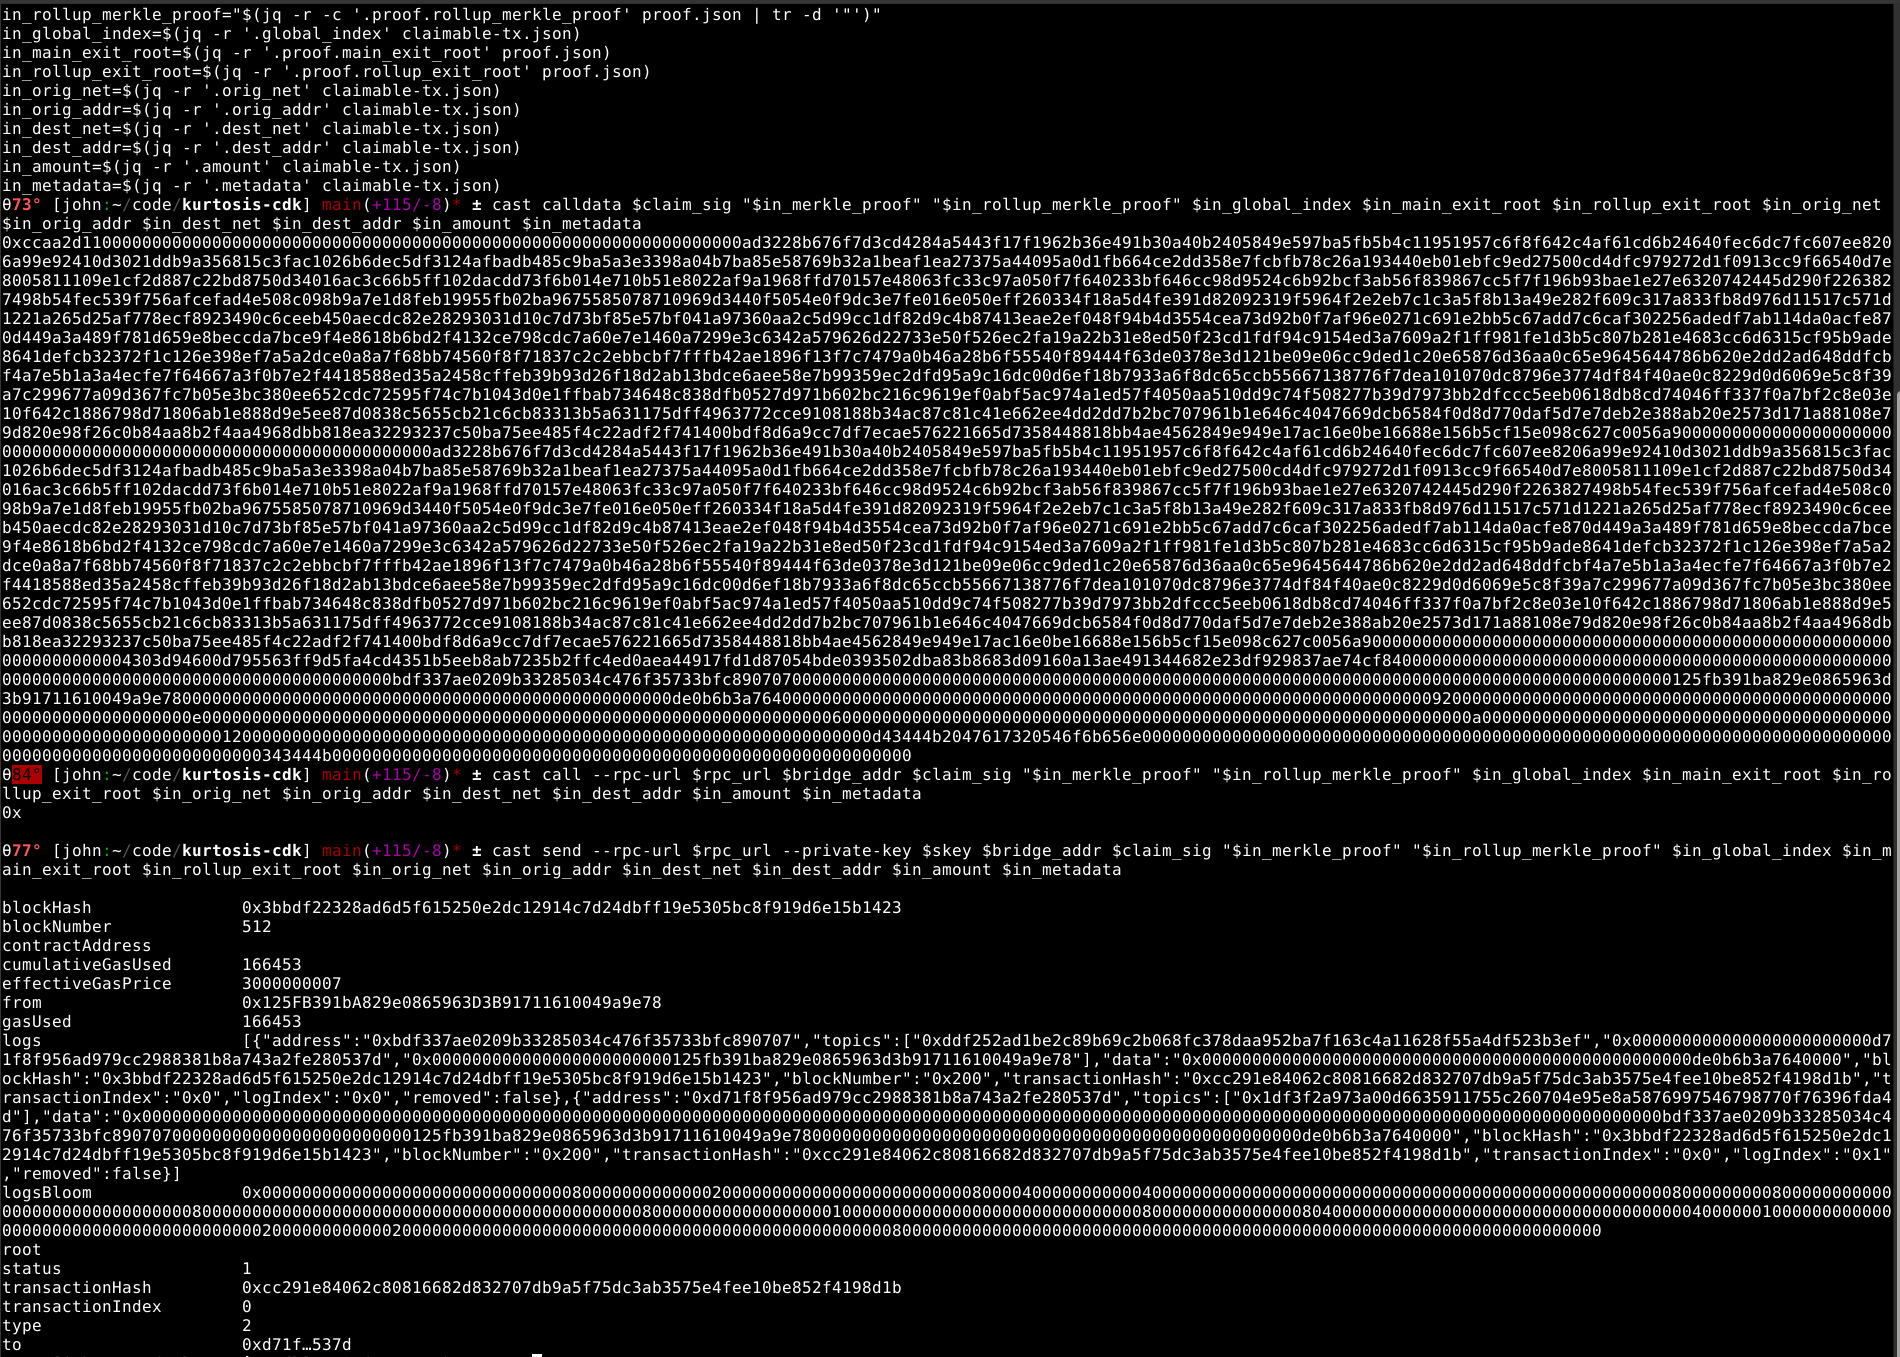
Confirm the claim went through using MetaMask and the bridge UI.
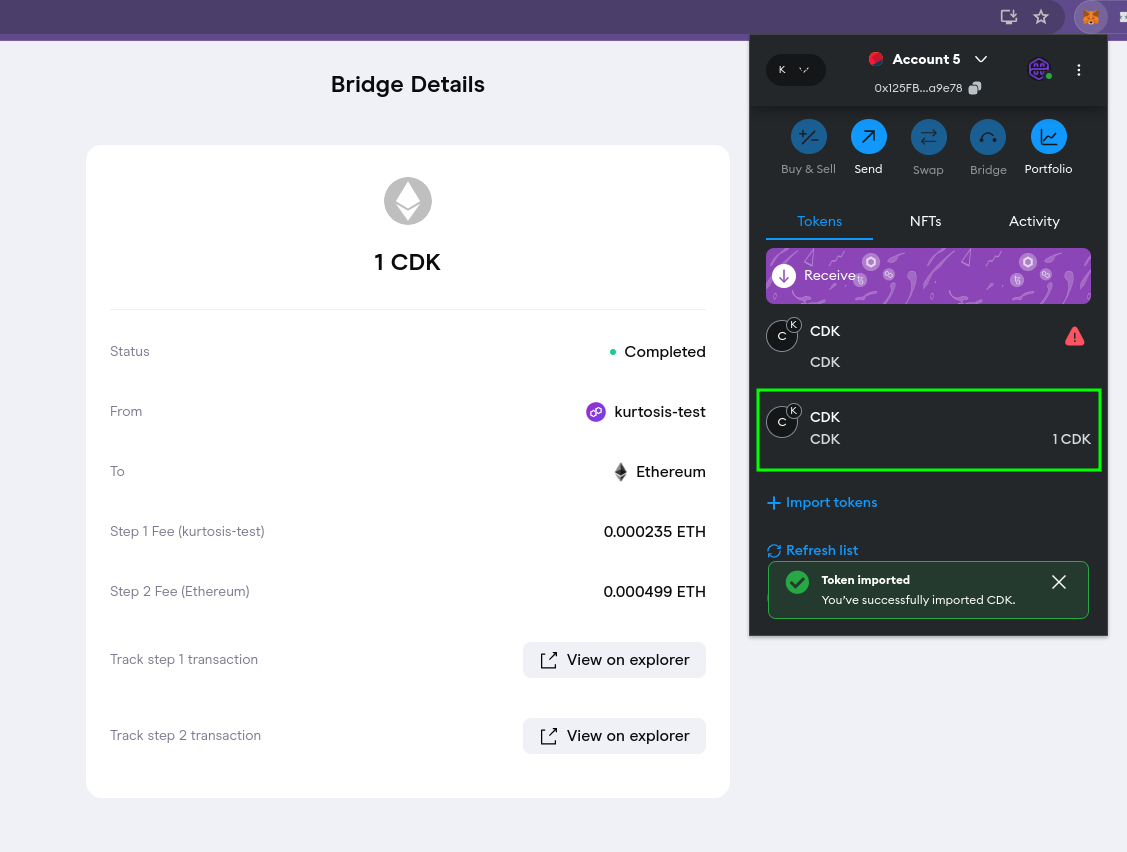
Info
Even though the bridge UI didn’t allow me to claim, it does correctly show that a claim was executed.