Verify a contract
Once a smart contract is deployed to zkEVM, it can be verified in various ways depending on the framework of deployment as well as the complexity of the contract. The aim here is to use examples to illustrate how you can manually verify a deployed smart contract.
Ensure that your wallet is connected while following this guide. We will use Metamask wallet throughout this tutorial.
Manual verification
After successfully compiling a smart contract, follow the next steps to verify your smart contract.
-
Copy the address to which the smart contract is deployed.
-
Navigate to the zkEVM Explorer and paste the contract address into the Search box. This opens a window with a box labelled Contract Address Details.
-
Scroll down to the box with tabs labelled Transactions, Internal Transactions, Coin Balance History, Logs, and Code.
-
Click the Transaction Hash in the Contract Creation box, which is the super long number.
-
Select the Code tab.
-
Click the Verify and Publish button.
-
There are 3 options to provide the Contract’s code. We will be diving into the following two options:
Flattened source code
Click Next after selecting the via Flattened Source Code option.
Various frameworks have specific ways to flatten the source code. Our examples are Remix and Foundry.
Using Remix
In order to flatten the contract code with Remix, one needs to only right-click on the contract name and select Flatten option from the drop-down menu that appears. See the below figure for reference.
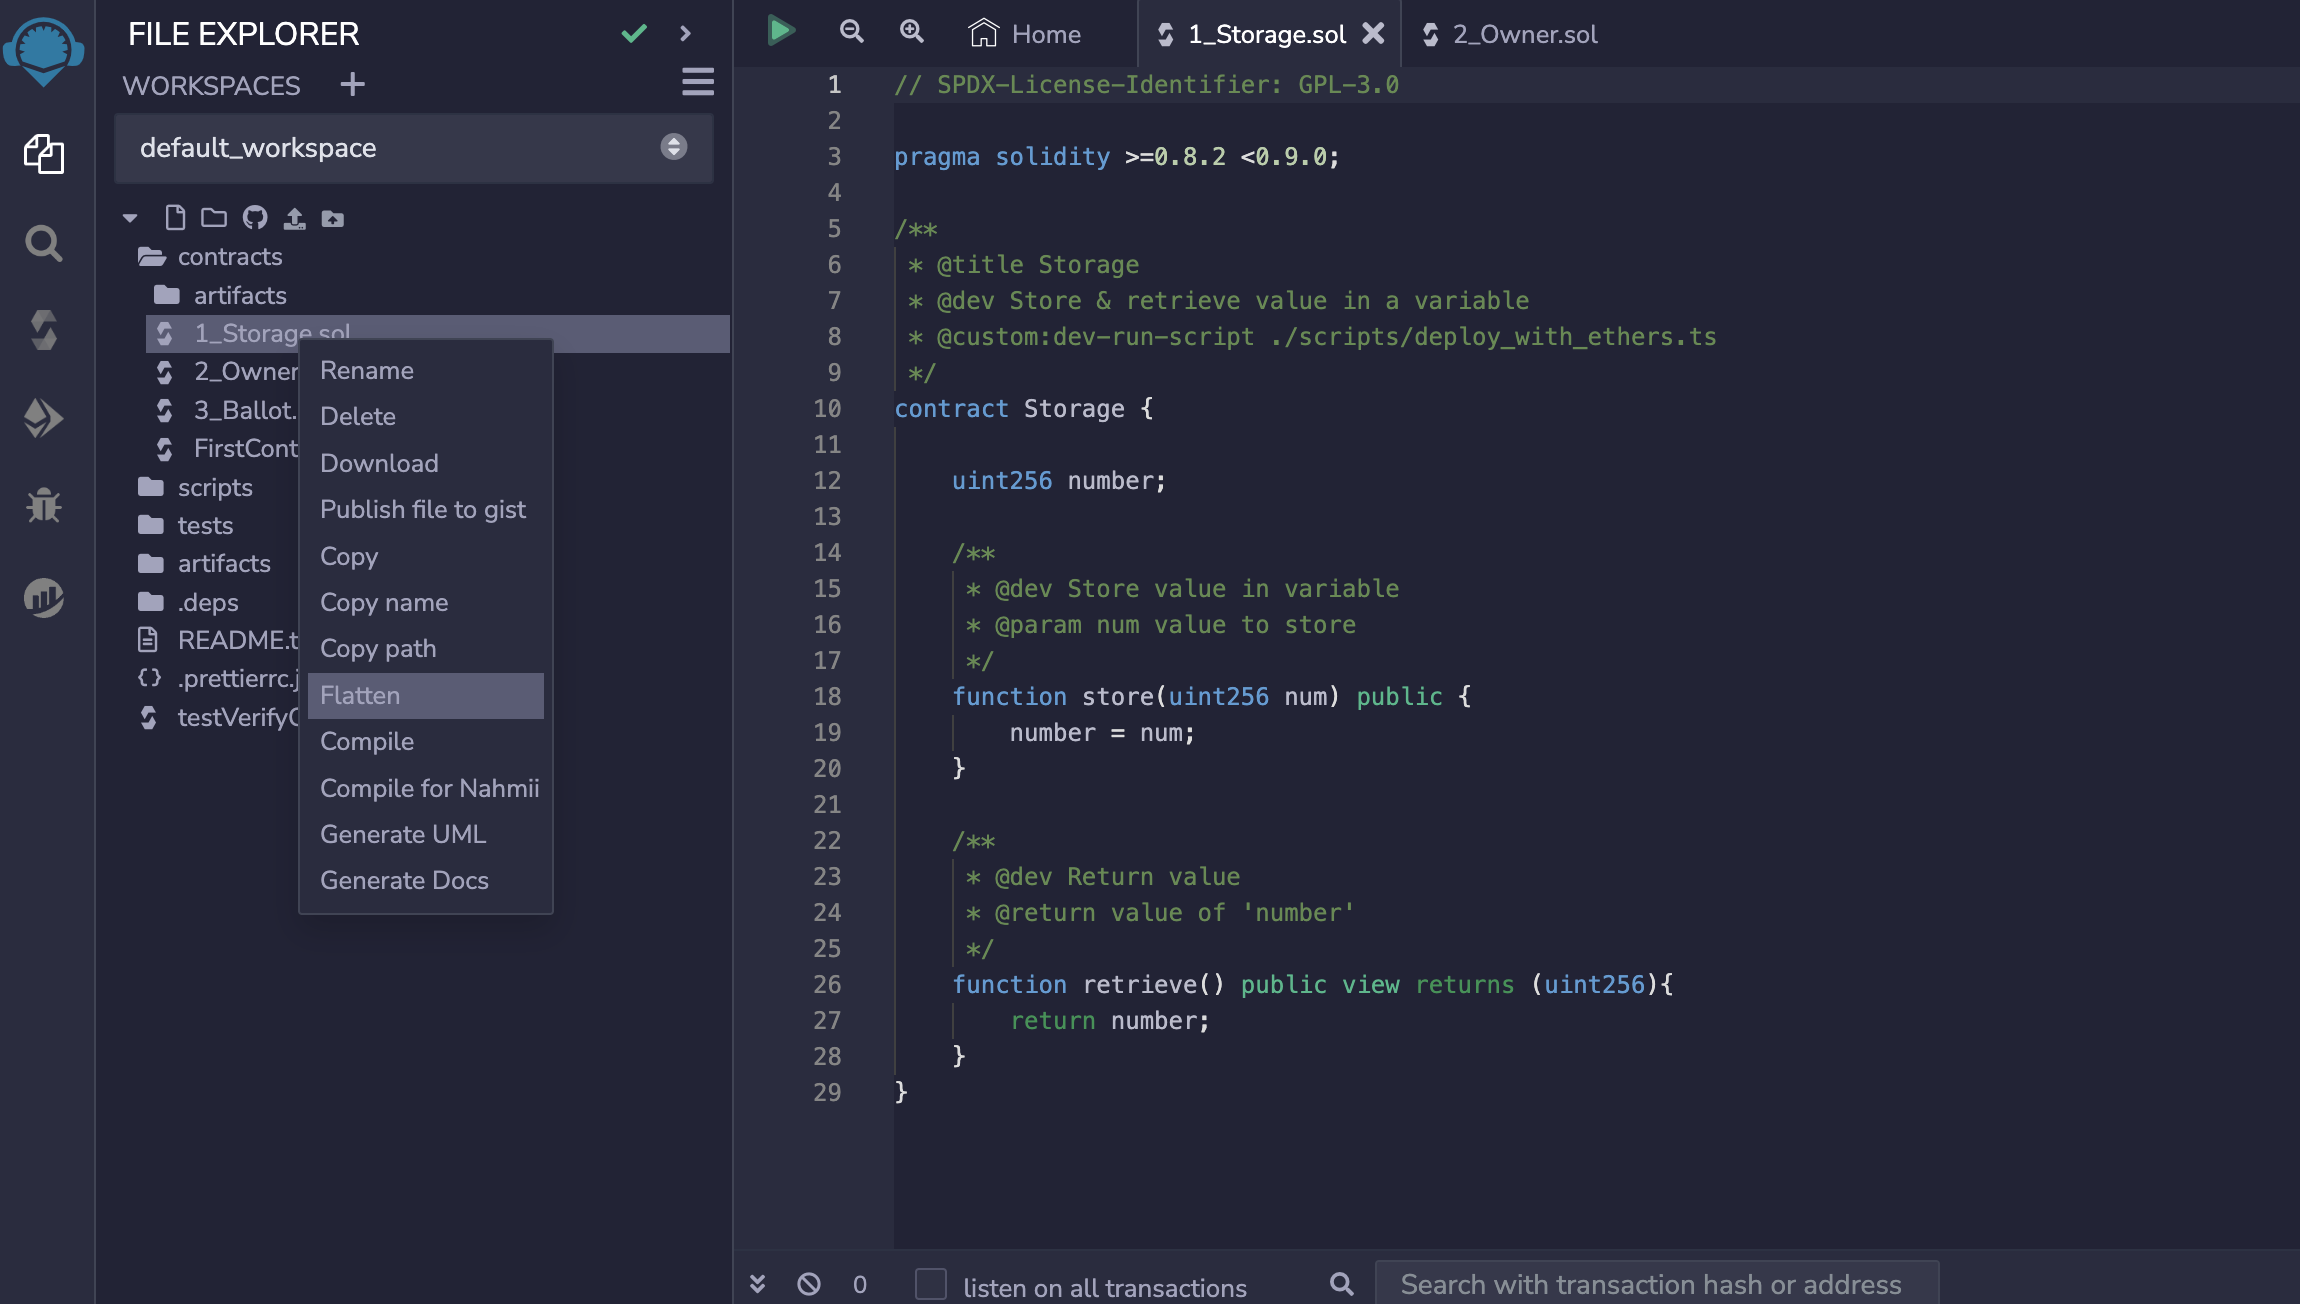
After selecting Flatten, a new .sol file with the suffix _flatten.sol is automatically created. Copy the contents of the new <Original-Name>_flatten.sol file and paste into the Enter the Solidity Contract field in the explorer.
Using Foundry
In order to flatten the code using Foundry, the following command can be used:
forge flatten src/<Contract-Name> -o <Any-Name-For-Flattened-Code>.sol
With this command, the flattened code gets saved in the <Any-Name-For-Flattened-Code>.sol file. Copy the contents of the new <Any-Name-For-Flattened-Code>.sol file and paste into the Enter the Solodity Contract field in the explorer.
Standard input JSON
Click Next after selecting the via Standard Input JSON option.
-
In order to update the Compiler based on your contract’s compiler version,
- Click the ↓ for a list of compiler versions.
- Select the corresponding version. For example, select
v0.8.9+commit.e5eed63aif your code haspragma solidity ^0.8.9;.
-
Paste the Standard input JSON file into the Drop the standard input JSON file or Click here field. You can find it in your local project folder.
- The Standard input JSON file is the
{"superlongnumberfile"}.jsonin thebuild-infosubfolder. Path example:fullstack-zkevm/src/build-info/{"superlongnumberfile"}.json - Save this file to parse it with Prettier
- Find the input JSON object. It will look something like this →
"input": {} - Copy the input object value into a new file
- Name and save this file locally in the root folder. Check this example file for reference
- Drag and drop the Standard Input JSON file into Drop the standard input JSON file or Click here field. Once pasted, the Verify & Publish button becomes active.
- The Standard input JSON file is the
-
Since you have provided an input, set Try to fetch constructor arguments automatically to No.
-
To add your ABI-encoded constructor arguments:
- Open the Online ABI Encoder
- Choose the
Auto-parsetab. - Copy the ABI-encoded output.
- Paste it into
ABI-encoded Constructor Argumentsif required by the contract.
Once you paste the contents of the newly created .sol file to the Enter the Solidity Contract field, the Verify & Publish button will be active.
Click on Verify & Publish to verify your deployed smart contract.
Verify using Remix
We will be using the ready-made Storage.sol contract in Remix. Compile the contract and follow the steps provided below.
-
Deploy the
Storage.solcontract:- Click the Deploy icon on the left-side of the IDE window.
- Change
ENVIRONMENTto “Injected Provider - MetaMask” (ensure that your wallet is already connected to Goërli network). - Confirm the connection request when MetaMask pops up.
- Click the Deploy button and confirm.
-
Check the deployed smart contract on Etherscan:
- Copy the contract address below the Deploy Contracts.
- Navigate to the Goërli explorer.
- Paste the contract address in the Search by address field and press ENTER.
- Click on the Transaction Hash to see transaction details.
-
You are going to need your Etherscan API Key in order to verify.
- Login to Etherscan.
- Hover the cursor over your username for a drop-down menu.
- Select API Keys.
- Click API Keys again below the Others option.
- Copy the API Key.
-
Next, in the Remix IDE:
-
Click Plugin Manager icon on the bottom-left corner of the Remix IDE.
-
Type Etherscan in the search field at the top.
-
Click Activate button as the Etherscan option appears. Etherscan icon will appear on the left-side of the IDE.
-
Click on the Etherscan icon.
-
Ensure that Goërli is present in the Selected Network field.
-
Click within the Contract Name field and type in the name of your deployed contract, or select it if it appears.
-
Paste the address in the Contract Address field.
-
Verify button will be active if all information has been provided.
-
Click the Verify button to complete verification of your smart contract.
-