Create account and use the faucet
In this second, we show you how to create a new local Miden account and how to receive funds from the public Miden faucet website.
Configure the Miden client
The Miden client facilitates interaction with the Miden rollup and provides a way to execute and prove transactions.
Tip
Check the Miden client documentation for more information.
-
Open your terminal and create a new directory to store the Miden client.
mkdir miden-client cd miden-client -
Build and install the client using cargo:
You can now use thecargo install miden-client --features testing,concurrentmiden-client --versioncommand, and you should seeMiden 0.2.1 -
Initialize the client. This creates the
miden-client.tomlfile line-by-line.miden-client initAccept the defaults for
Protocol,Node RPC Port, andSqlite file pathby clicking enter.When
Hostcomes up, enter18.203.155.106Host (default: localhost): 18.203.155.106 -
Check you can sync with the blockchain.
If you see something likemiden-client syncState synced to block 59203, you are all set!
Create a new Miden account
-
Create a new account of type
basic-mutableusing the following command:miden-client account new basic-mutable -
List all created accounts by running the following command:
You should see something like this:miden-client account -l
Save the account ID for a future step.
Request tokens from the public faucet
-
To request funds from the faucet navigate to the following website: Miden faucet website.
-
Copy the Account ID printed by the
miden-client account -lcommand in the previous step. -
Paste this id into the Request test POL tokens input field on the faucet website and click Send me 333 tokens!.
-
After a few seconds your browser should download - or prompt you to download - a file called
note.mno(mno = Miden note). This private note contains the funds the faucet sent to your address. -
Save this file on your computer, you will need it for the next step.
Import the note into the Miden client
-
Import the private note that you have received using the following commands:
miden-client input-notes -i <path-to-note>/note.mno -
You should see something like this:
Succesfully imported note 0x0ff340133840d35e95e0dc2e62c88ed75ab2e383dc6673ce0341bd486fed8cb6 -
Now that the note has been successfully imported, you can view the note’s information using the following command:
miden-client input-notes -l -
You should see something like this:

The importance of syncing
- As you can see, the listed note is lacking a
commit-height. - This is because you have received a private note but have not yet synced your view of the rollup to check that the note is the result of a valid transaction.
- Hence, before consuming the note we will need to update our view of the rollup by syncing.
- Many users could have received the same private note, but only one user can consume the note in a transaction that gets verified by the Miden operator.
Sync the client
Do this periodically to keep informed about any updates on the node by running the sync command:
miden-client sync
You will see something like this as output:
State synced to block 179672
Consume the note & receive the funds
-
Now that we have synced the client, the input-note imported from the faucet should have a
Commit Heightconfirming it exists at the rollup level:miden-client input-notes -l -
You should see something like this:

-
Find your account and note id by listing both
accountsandinput-notes:miden-client account -l miden-client input-notes -l -
Consume the note and add the funds from its vault to our account using the following command:
miden-client tx new consume-notes --account <Account-Id> <Note-Id>
Amazing! You just have created a client-side zero-knowledge proof locally on your machine.
Tip
You only need to copy the top line of characters of the Note ID.
View confirmations
-
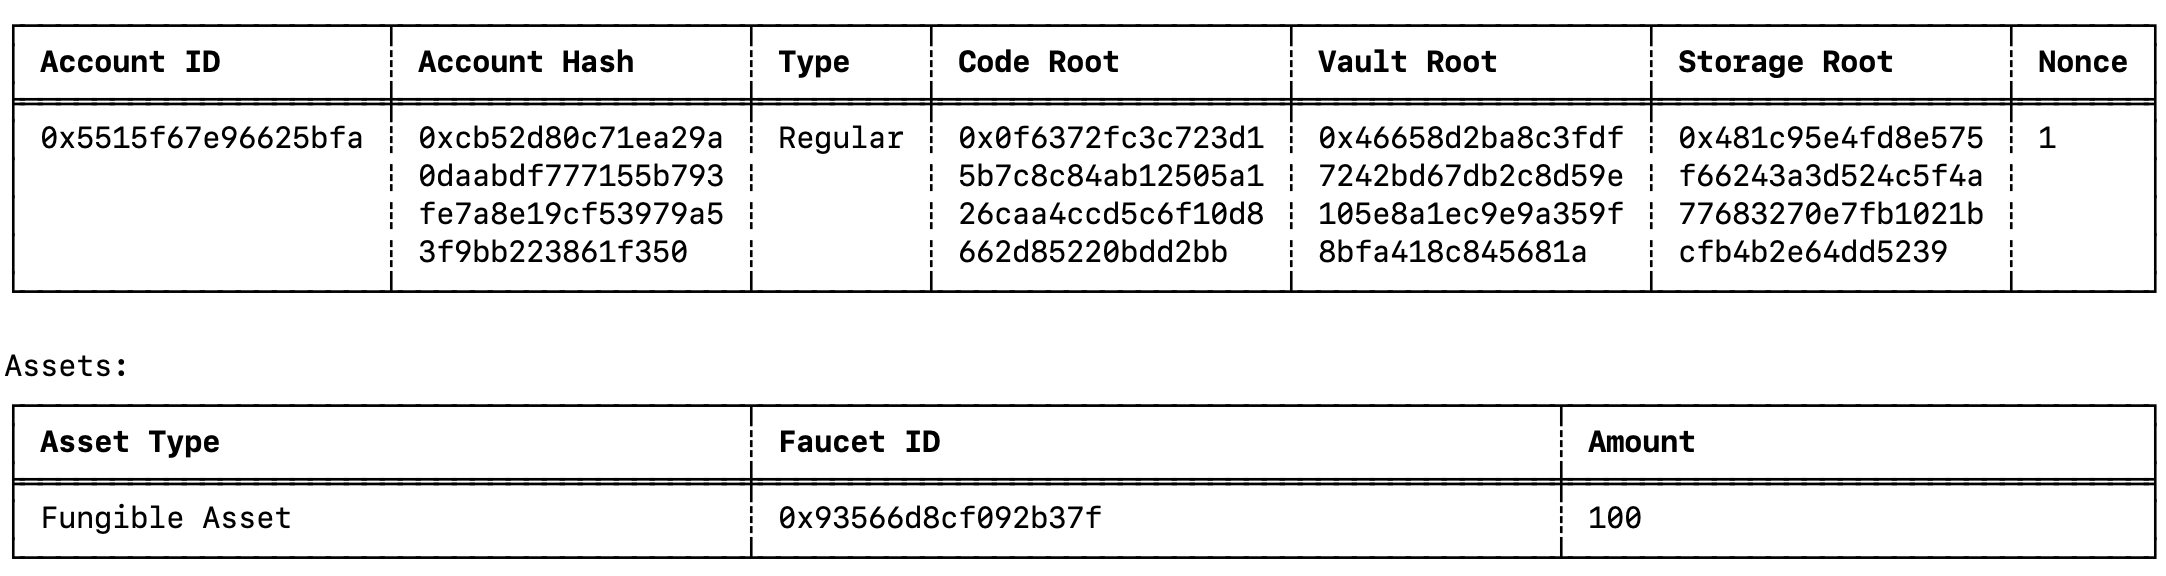
View your updated account’s vault containing the tokens sent by the faucet by running the following command:
miden-client account show <Account-Id> -v -
You should now see your accounts vault containing the funds sent by the faucet.