PIL-STARK demo
Note
This document is a guide to a DIY implementation of the PIL-STARK proof/verification system.
Before delving into the implementation, we first ensure the boundary constraints in the \(\texttt{mFibonacci.pil}\) code are not hardcoded. The aim here is to implement these values as \(\texttt{publics}\). This subsequently populates the \(\texttt{publics}\)’ field in the parsed \(\texttt{\{ \} fibonacci.pil.json}\) file.
Boundary Constraints As Publics
As seen in the description of PIL-STARK, one of the outputs of the SM-Prover is the \(\texttt{publics}\), which are publicly known values. However, looking back at our demonstration, where the \(\texttt{mFibonacci.pil}\) file was compiled with \(\texttt{PILCOM}\), you will notice that the \(\texttt{publics}\) field in the parsed \(\texttt{\{ \} fibonacci.pil.json}\) file is empty. Check \(\text{line 6}\) in the provided snapshot of the “\(\texttt{\{ \} fibonacci.pil.json}\)” file, and notice it reads thus:
This is so, because no \(\texttt{publics}\) were defined in the \(\texttt{mFibonacci.pil}\) file that we compiled.
Again, you’ll notice that the 1024-th value of the polynomial \(\texttt{a}\) was hardcoded as \(\mathtt{144115188042301440}\) in \(\texttt{line}\) \(\texttt{13}\), which checks the boundary constraint:
This is undesirable because any change in the initial conditions would yield a wrong proof, which the Verifier would reject.
The aim in this subsection is to therefore, rewrite the boundary constraint in the \(\texttt{mFibonacci.pil}\) file such that, instead of hardcoding this public value, it is rather generically defined. So, \(\mathtt{144115188042301440}\), is replaced with a public variable called “\(\texttt{out}\)”. The new variable must be declared, and it is defined as;
The modified boundary constraint check in \(\texttt{mFibonacci.pil}\) now looks like this;
where the : colon-prefix indicates a read of the value stored at \(\texttt{out}\).
The modified \(\texttt{mFibonacci.pil}\) file, before compilation with \(\texttt{PILCOM}\), is now as follows,
This modified \(\texttt{mFibonacci.pil}\) file can be compiled with \(\texttt{PILCOM}\) in the manner demonstrated earlier. The resulting parsed PIL file, “\(\texttt{\{ \} mfibonacci.pil.json}\)”, now reflects some information in the “\(\texttt{publics}\)” field, as shown here:

PIL-STARK Implementation Guide
Here is a step-by-step guide on how PIL-STARK is implemented. You are encouraged to Do-It-Yourself by following the steps provided below.
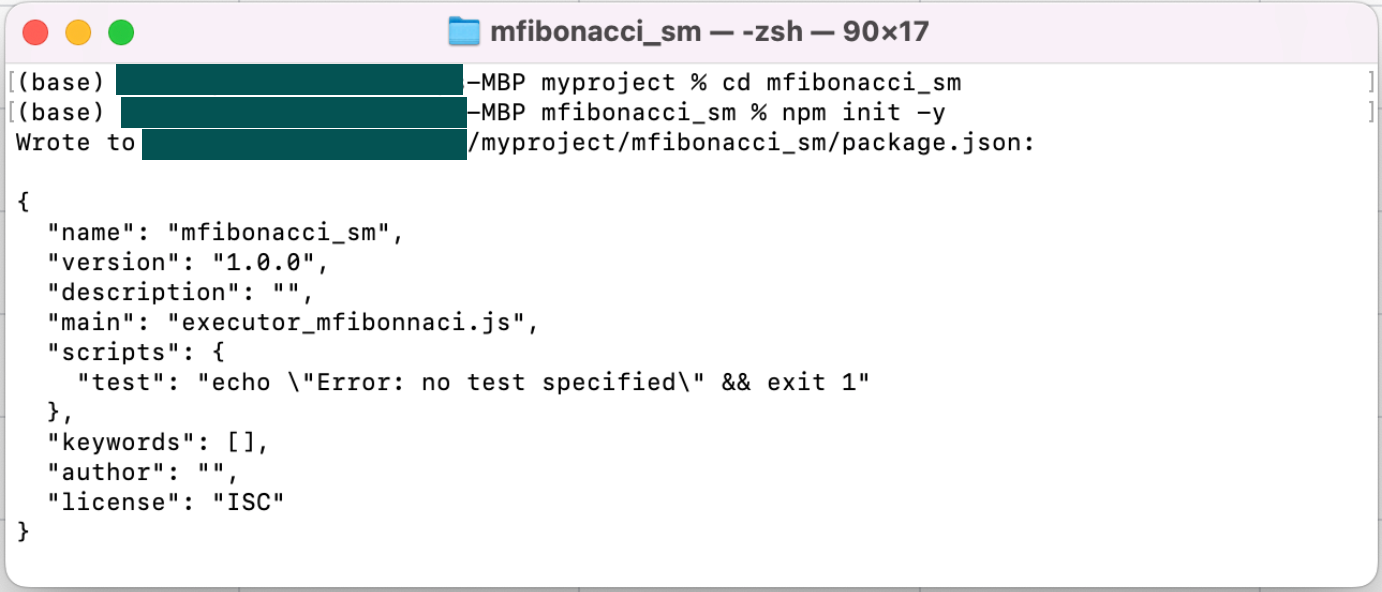
Initialise A Node Project
The first step is to make a new subdirectory named mfibonacci_sm, switch directory to it and initialise a node project as indicated below;
npm init -y
A successful initialisation looks like this:
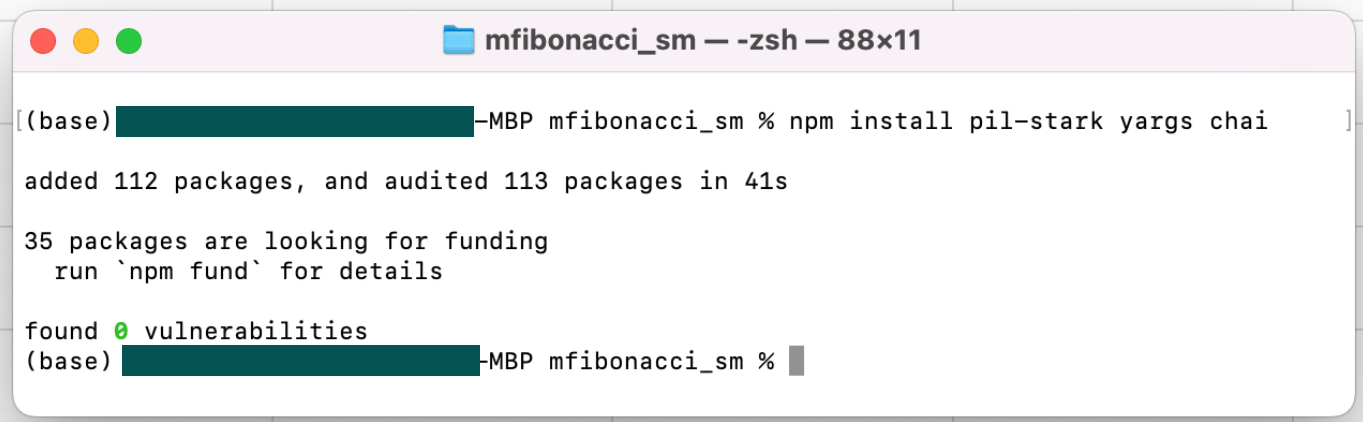
Next, install the required dependencies with the following command,
npm install pil-stark yargs chai
The installation takes seconds, and again the results looks like this,
Create Input Files
First of all, the overall inputs to PIL-STARK are; the \(\texttt{.pil}\) file describing the mFibonacci state machine, the STARK configuration \(\texttt{.json}\) file and the inputs \(\texttt{.json}\) file, which contains initial values of the mFibonacci state machine.
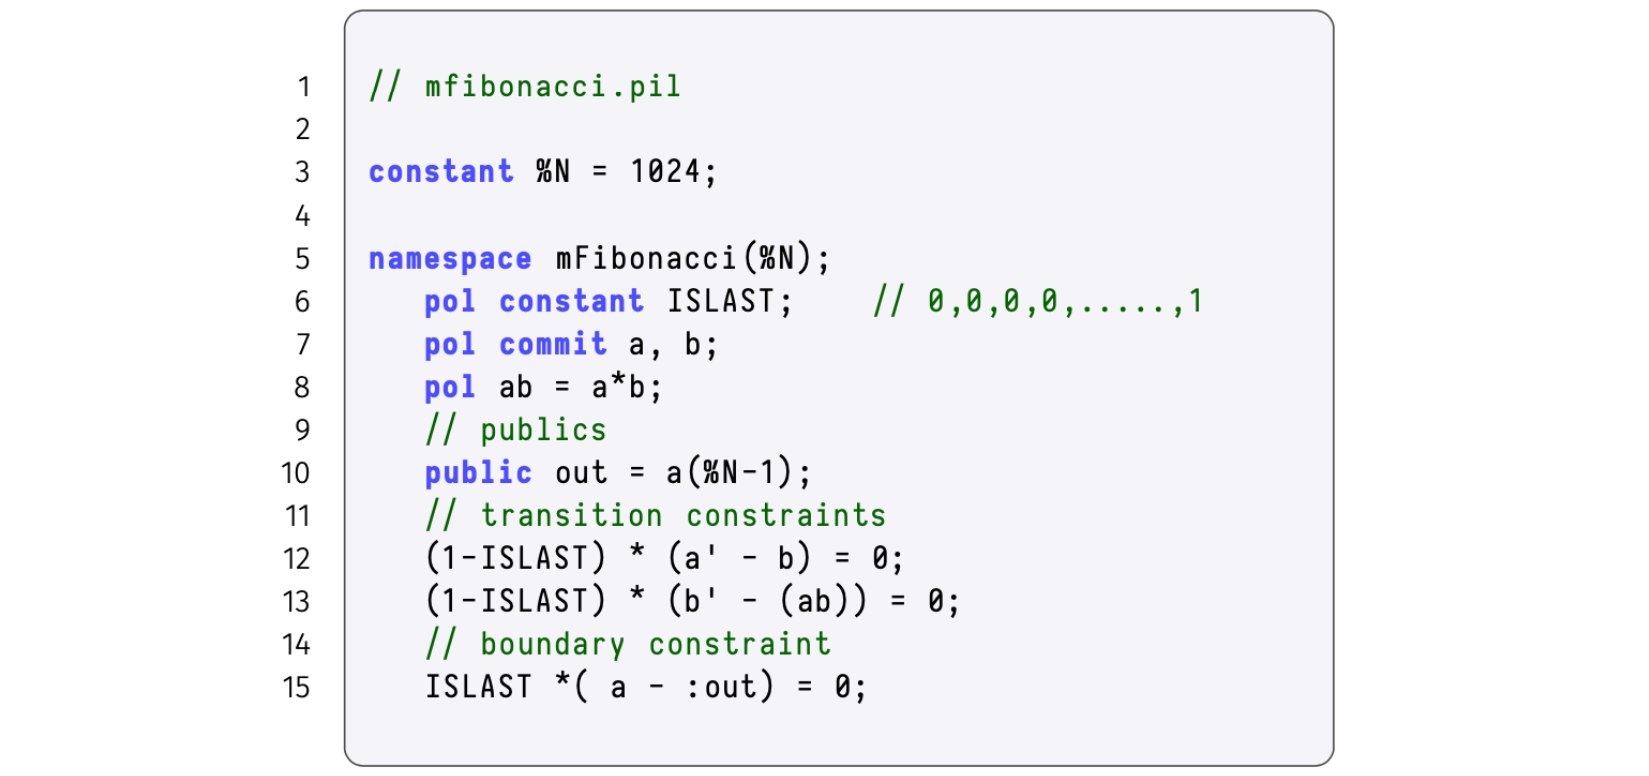
- Either move the modified version of the \(\texttt{mfibonacci.pil}\) file to the \(\mathtt{mfibonacci\_sm}\) subdirectory, or create a new file afresh at this subdirectory. Call it \(\texttt{mfibonacci.pil}\). That is, copy the text below to the new file. Save the file.
constant %N = 1024;

namespace mFibonacci(%N);
  pol constant ISLAST; // 0,0,0,0,.....,1
  pol commit a, b;
  pol ab = a*b;

// publics
 public out = a(%N-1);

// transition constraints
 (1-ISLAST) * (a' - b) = 0;
 (1-ISLAST) * (b' - (ab)) = 0;

// boundary constraint
  ISLAST*(a-:out)=0;
- Next, create a new file and call it
mfib.starkstruct.json. Copy the code provided below into this JSON file, and save it.
{
  "nBits": 10,
  "nBitsExt": 11,
  "nQueries": 8,
  "verificationHashType": "GL",
  "steps": [
   {"nBits": 11},
    {"nBits": 7},
    {"nBits": 3}
 ]
}
- Create a new file and call it
mfib.input.json. Populate this JSON file with the initial values of the mFibonacci state machine of your choice (the numbers must be positive integers). We use here \(\texttt{[ 234, 135 ]}\). Simply type the 2-element array in themfib.input.jsonfile and save it.
Create The Executor
In our earlier description of PIL-STARK, the \(\texttt{Executor}\) was ‘split’ into the \(\texttt{Setup} \texttt{ executor}\) and the \(\texttt{Prover } \texttt{executor}\). This was done for simplicity’s sake. The two \(\texttt{executors}\) are but one program that generates the evaluations of the constant polynomial, as well as the evaluations of the committed polynomials.
Create a new file and call it executor_mfibonacci.js. Copy the code-text shown below, into this .js file and save it in the mfibonacci_sm subdirectory.
const { FGL } = require("pil-stark");

module.exports.buildConstants = async function (pols) {
 const N = 1024;
 for ( let i=0; i<N; i++) {
   pols.ISLAST[i] = (i == N-1) ? 1n : 0n;}
    }

module.exports.execute = async function (pols, input) {
  const N = 1024;
 pols.a[0] = BigInt(input[0]);
 pols.b[0] = BigInt(input[1]);
  for(let i=1; i<N; i++){
  pols.a[i] = pols.b[i-1];
  pols.b[i] = FGL.mul(pols.a[i-1], pols.b[i-1]);
 }
 return pols.a[N-1];
}
Create PIL-STARK Proof Generator And Verifier
Finally, create the PIL-STARK proof generator and verifier by creating a new file (using a code editor) and name it mfib_gen_and_prove.js.
Copy the code-text shown below, into this mfib_gen_and_prove.js file and save it in the mfibonacci_sm subdirectory.
const { FGL, starkSetup, starkGen, starkVerify } = require("pil-stark");
const { newConstantPolsArray, newCommitPolsArray, compile, verifyPil } = require("pilcom");
const path = require("path");
// Files
const pilFile = path.join(__dirname, "mfibonacci.pil");
const input = require("./mfib.input.json");
const mFibExecutor = require("./executor_mfibonacci");
const starkStruct = require("./mfib.starkstruct.json");

async function generateAndVerifyPilStark() {
    // Generate constants (preprocessed)
    const pil = await compile(FGL, pilFile);
    const constPols = newConstantPolsArray(pil);
    const cmPols = newCommitPolsArray(pil);
    await mFibExecutor.buildConstants(constPols.mFibonacci);
    const executionResult = await mFibExecutor.execute(cmPols.mFibonacci, input);
    console.log(executionResult);

    // Generate trace
    const evaluationPilResult = await verifyPil(FGL, pil, cmPols , constPols);
   if (evaluationPilResult.length != 0) {
        console.log("Abort: the execution trace generated does not satisfy the PIL description!");
        for (let i=0; i < evaluationPilResult.length; i++) {
          console.log(pilVerificationResult[i]); } return;
      } else {
          console.log("Continue: execution trace matches the PIL!"); }

    // Setup for the stark
    const setup = await starkSetup(constPols, pil, starkStruct);

    // Generate the stark
    const proverResult = await starkGen(cmPols,constPols,setup.constTree,setup.starkInfo);

    // Verify the stark
    const verifierResult= await starkVerify(proverResult.proof, proverResult.publics, setup.constRoot,setup.starkInfo);
    if (verifierResult === true) { console.log("VALID proof!");
     } else { console.log("INVALID proof!"); }
}
generateAndVerifyPilStark();
Run the mfib_gen_and_prove.js code:
node mfib_gen_and_prove.js
After a long reporting on all the checks made, a successful STARK generation and its verification is indicated with a \(\texttt{VALID proof!}\) message. If you used different filenames from ours, you might have to do some light debugging.