Known issues and errors
Error: Bad block/Invalid Merkle
Description: A bad block or invalid Merkle root error occurs when the Heimdall and Bor layers are not in sync. Heimdall, as the consensus layer for Polygon POS chain, directs Bor to create blocks accordingly. A bad block error occurs when the Bor moves ahead to create a block which has not been directed by Heimdall. This causes an invalid hash being created, and hence results in an invalid Merkle root.
Solution 1: Restart the Bor service by using the following command,
sudo service bor restart
Typically a restart of the Bor service should resolve the problem, and that’s because restarting causes Bor to reconnect with Heimdall, start syncing, and create blocks correctly.
If restarting the Bor service does not fix the problem, then try the next option.
Solution 2: Make the following checks.
-
Check if your Heimdall and REST servers are running.
The Heimdall service might have stopped, and thus causing the bad block issue on Bor.
-
Check the logs for your Heimdall first,
journalctl -u heimdalld -f -
Check if everything is working correctly.
-
Additionally, check your REST server logs,
journalctl -u heimdalld-rest-server -f -
Restart the services not running.
This should cause Bor to automatically resolve the problem
If restarting both the Bor and Heimdall services doesn’t solve the problem, it could be that Bor is stuck on some block.
Solution 3: Check the bad block in logs for Bor.
-
Check Bor logs with this command
journalctl -u bor -fThe bad block is typically displayed in the logs as shown in the below figure:
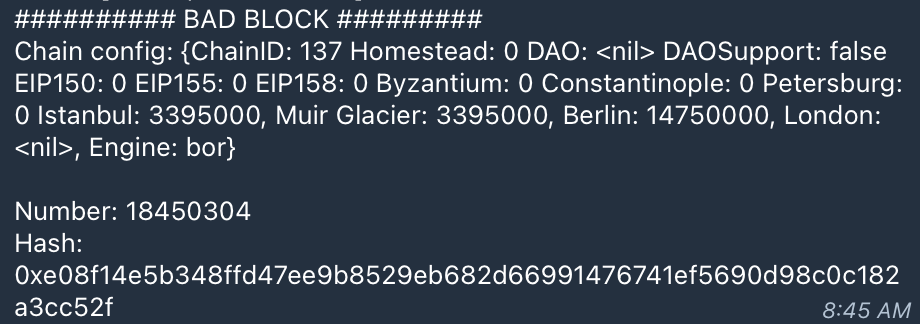
- Note the bad block number.
- Convert the block number to a hexadecimal number.
Info
Use this tool to convert the block number to a hexadecimal number.
- Roll back the Blockchain by a few hundred blocks. That is, set Bor at the right block height, with the
debug.setHead()function. Use the following command
    bor attach ./.bor/data/bor.ipc
    > debug.setHead("0xE92570")
The debug.setHead() function allows Bor to set the tip at a particular block height, resyncing from a previous block.
A successful output of the above command is a null. Once this is achieved, monitoring of the Bor can resume and see if the blochain goes passed the previously bad block number.
If none of these solutions works for you, please contact the Polygon Support team immediately.
Log: Error validating checkpoint module=checkpoint startBlock
If the node throws these logs, check the following:
-
Check if the Bor node is in sync by running the following command
bor attach .bor/data/bor.ipc
eth.syncing
If the output is “false”, then the Bor node is in sync.
-
Check if the Bor node is on the wrong fork by running this command
bor attach .bor/data/bor.ipc
eth_blockNumber
Find the associated block hash for the block number:
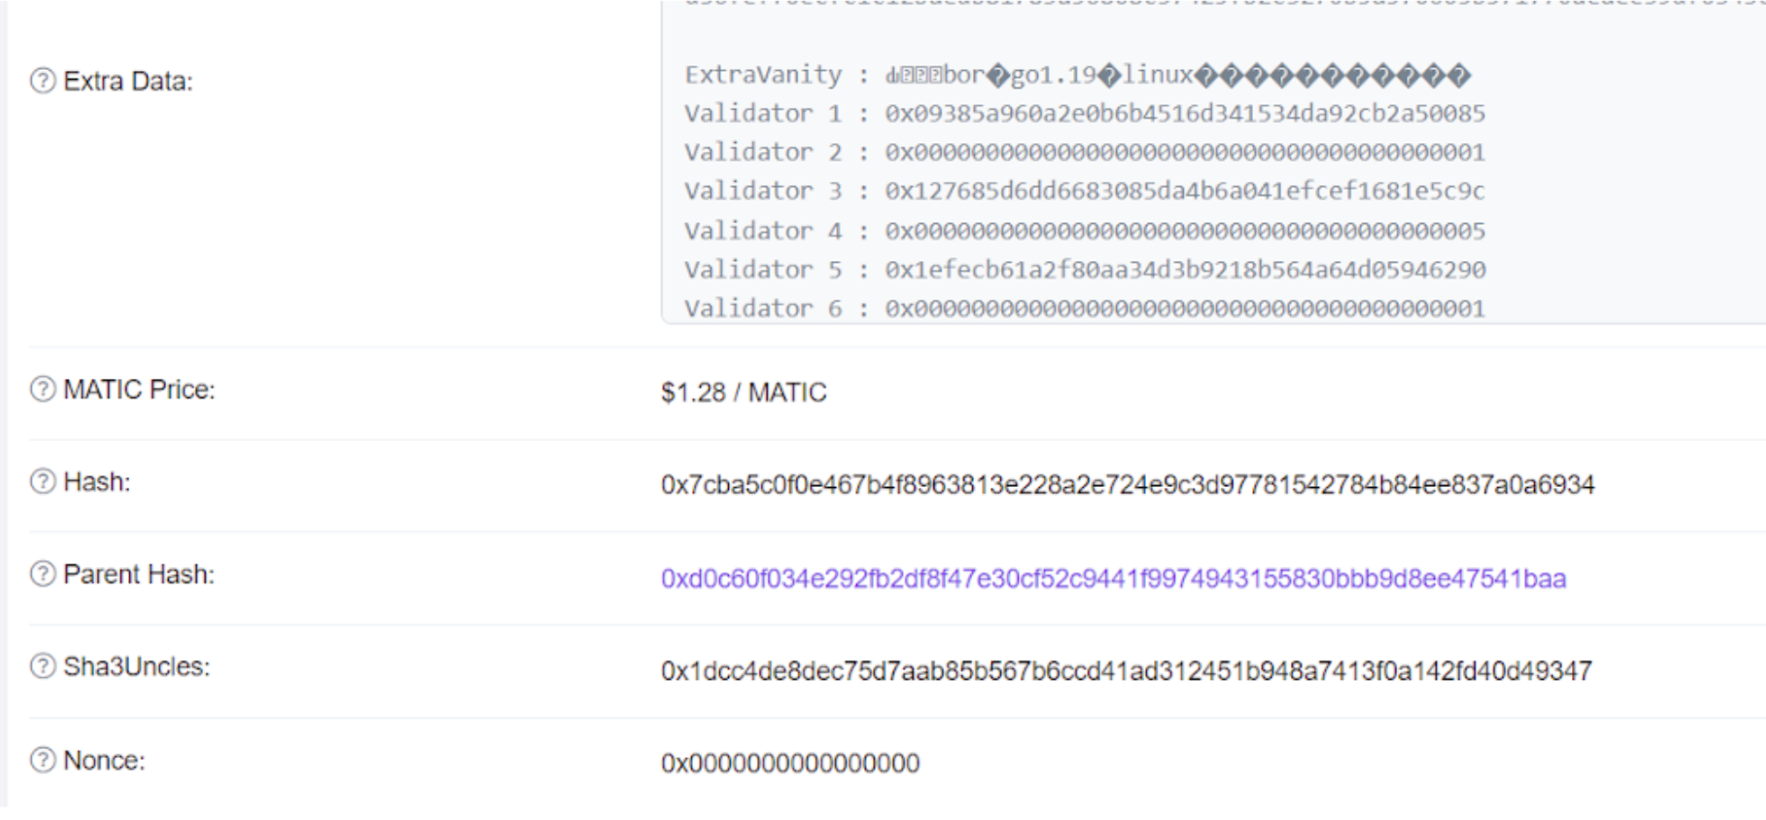
bor attach .bor/data/bor.ipc
eth.getBlockByNumber("<Block Number>").hash
Inspect the block number to identify if you are running on the right fork. One way to do this is to search for the block number on an explorer like PolygonScan.
If the hashes match, then the node is on the right fork.
Log: Error dialing seed
- Check whether your Heimdall node is configured with the latest seeds as listed on the node setup documents.
If you’re still encountering the error, after either updating to the latest seeds or confirming that you are using the right seeds, you may need to clear the addrbook.json file. To do this, follow the steps below.
-
Open the
config.tomlfile in your terminal:vi /var/lib/heimdall/config/config.toml -
Stop
heimdalldservice:sudo service heimdalld stop -
Clear your
addrbooksudo service heimdalld stop cp /var/lib/heimdall/config/addrbook.json /var/lib/heimdall/config/addrbook.json.bkp rm /var/lib/heimdall/config/addrbook.json -
Increase
max_num_inbound_peersandmax_num_outbound_peersin/var/lib/heimdall/config/config.toml:max_num_inbound_peers = 300 max_num_outbound_peers = 100 -
Start
heimdalldservice with the following commandsudo service heimdalld start
Log: Demoting invalidated transaction
This log is not an error but a process in the transactinos pool txpool which rearranges the transactions and removes some of them (as per specified conditions).
It should in no way affect the checkpointing mechanism.
Error: Failed Sanity Checks
Description:
Addressbook warnings can be ignored without an issue most of the time. If your node is connected to sufficient number of peers these kind of errors can be ignored. Your pex is just trying to re-establish it’s connections with peers already present in addrbook.json.
Issue: Bor synchronisation is slow
Description: If Bor synchronisation is slow it could be due to either of the below reasons:
- The node is running on a fork - means at certain point the block production was done by forking on a different block and that has impacted the further block production
- The machine is not working at optimum levels and could be with insufficient resources.
- This can be addressed by checking on:
- IOPS
- IOPS stands for Input/Output state of cycle
- The rate of reading is usually higher than write speed
- 6000 is the recommended range for IOPS
- Processing Power
- Processor has to be 8 or 16 core
- RAM: 32 GB is the minimum; 64 GB is recommended
- Block import should be more than 2 block for every second
- Node sync rate should be at 15-20 blocks every 8 secs
- IOPS
- This can be addressed by checking on:
Solution: As the issue is more about lack of hardware resources try upgrading it to double of the current specifications.
Node is not signing any checkpoints
PreRequisite: First, please point the bor_rpc_url(heimdall-config.toml) of the validator to any external infra providers and restart the services. This change helps to avoid missing checkpoints.
You can find a list of Infra Providers, on the navbar, that validators can make use of.
Note
At this point in time, the node will not mine blocks. So once the issue is fixed, the changes made have to be reverted for the node to return to normal functionality.
Description: First of all, your node not signing checkpoints could be for a multiple reasons.
Solution 1: First check if your Heimdall service is running correctly on your Sentry and Validator node. If the service has stopped abruptly or see any errors, try restarting your Heimdall service and see it comes back to normal.
Solution 2: Check your Bor service and see if it has halted abruptly or there are any errors on the logs. Try restarting your Bor service to resolve this issue.
Solution 3: Check if your Heimdall Bridge is running or not or if it has any errors in the logs. Try restarting the service and see if the issue resolves.
Issue: Validator Heimdall is unable to connect to Peers
Description: This typically means that your Sentry Heimdall is running into issues.
Solution:
- Check your Sentry Heimdall and see if the service is running fine.
- If the service is stopped then restarting the service on your Sentry should resolve this issue.
- Similarly, after fixing your sentry, a restart of your Heimdall service should also resolve the problem.
Error: Error while fetching mainchain receipt error
Description: These are normal logs. Do not do anything to your bridge.
Validator bor is stuck on block for a long time
Description: This means that your Bor on your Sentry is also stuck because your Validator gets information from your Sentry.
Solution:
- Please check your Bor logs on your sentry and see if everything is okay.
- Probably restart the Bor service first on your Bor and then simultaneously restart the Bor service on your Validator as well.
Error: (in Bor) “Failed to prepare header mining at block 0”
Description:
This happens because of a formatting issue in your static-nodes.json file (/var/lib/bor/data/bor/static-nodes.json).
Solution:
- Ensure there are no space and no additional characters like < / > .
- If you have made any changes to the file then please restart your Bor service and you should see logs printing.
Error: “30303” or invalid command
Description: This is because you haven’t created the bor keystore and the password file for it.
Solution:
Ensure that you follow all the steps from the guide setup.
Error: Impossible reorg, please file an issue
Description: Let these logs be. Your node should ideally not suffer because of this and the issue should be automatically resolved.
If your node is suffering because of this, please contact the support team immdiately.
Error: “Host not found” while setting up a node using Ansible
Description:
This could be because your inventory.yml file may have some formatting issues.
Solution: Correct them with proper indentation and then try again.
Issue: “Dialling failed” in Heimdall
Description: This is related to connectivity and more specifically a port related problem.
Solution:
- Check to
curl localhost:26657/statusstill shows the same block. - Try a Heimdall Restart.
- Make sure that the connectivity to this port 26656 is open.
- Try adding additional peers in vi /var/lib/heimdall/config/config.toml
- Set
max_open_connectionparameter to 100.
Issue: Looking for Peers or Stopping Peer for error
Solution:
-
open the
config.tomlfile on your Sentry node./var/lib/heimdall/config/config.toml -
And then find the parameter
external_address. Once you find it this what you should be updating it withtcp://<my_elastic_ip>:26656 -
Where
my_elastic_ipis your Sentry’s public IP -
Once you have updated this, all you need to do is restart your Heimdall service on your Sentry
sudo service heimdalld restart -
Ensure that you’re only doing this on your sentry only.
Follow the below steps for adding additional peers in vi /var/lib/heimdall/config/config.toml
-
Stop heimdalld service
sudo service heimdalld stop -
Clear your
addrbooksudo service heimdalld stop cp /var/lib/heimdall/config/addrbook.json /var/lib/heimdall/config/addrbook.json.bkp rm /var/lib/heimdall/config/addrbook.json -
Increase
max_num_inbound_peersandmax_num_outbound_peersin/var/lib/heimdall/config/config.toml:max_num_inbound_peers = 300 max_num_outbound_peers = 100 -
Start heimdalld service:
sudo service heimdalld start
Error: Error while fetching data from URL
Error sample:
module=span service=processor error="Error while fetching data from url:
[http://0.0.0.0:1317/bor/prepare-next-span?chain_id=137&proposer=0x29f265b54a298df0c1b762f688e7e7c09d8790ea&span_id=2863&start_block=18317056](http://0.0.0.0:1317/bor/prepare-next-span?chain_id=137&proposer=0x29f265b54a298df0c1b762f688e7e7c09d8790ea&span_id=2863&start_block=18317056), status: 400"
Aug 23 12:07:23 US-CA-SN01 bridge[2340]: E[2021-08-23|12:07:23.158] Unable to fetch next span details
module=span service=processor lastSpanId=2862
Solution:
Then the Heimdall Bridge needs a restart.
Error: no contract code at the given address
Solution
- Get the right configs from Github and copy them to
/var/lib/heimdall/configand - Please reset heimdall using
heimdalld unsafe-reset-all.
Issue: Problems in starting Bor
Issue: Address is required as an argument.
Solution: You have to add address.
/etc/matic/metadata
Error: Failed to unlock account (0x…) No key for given address or file
Description:
This error happens in light of the fact that the way for the password.txt record is erroneous. You can follow the beneath steps to amend this.
Solution:
For Linux packages:
Kill Bor process
For linux:
ps -aux | grep bor. Get the PID for Bor and then run the following command.sudo kill -9 PID
For Ansible:
-
Copy the bor keystore file to
/etc/bor/dataDir/keystore -
And password.txt to
/etc/bor/dataDir/ -
Make sure you have added correct address in
/etc/bor/metadata
For Binaries:
-
Copy the Bor keystore file to:
/var/lib/bor/keystore/ -
And password.txt to
/var/lib/bor/password.txt
Consequences of validator missing a checkpoint and points to investigate from our side
- Economics
- Bad reputation for Validator
- Rewards gets missed for Delegator
- Investigation
- Ask for recent logs
Error: dpkg: error processing archive matic-heimdall-xxxxxxxxxx
Sample:
"dpkg: error processing archive matic-heimdall_1.0.0_amd64.deb (--install): trying to overwrite '/heimdalld-rest-server.service', which is also in package matic-node 1.0.0"
Solution:
This occurs mainly because of a previous installation of Matic on machine. To resolve you can run: sudo dpkg -r matic-node
Issue: Tendermint was rest without resetting application’s data
Solution:
-
Reset Heimdall config data and try running the installation again;
$ heimdalld unsafe-reset-all$ rm -rf $HEIMDALLDIR/bridge
Issue: Bor crashed
Solution:
- Try upgrading to double the amount of RAM
- For example, their current RAM capacity is 16GB, it can be upgraded to 32GB
Error: err=”insufficient funds for gas * price + value”
Description:
These logs throw up when there is no enough ETH in your signer wallet.
Solution: It is recommended to have 1 ETH in your signer wallet but can keep .5 to .75 in case you check it often enough.
Heimdall: No staking sequence exists: %s %s module=staking
If the following logs are found on a large frequency on Heimdall then this issue is related to the bridge service resetting the bridge directory fixes this issue.
sudo service rabbitmq-server stop
mv /var/lib/rabbitmq/mnesia /var/lib/rabbitmq/mnesia-old
sudo service rabbitmq-server start
Retrying again in 5 seconds to fetch data from Heimdall path=bor/span/1
These logs in Bor mean that it cannot connect to Heimdall.
The Heimdall doesn’t look in sync and hence it won’t have data on all the things that Bor would require.
So the recommended procedure would be to clear the historical data of both Heimdall and Bor and resync from the snapshot.
Ensure the following is fine:
-
Heimdall logs are normal or is it throwing up any errors?
-
Ensure Heimdall is fully synced by running:
curl localhost:26657/status -
Also ensure whether Heimdall is connected with the other peers.
curl localhost:26657/net_info? | jq .result.n_peers
If there aren’t any peers, check whether the seeds or persistent peers are rightly set on Heimdall and ensure Port 26656 is all open.
Reset Heimdall
sudo service heimdalld stop
heimdalld unsafe-reset-all
Sync Heimdall from Snapshot
wget -c <Snapshot URL>
tar -xzvf <snapshot file> -C <HEIMDALL_DATA_DIRECTORY>
etherbase missing: etherbase must be explicitly specified
To fix this issue, the signer address that is used to mine must be added inside miner.etherbase section in the config.toml file.
Steps to Prune the node
Please use the below steps:
-
Check your Bor data size before pruning
du -sh /usr/bin/bor -
Stop Bor
sudo service bor stop -
Start
tmuxto ensure that even if your SSH connection is reset, the process is running on the remote machinetmux. -
Start pruning.
sudo bor snapshot prune-state --datadir /usr/bin/borThe default –datadir is
/usr/bin/bor. -
Once the pruning is completed, you will see success logs and details. Then start Bor again.
sudo service bor start -
Check your Bor data size after pruning.
du -sh /usr/bin/bor