What you will do
- Create a file on Remix and add a smart contract.
- Compile the smart contract.
- Connect to the Polygon Amoy testnet via MetaMask.
- Deploy the smart contract.
- Verify the smart contract on Polygonscan.
Prerequisites
- A MetaMask account configured with the Polygon Amoy testnet.
- Test POL tokens from the Polygon faucet to pay gas fees.
Step 1: Create the contract file
Go to Remix IDE. Click New File and name itHelloWorld.sol.
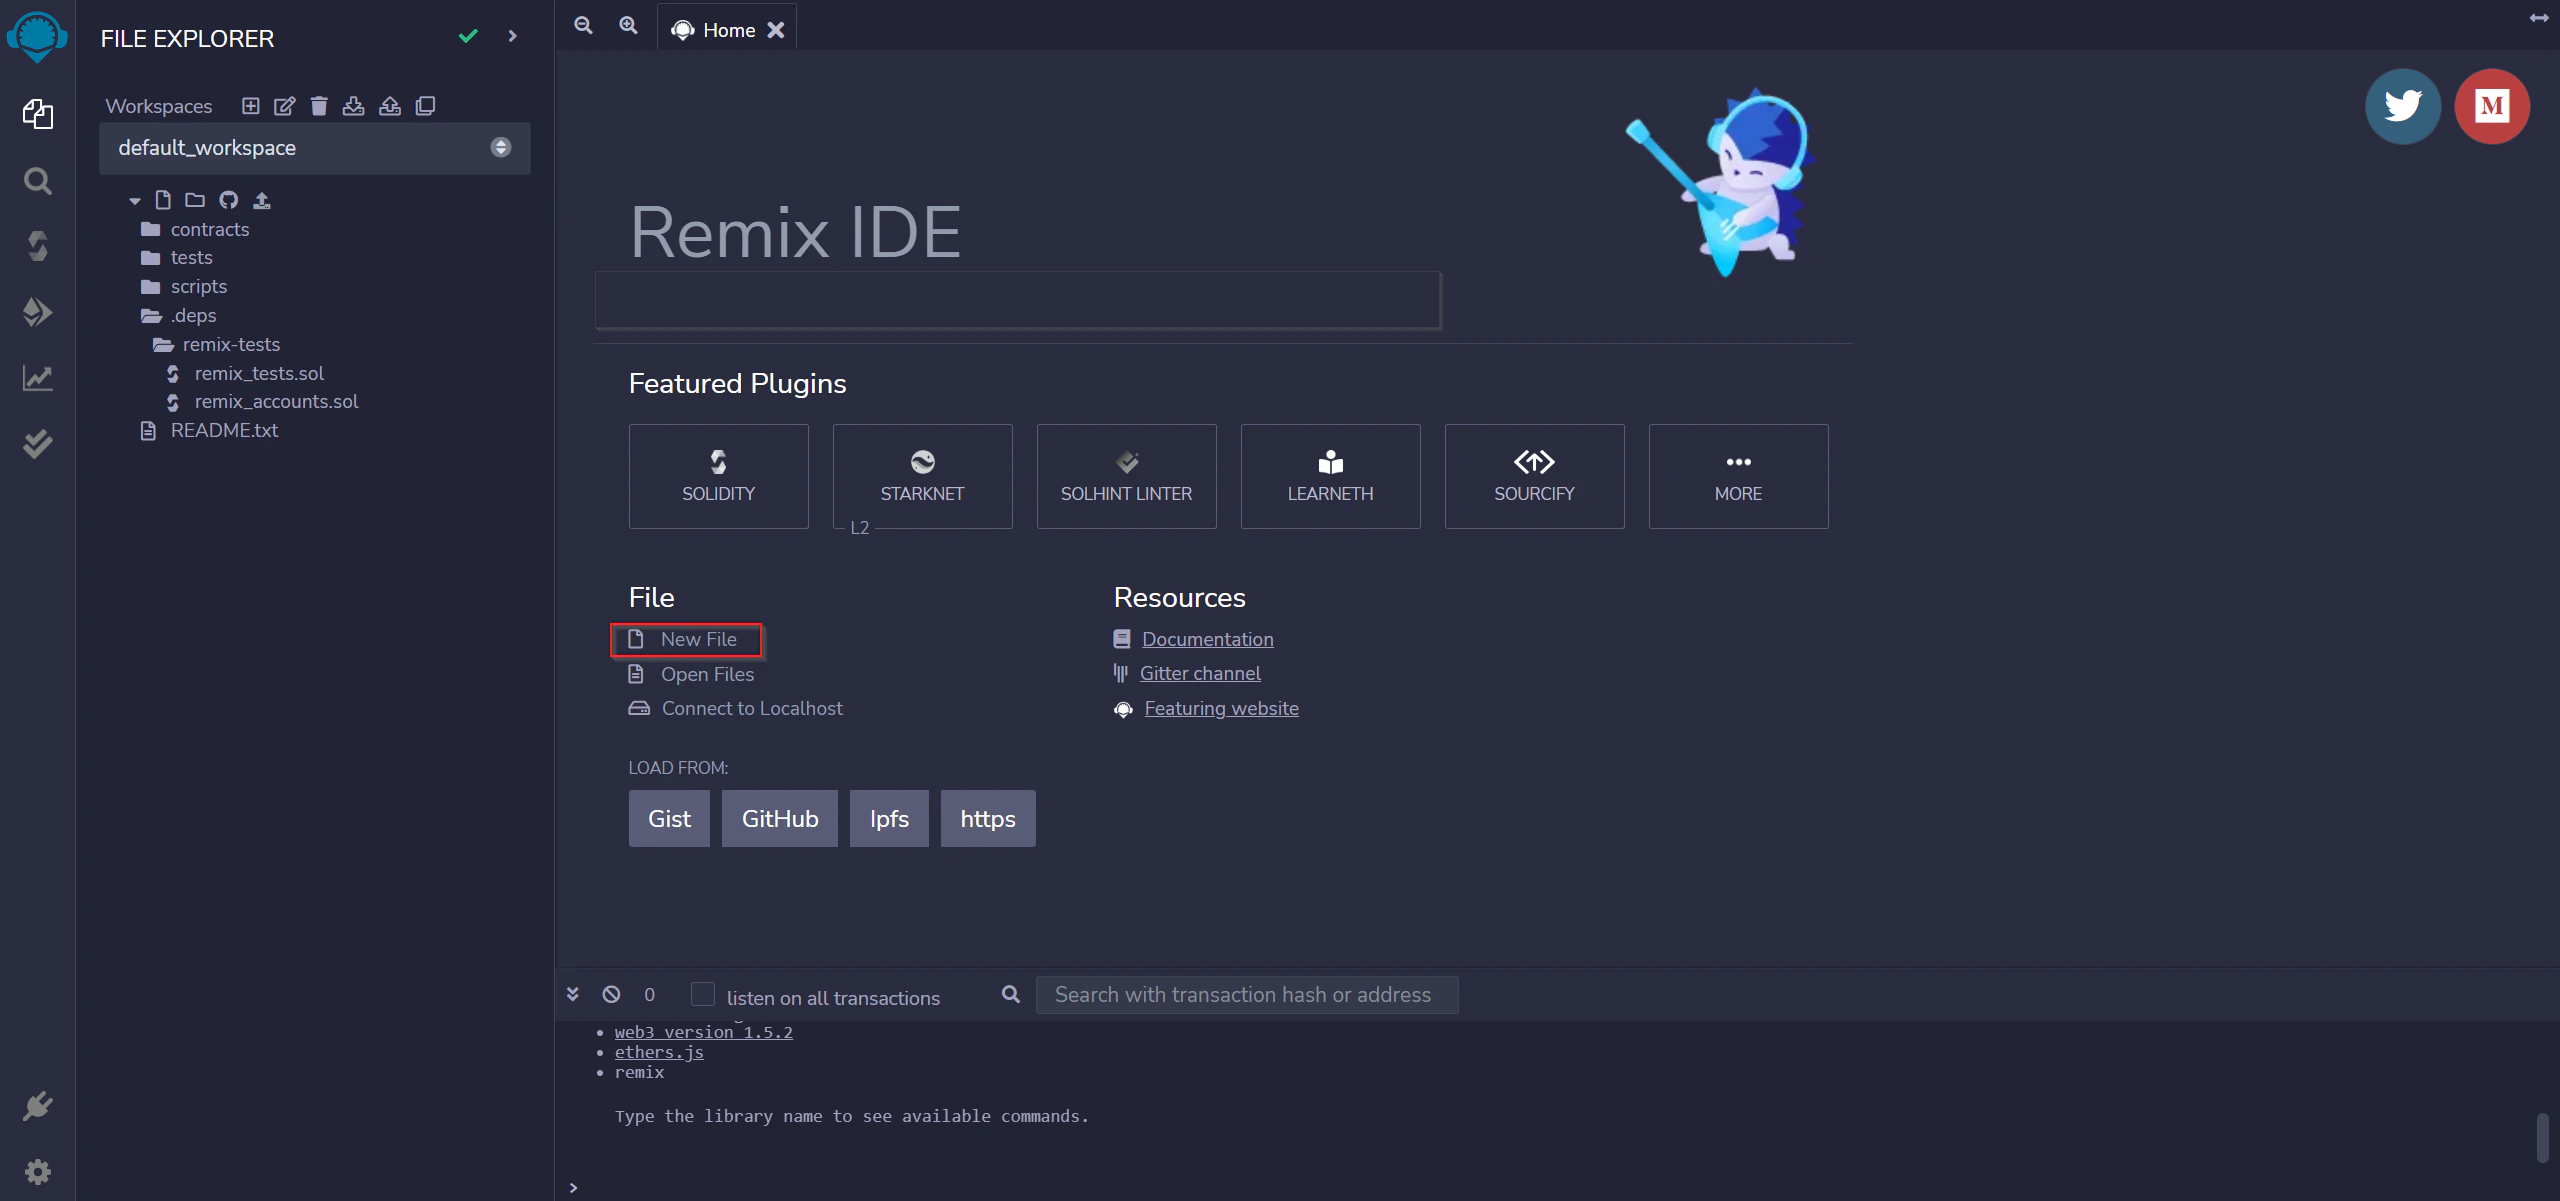
Step 2: Add the smart contract
Copy and paste the following intoHelloWorld.sol:
HelloWorld.sol
message string in public state. The constructor sets the initial message on deployment. The update function lets anyone with owner access change the message afterward.
Step 3: Compile the contract
- Go to the Solidity Compiler tab (below the search button).
- Set the compiler version to 0.5.10.
- Compile
HelloWorld.sol.
Step 4: Connect MetaMask to Polygon Amoy
- Open MetaMask and click the network dropdown (set to Ethereum Mainnet by default).
-
Click Add Network and enter the Amoy testnet details:
- Network: Polygon Amoy testnet
- RPC URL (public):
https://rpc-amoy.polygon.technology/ - RPC URL (dedicated):
https://polygon-amoy.g.alchemy.com/v2/{your-api-key}(requires a free Alchemy API key) - Chain ID: 80002
- Currency Symbol: POL
- Block Explorer URL:
https://amoy.polygonscan.com/
- Click Save.
- Copy your wallet address from MetaMask.
- Go to the Polygon faucet and request test POL. Select Amoy as the network and POL Token as the token. You can also use the Alchemy Amoy faucet.
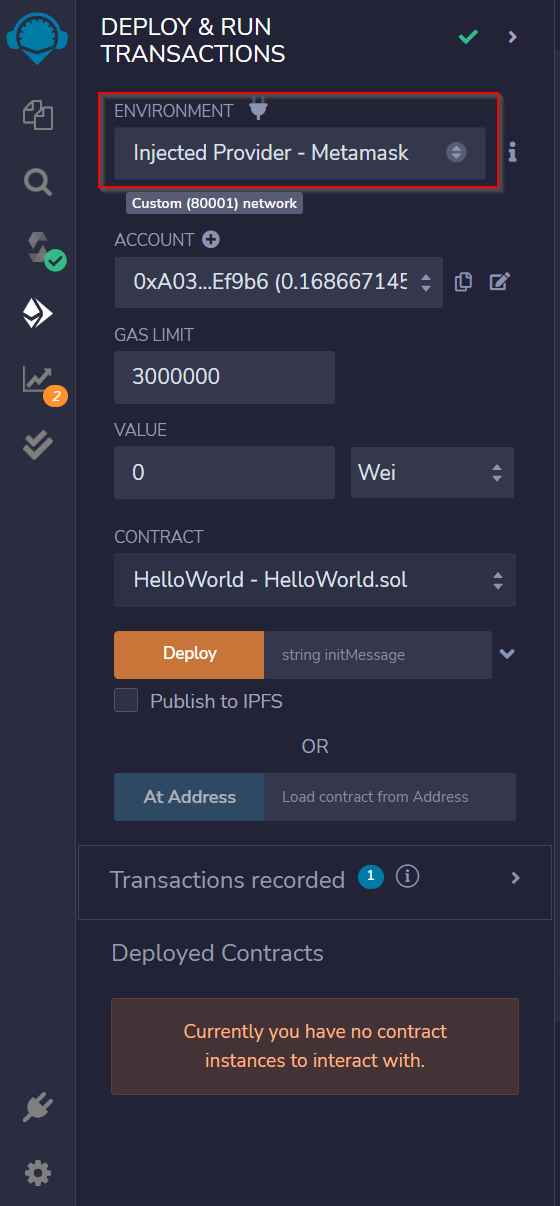
Step 5: Deploy to Amoy
In Remix, use the Deploy & Run Transactions tab:- Select Injected Provider - MetaMask in the Environment dropdown.
-
Select your contract from the contract list.
- Accept the Connect request in MetaMask when it appears.
-
Click Deploy. A MetaMask popup will ask you to confirm the transaction. Confirm it.
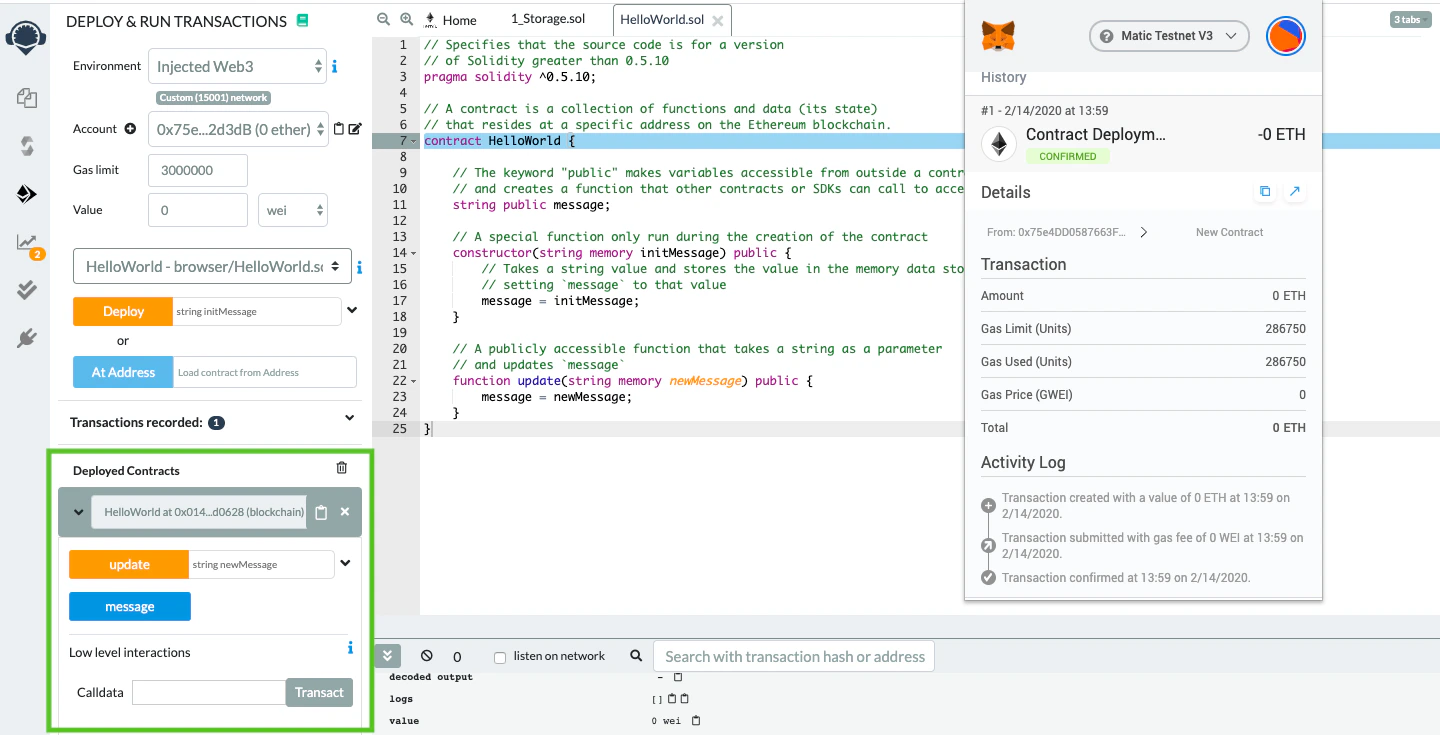
HelloWorld contract is now deployed to the Polygon Amoy testnet. Check the deployment at https://amoy.polygonscan.com/.
Deploy to Polygon mainnet
After testing on Amoy, deploy to mainnet the same way. Note that mainnet deployment costs real POL for gas.- Open MetaMask and click Add Network.
- Have your Alchemy API key ready.
-
Add the mainnet details:
- Network Name: Polygon Mainnet
- New RPC URL:
https://polygon-mainnet.g.alchemy.com/v2/{your-api-key} - Chain ID: 137
- Currency Symbol: POL
- Block Explorer URL:
https://polygonscan.com/
- Click Save and make sure your wallet holds POL to cover gas fees.
- Follow the same Remix deployment steps above, now with Polygon Mainnet selected in MetaMask.
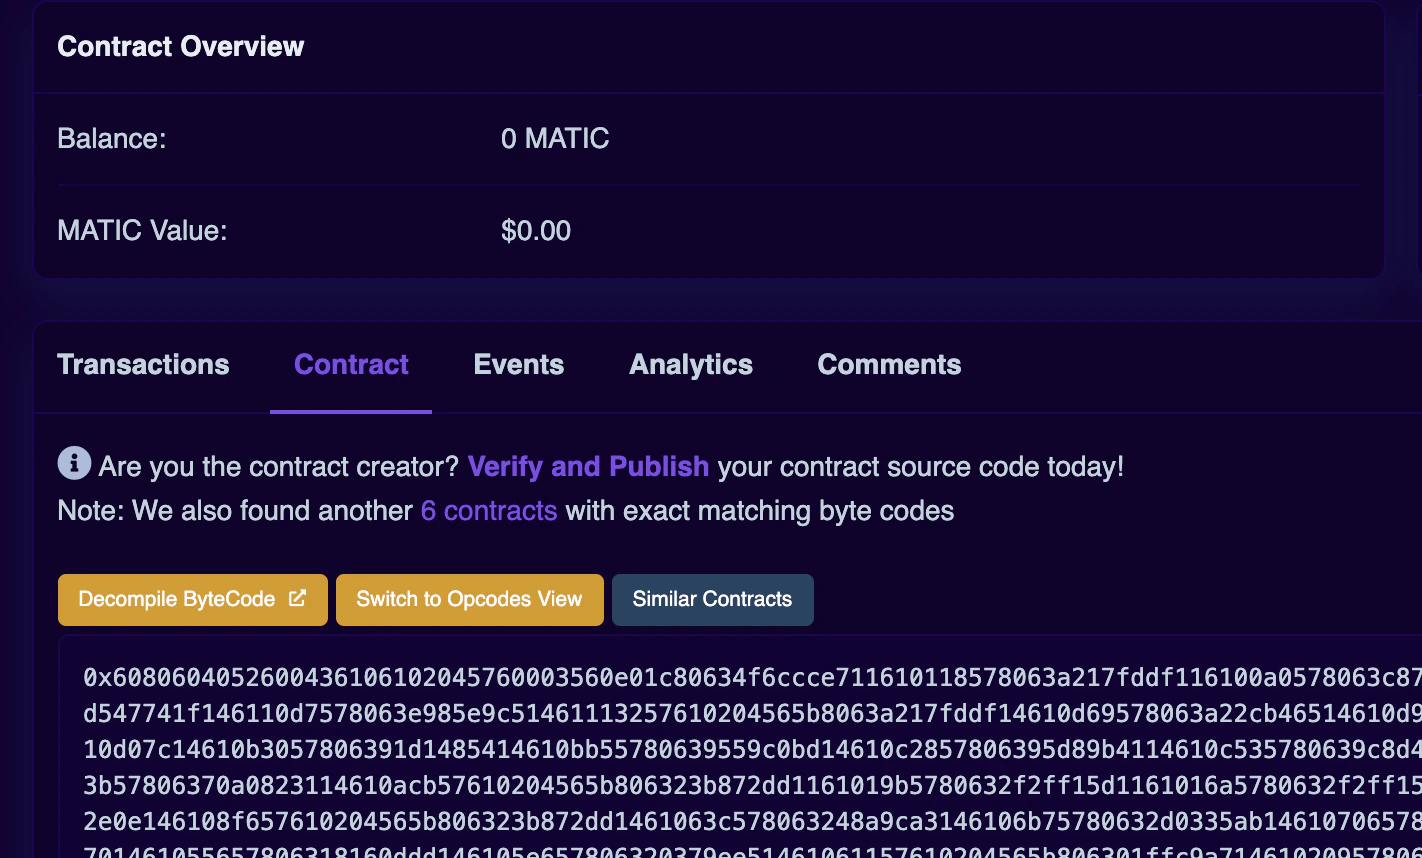
Verify your contract on Polygonscan
Flatten the contract
Install a flattener to combine all Solidity source files into one:Submit for verification
-
Navigate to your contract’s Polygonscan page and click Verify and Publish.
- Select Solidity (Single File) as the compiler type.
- Select the compiler version you used.
- Choose your license type.
- Paste your flattened contract source. Adjust the optimization settings to match what you used during compilation.
000000000000000000000000a6fa4fb5f76172d178d61b04b0ecd319c5d1c0aa).