> ## Documentation Index
> Fetch the complete documentation index at: https://docs.polygon.technology/llms.txt
> Use this file to discover all available pages before exploring further.
# The Graph
> How to create, deploy, and query a subgraph for a Polygon smart contract using The Graph.
**Polygon zkEVM is deprecated.** It is no longer recommended for new integrations and references on this page reflect historical context only. New chains and applications should use Polygon Chain or [Polygon CDK](/chain-development/cdk/index).
Please view the third-party content disclaimer [here](https://github.com/0xPolygon/polygon-docs/blob/main/CONTENT_DISCLAIMER.md).
[The Graph](https://thegraph.com/) lets you index and query smart contract data through APIs called subgraphs. This avoids the need to query an RPC node directly for historical event data.
The Graph supports:
* Polygon Chain mainnet
* Amoy testnet
## Prerequisites
* A smart contract deployed and verified on a supported Polygon network.
* Node.js installed.
* A [Subgraph Studio](https://thegraph.com/studio/) account with a connected wallet.
## Step 1: Initialize your subgraph project
### Create a subgraph in Subgraph Studio
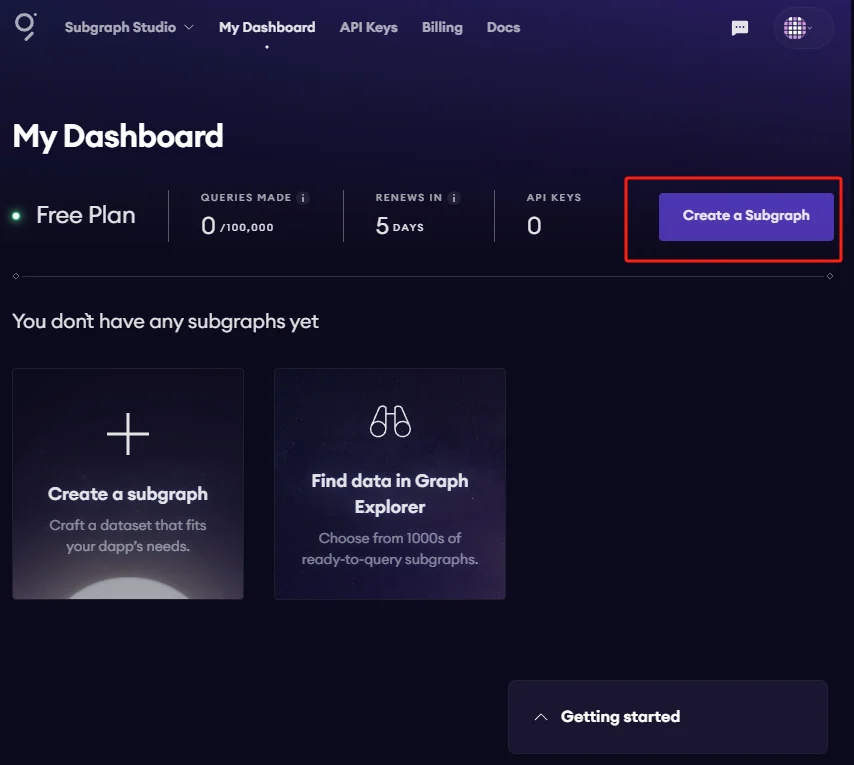
Go to [Subgraph Studio](https://thegraph.com/studio/) and connect your wallet. Click **Create a Subgraph**. Use Title Case for the name, for example: "My Contract Polygon Chain".
 The subgraph page displays the CLI commands you need on the right side:
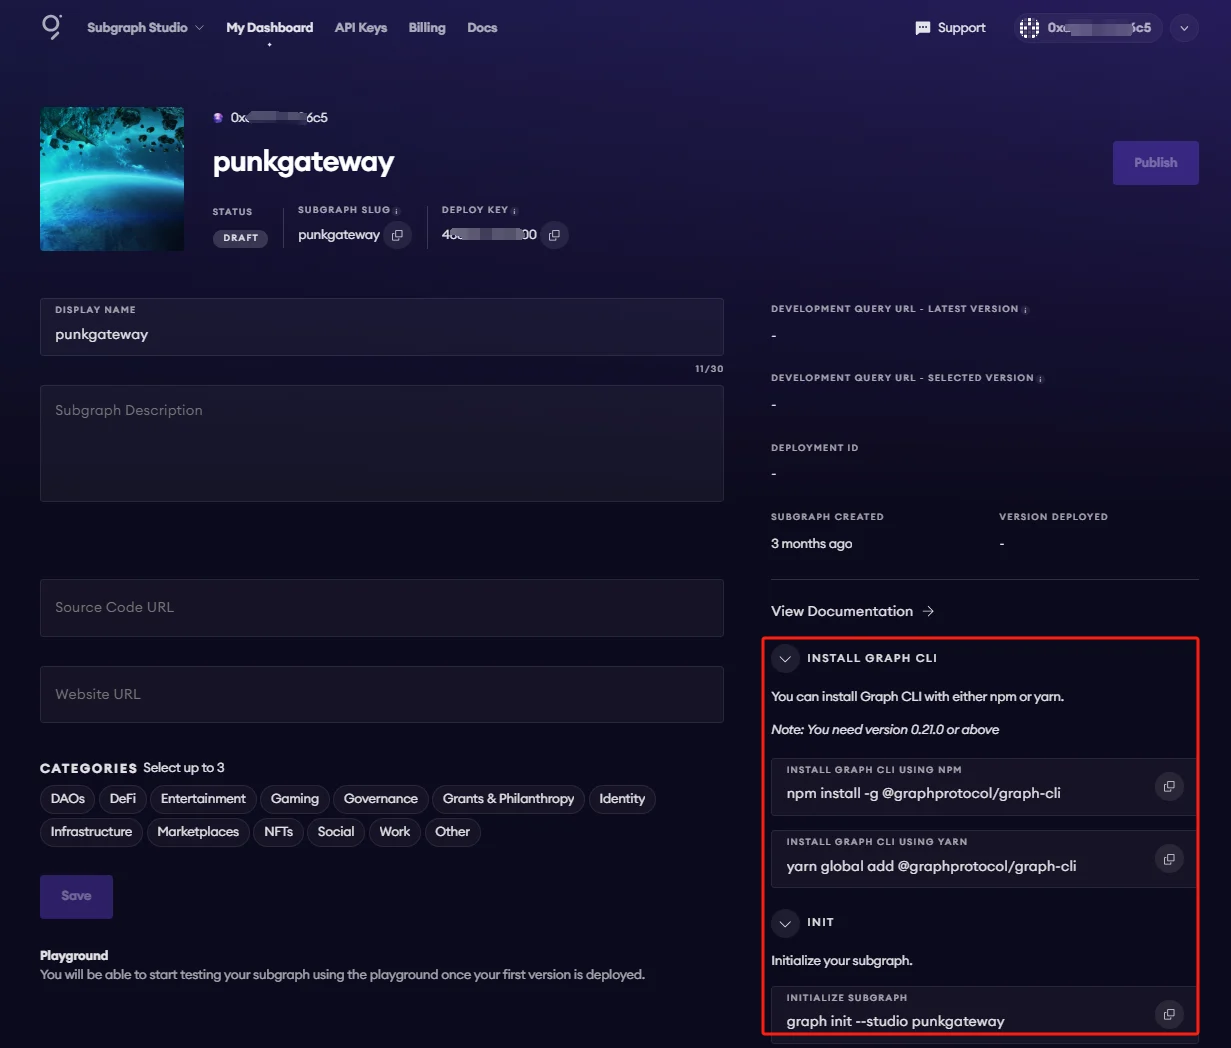 ### Install the Graph CLI
```
npm install -g @graphprotocol/graph-cli
```
### Initialize your subgraph
Copy the command from your subgraph page to include your specific subgraph slug:
```
graph init --studio
```
You will be prompted for details about your subgraph:
### Install the Graph CLI
```
npm install -g @graphprotocol/graph-cli
```
### Initialize your subgraph
Copy the command from your subgraph page to include your specific subgraph slug:
```
graph init --studio
```
You will be prompted for details about your subgraph:
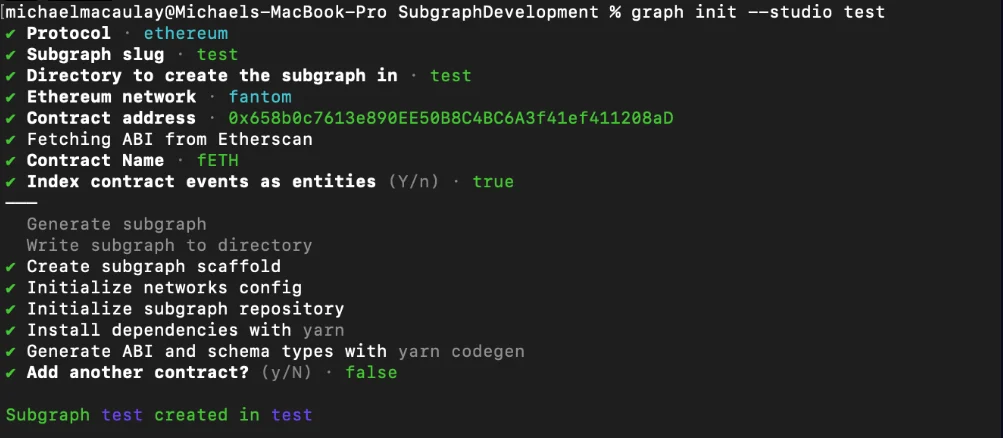 If your contract is verified on the block explorer, the CLI fetches the ABI automatically and generates an entity for each event.
## Step 2: Deploy and publish
### Deploy to Subgraph Studio
Build the subgraph:
```bash theme={null}
$ graph codegen
$ graph build
```
Authenticate and deploy. Copy these commands from your subgraph page to use your specific deploy key and slug:
```bash theme={null}
$ graph auth --studio
$ graph deploy --studio
```
Enter a version label when prompted, for example `v0.0.1`.
### Test your subgraph
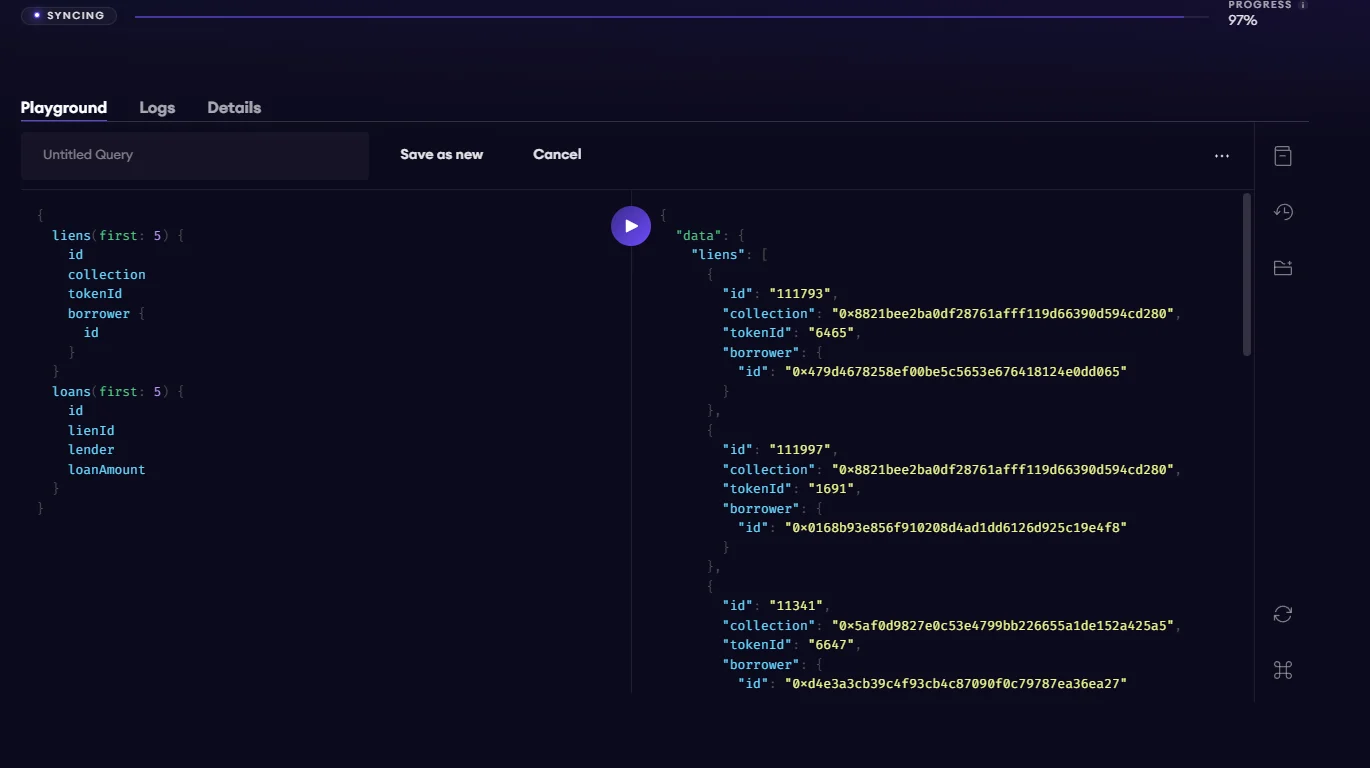
Use the playground in Subgraph Studio to run a sample query. The **Details** tab shows your API endpoint for testing from your dApp.
If your contract is verified on the block explorer, the CLI fetches the ABI automatically and generates an entity for each event.
## Step 2: Deploy and publish
### Deploy to Subgraph Studio
Build the subgraph:
```bash theme={null}
$ graph codegen
$ graph build
```
Authenticate and deploy. Copy these commands from your subgraph page to use your specific deploy key and slug:
```bash theme={null}
$ graph auth --studio
$ graph deploy --studio
```
Enter a version label when prompted, for example `v0.0.1`.
### Test your subgraph
Use the playground in Subgraph Studio to run a sample query. The **Details** tab shows your API endpoint for testing from your dApp.
 ### Publish to the decentralized network
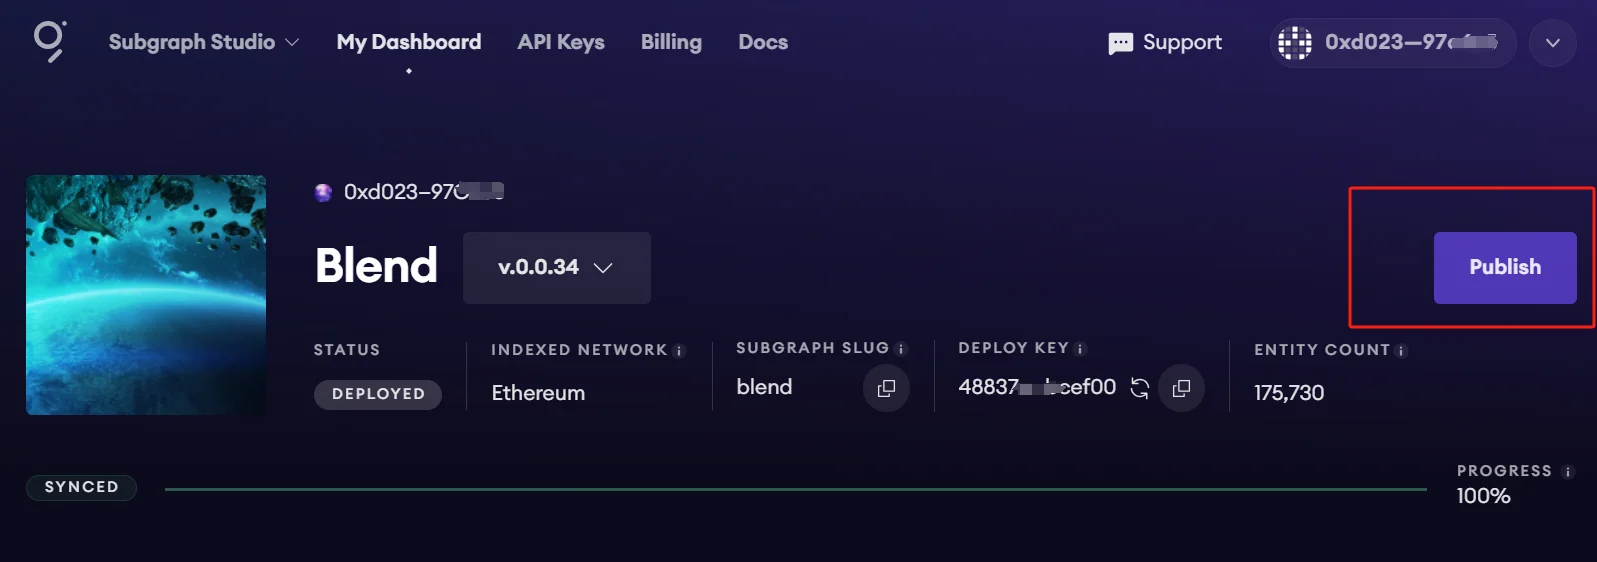
When your subgraph is ready for production, click **Publish** on the subgraph page in Subgraph Studio:
### Publish to the decentralized network
When your subgraph is ready for production, click **Publish** on the subgraph page in Subgraph Studio:
 After publishing, indexers must begin serving queries. To speed this up, curate your subgraph with GRT. As of May 2024, curating with at least 3,000 GRT is recommended to ensure the subgraph is indexed and queryable promptly.
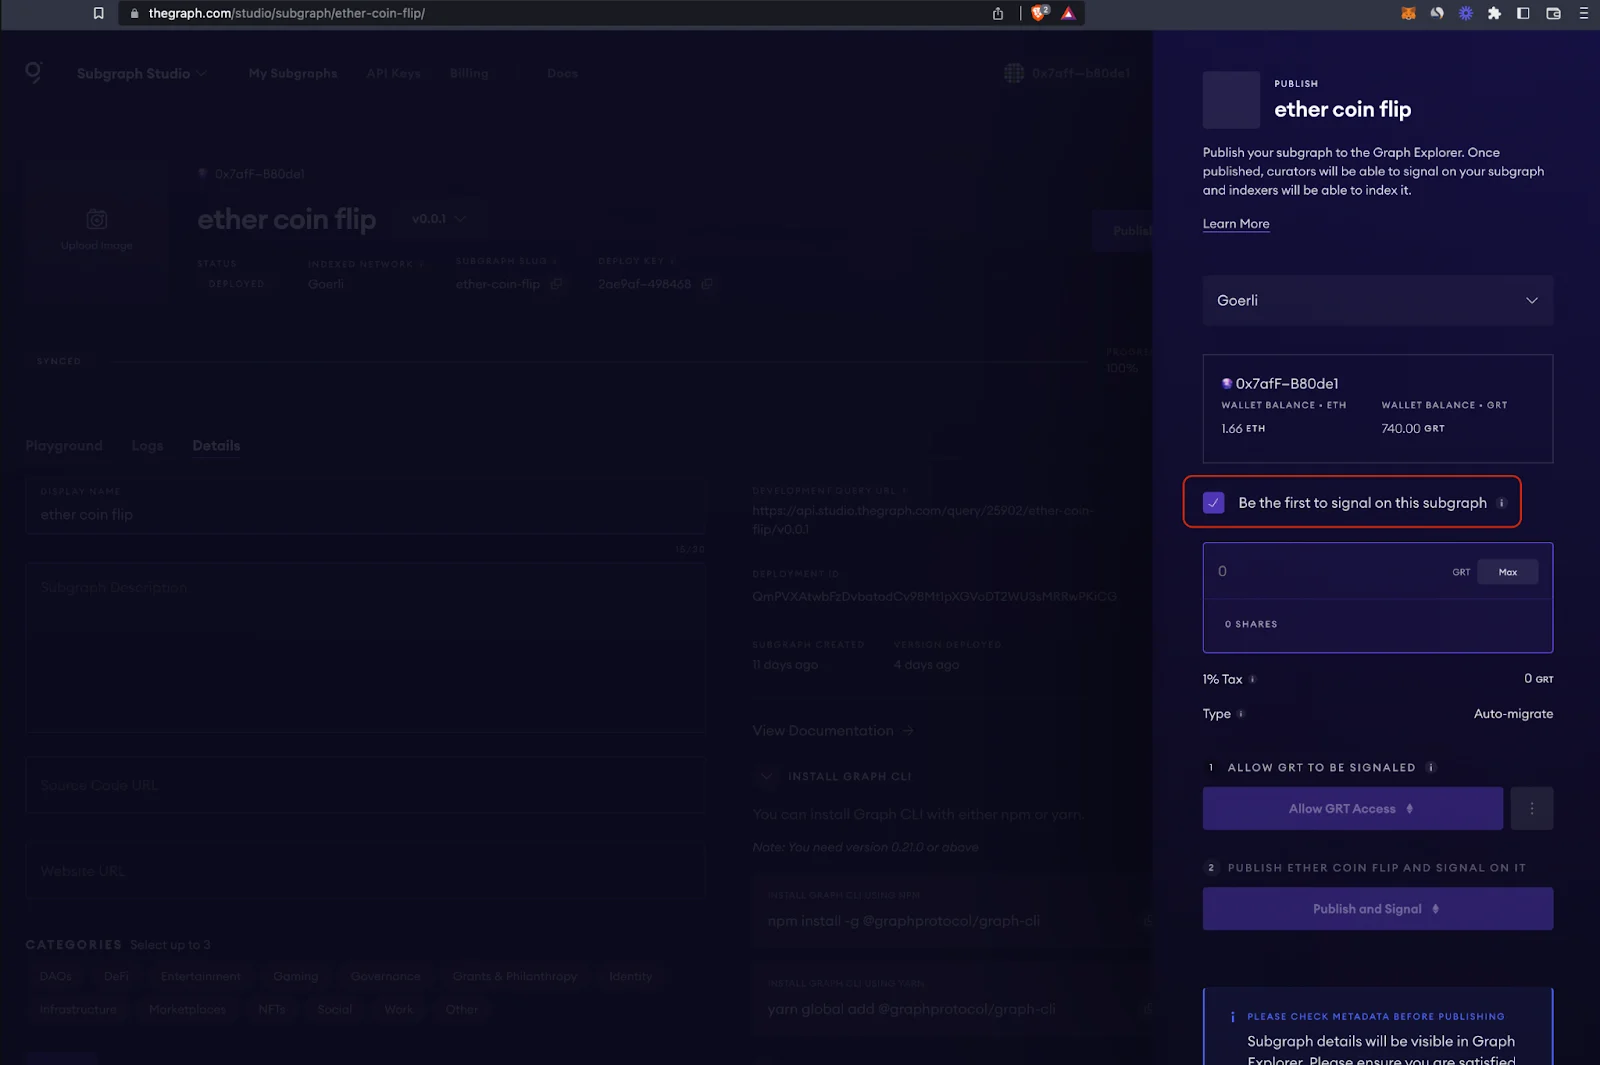 > **Note:** The Graph's smart contracts are on Arbitrum One, even when your subgraph indexes data from Polygon or other [supported chains](https://thegraph.com/docs/en/developing/supported-networks/).
## Step 3: Query your subgraph
Once published, query your subgraph by sending a GraphQL query to the subgraph's query URL. Find the URL at the top of the subgraph's Explorer page.
Example from the [CryptoPunks Ethereum subgraph](https://thegraph.com/explorer/subgraphs/HdVdERFUe8h61vm2fDyycHgxjsde5PbB832NHgJfZNqK):
> **Note:** The Graph's smart contracts are on Arbitrum One, even when your subgraph indexes data from Polygon or other [supported chains](https://thegraph.com/docs/en/developing/supported-networks/).
## Step 3: Query your subgraph
Once published, query your subgraph by sending a GraphQL query to the subgraph's query URL. Find the URL at the top of the subgraph's Explorer page.
Example from the [CryptoPunks Ethereum subgraph](https://thegraph.com/explorer/subgraphs/HdVdERFUe8h61vm2fDyycHgxjsde5PbB832NHgJfZNqK):
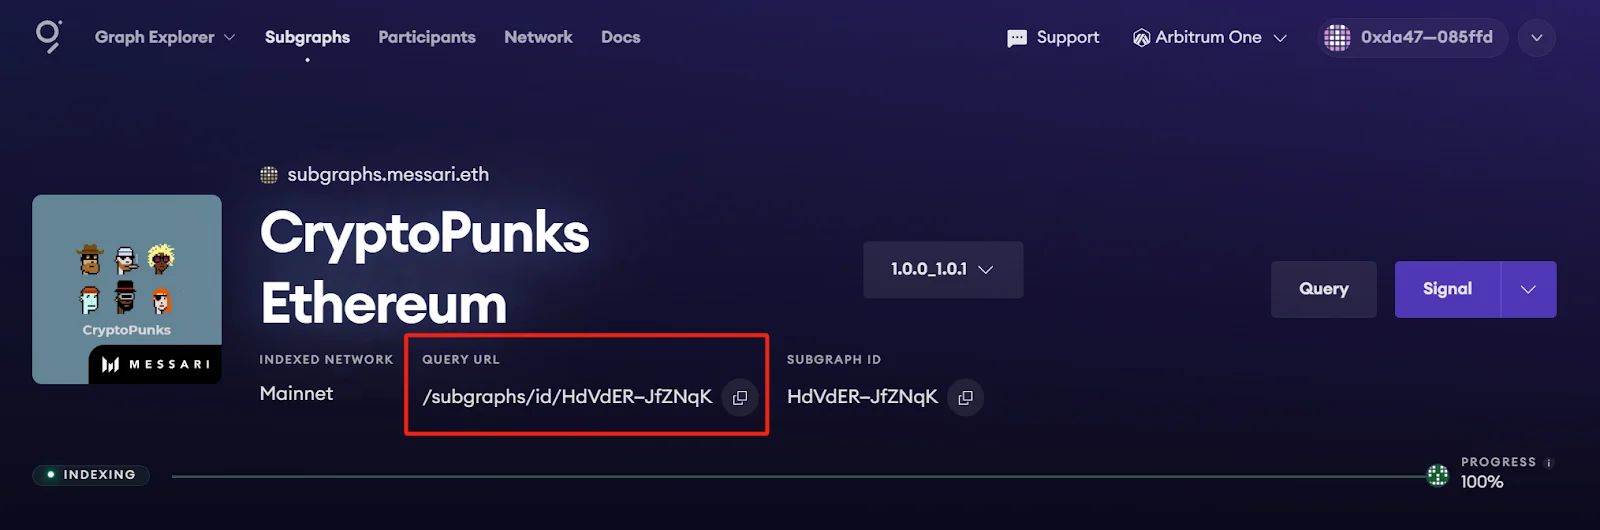 The query URL format is:
`https://gateway-arbitrum.network.thegraph.com/api/`**\[api-key]**`/subgraphs/id/HdVdERFUe8h61vm2fDyycgxjsde5PbB832NHgJfZNqK`
### Get an API key
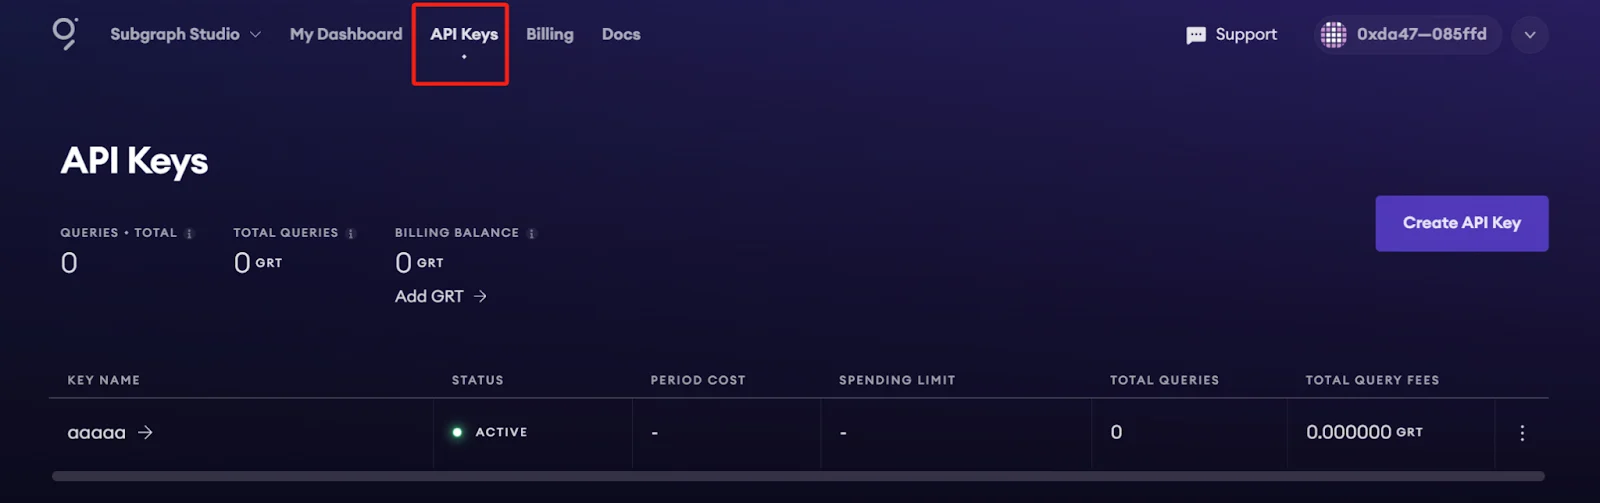
In Subgraph Studio, open the **API Keys** menu at the top of the page to create an API key.
The query URL format is:
`https://gateway-arbitrum.network.thegraph.com/api/`**\[api-key]**`/subgraphs/id/HdVdERFUe8h61vm2fDyycgxjsde5PbB832NHgJfZNqK`
### Get an API key
In Subgraph Studio, open the **API Keys** menu at the top of the page to create an API key.
 ## Appendix
### Sample query
This query returns the most expensive CryptoPunks sold, ordered by price:
```graphql theme={null}
{
trades(orderBy: priceETH, orderDirection: desc) {
priceETH
tokenId
}
}
```
Response:
```
{
"data": {
"trades": [
{
"priceETH": "124457.067524886018255505",
"tokenId": "9998"
},
{
"priceETH": "8000",
"tokenId": "5822"
},
// ...
```
### Sample code
```jsx theme={null}
const axios = require('axios');
const graphqlQuery = `{
trades(orderBy: priceETH, orderDirection: desc) {
priceETH
tokenId
}
}`;
const queryUrl = 'https://gateway-arbitrum.network.thegraph.com/api/[api-key]/subgraphs/id/HdVdERFUe8h61vm2fDyycHgxjsde5PbB832NHgJfZNqK'
const graphQLRequest = {
method: 'post',
url: queryUrl,
data: {
query: graphqlQuery,
},
};
// Send the GraphQL query
axios(graphQLRequest)
.then((response) => {
// Handle the response here
const data = response.data.data
console.log(data)
})
.catch((error) => {
// Handle any errors
console.error(error);
});
```
### Additional resources
* [Creating a subgraph](https://thegraph.com/docs/en/developing/creating-a-subgraph/)
* [Querying data from your subgraph](https://thegraph.com/docs/en/querying/querying-the-graph/)
## Appendix
### Sample query
This query returns the most expensive CryptoPunks sold, ordered by price:
```graphql theme={null}
{
trades(orderBy: priceETH, orderDirection: desc) {
priceETH
tokenId
}
}
```
Response:
```
{
"data": {
"trades": [
{
"priceETH": "124457.067524886018255505",
"tokenId": "9998"
},
{
"priceETH": "8000",
"tokenId": "5822"
},
// ...
```
### Sample code
```jsx theme={null}
const axios = require('axios');
const graphqlQuery = `{
trades(orderBy: priceETH, orderDirection: desc) {
priceETH
tokenId
}
}`;
const queryUrl = 'https://gateway-arbitrum.network.thegraph.com/api/[api-key]/subgraphs/id/HdVdERFUe8h61vm2fDyycHgxjsde5PbB832NHgJfZNqK'
const graphQLRequest = {
method: 'post',
url: queryUrl,
data: {
query: graphqlQuery,
},
};
// Send the GraphQL query
axios(graphQLRequest)
.then((response) => {
// Handle the response here
const data = response.data.data
console.log(data)
})
.catch((error) => {
// Handle any errors
console.error(error);
});
```
### Additional resources
* [Creating a subgraph](https://thegraph.com/docs/en/developing/creating-a-subgraph/)
* [Querying data from your subgraph](https://thegraph.com/docs/en/querying/querying-the-graph/)