> ## Documentation Index
> Fetch the complete documentation index at: https://docs.polygon.technology/llms.txt
> Use this file to discover all available pages before exploring further.
# Using GCP
> Steps to deploy a Polygon Chain node in a Google Cloud Platform VM instance using the gcloud CLI.
This guide deploys a Polygon Chain node in a GCP VM instance. The examples use Ubuntu 20.04, though any modern Debian or Ubuntu LTS release (e.g., Debian 11) works.
This setup is currently only supported for mainnet. GCP support for deploying Amoy testnet nodes will be available soon.
## Deploy VM instance
You may use any of the following ways to create an instance in Google Cloud:
1. Google Cloud CLI, local or [Cloud Shell](https://cloud.google.com/shell)
2. Web Console
We only cover the first case in this guide. Let's start with deployment using Google Cloud CLI.
1. Follow ["Before you begin" section](https://cloud.google.com/compute/docs/instances/create-start-instance#before-you-begin) to install and configure gcloud command-line tool.
Pay attention to default region and zone, choose ones closer to you or your customers. You may use [gcping.com](https://gcping.com) to measure latency to choose the closest location.
2. Adjust the following command variables using your favorite editor prior to executing, when required:
* `POLYGON_NETWORK` - choose `mainnet` network to run.
* `POLYGON_NODETYPE` - choose `archive`,`fullnode` node type to run.
* `POLYGON_BOOTSTRAP_MODE` - choose bootstrap mode `snapshot` or `from_scratch`.
* `POLYGON_RPC_PORT` - choose JSON RPC bor node port to listen on, the default value is what used on VM instance creation and in firewall rules.
* `EXTRA_VAR` - choose Bor and Heimdall branches, use `network_version=mainnet-v1` with `mainnet` network and `network_version=testnet-v4` with `amoy` network.
* `INSTANCE_NAME` - the name of a VM instance with Polygon we are going to create.
* `INSTANCE_TYPE` - GCP [machine type](https://cloud.google.com/compute/docs/machine-types), default value is recommended, You may change it later if required.
* `BOR_EXT_DISK_SIZE` - additional disk size in GB to use with Bor, default value with `fullnode` is recommended, You may expand it later if required. You'll need 8192GB+ with `archive` node though.
* `HEIMDALL_EXT_DISK_SIZE` - additional disk size in GB to use with Heimdall, default value is recommended.
* `DISK_TYPE` - GCP [disk type](https://cloud.google.com/compute/docs/disks#disk-types), SSD is highly recommended. You may need to increase the total SSD GB quota in the region you are spinning up the node.
3. Use the following command to create an instance with the correct hardware and software requirements. In the example below, we deploy Polygon Chain `mainnet` from `snapshot` in the `fullnode` mode:
```bash theme={null}
export POLYGON_NETWORK=mainnet
export POLYGON_NODETYPE=fullnode
export POLYGON_BOOTSTRAP_MODE=snapshot
export POLYGON_RPC_PORT=8747
export GCP_NETWORK_TAG=polygon
export EXTRA_VAR=(bor_branch=v1.1.0 heimdall_branch=v1.0.3 network_version=mainnet-v1 node_type=sentry/sentry heimdall_network=${POLYGON_NETWORK})
gcloud compute firewall-rules create "polygon-p2p" --allow=tcp:26656,tcp:30303,udp:30303 --description="polygon p2p" --target-tags=${GCP_NETWORK_TAG}
gcloud compute firewall-rules create "polygon-rpc" --allow=tcp:${POLYGON_RPC_PORT} --description="polygon rpc" --target-tags=${GCP_NETWORK_TAG}
export INSTANCE_NAME=polygon-0
export INSTANCE_TYPE=e2-standard-8
export BOR_EXT_DISK_SIZE=1024
export HEIMDALL_EXT_DISK_SIZE=500
export DISK_TYPE=pd-ssd
gcloud compute instances create ${INSTANCE_NAME} \
--image-project=ubuntu-os-cloud \
--image-family=ubuntu-2004-lts \
--boot-disk-size=20 \
--boot-disk-type=${DISK_TYPE} \
--machine-type=${INSTANCE_TYPE} \
--create-disk=name=${INSTANCE_NAME}-bor,size=${BOR_EXT_DISK_SIZE},type=${DISK_TYPE},auto-delete=no \
--create-disk=name=${INSTANCE_NAME}-heimdall,size=${HEIMDALL_EXT_DISK_SIZE},type=${DISK_TYPE},auto-delete=no \
--tags=${GCP_NETWORK_TAG} \
--metadata=user-data='
#cloud-config
bootcmd:
- screen -dmS polygon su -l -c bash -c "curl -L https://raw.githubusercontent.com/0xPolygon/node-ansible/master/install-gcp.sh | bash -s -- -n '${POLYGON_NETWORK}' -m '${POLYGON_NODETYPE}' -s '${POLYGON_BOOTSTRAP_MODE}' -p '${POLYGON_RPC_PORT}' -e \"'${EXTRA_VAR}'\"; bash"'
```
The instance should be created and live in a couple of minutes.
## Login to VM
It will take a couple of minutes to install all the required software, and a couple of hours to download a snapshot when chosen.
* You should see working `bor` and `heimdalld` processes filling up additional drives. You may run the following commands to check it.
```bash theme={null}
gcloud compute ssh ${INSTANCE_NAME}
# inside the connected session
sudo su -
ps uax|egrep "bor|heimdalld"
df -l -h
```
* You may use the following command to watch the installation progress, it's really handy in case of `snapshot` bootstrap:
```bash theme={null}
# inside the connected session
screen -dr
```
Use `Control+a d` key combination to disconnect from progress review.
* You may use the following commands to get Bor and Heimdall logs:
```bash theme={null}
# inside the connected session
journalctl -fu bor
journalctl -fu heimdalld
```
Blockchain data is saved onto additional drives which are kept by default on VM instance removal. You need to remove additional disks manually if you don't need this data anymore.
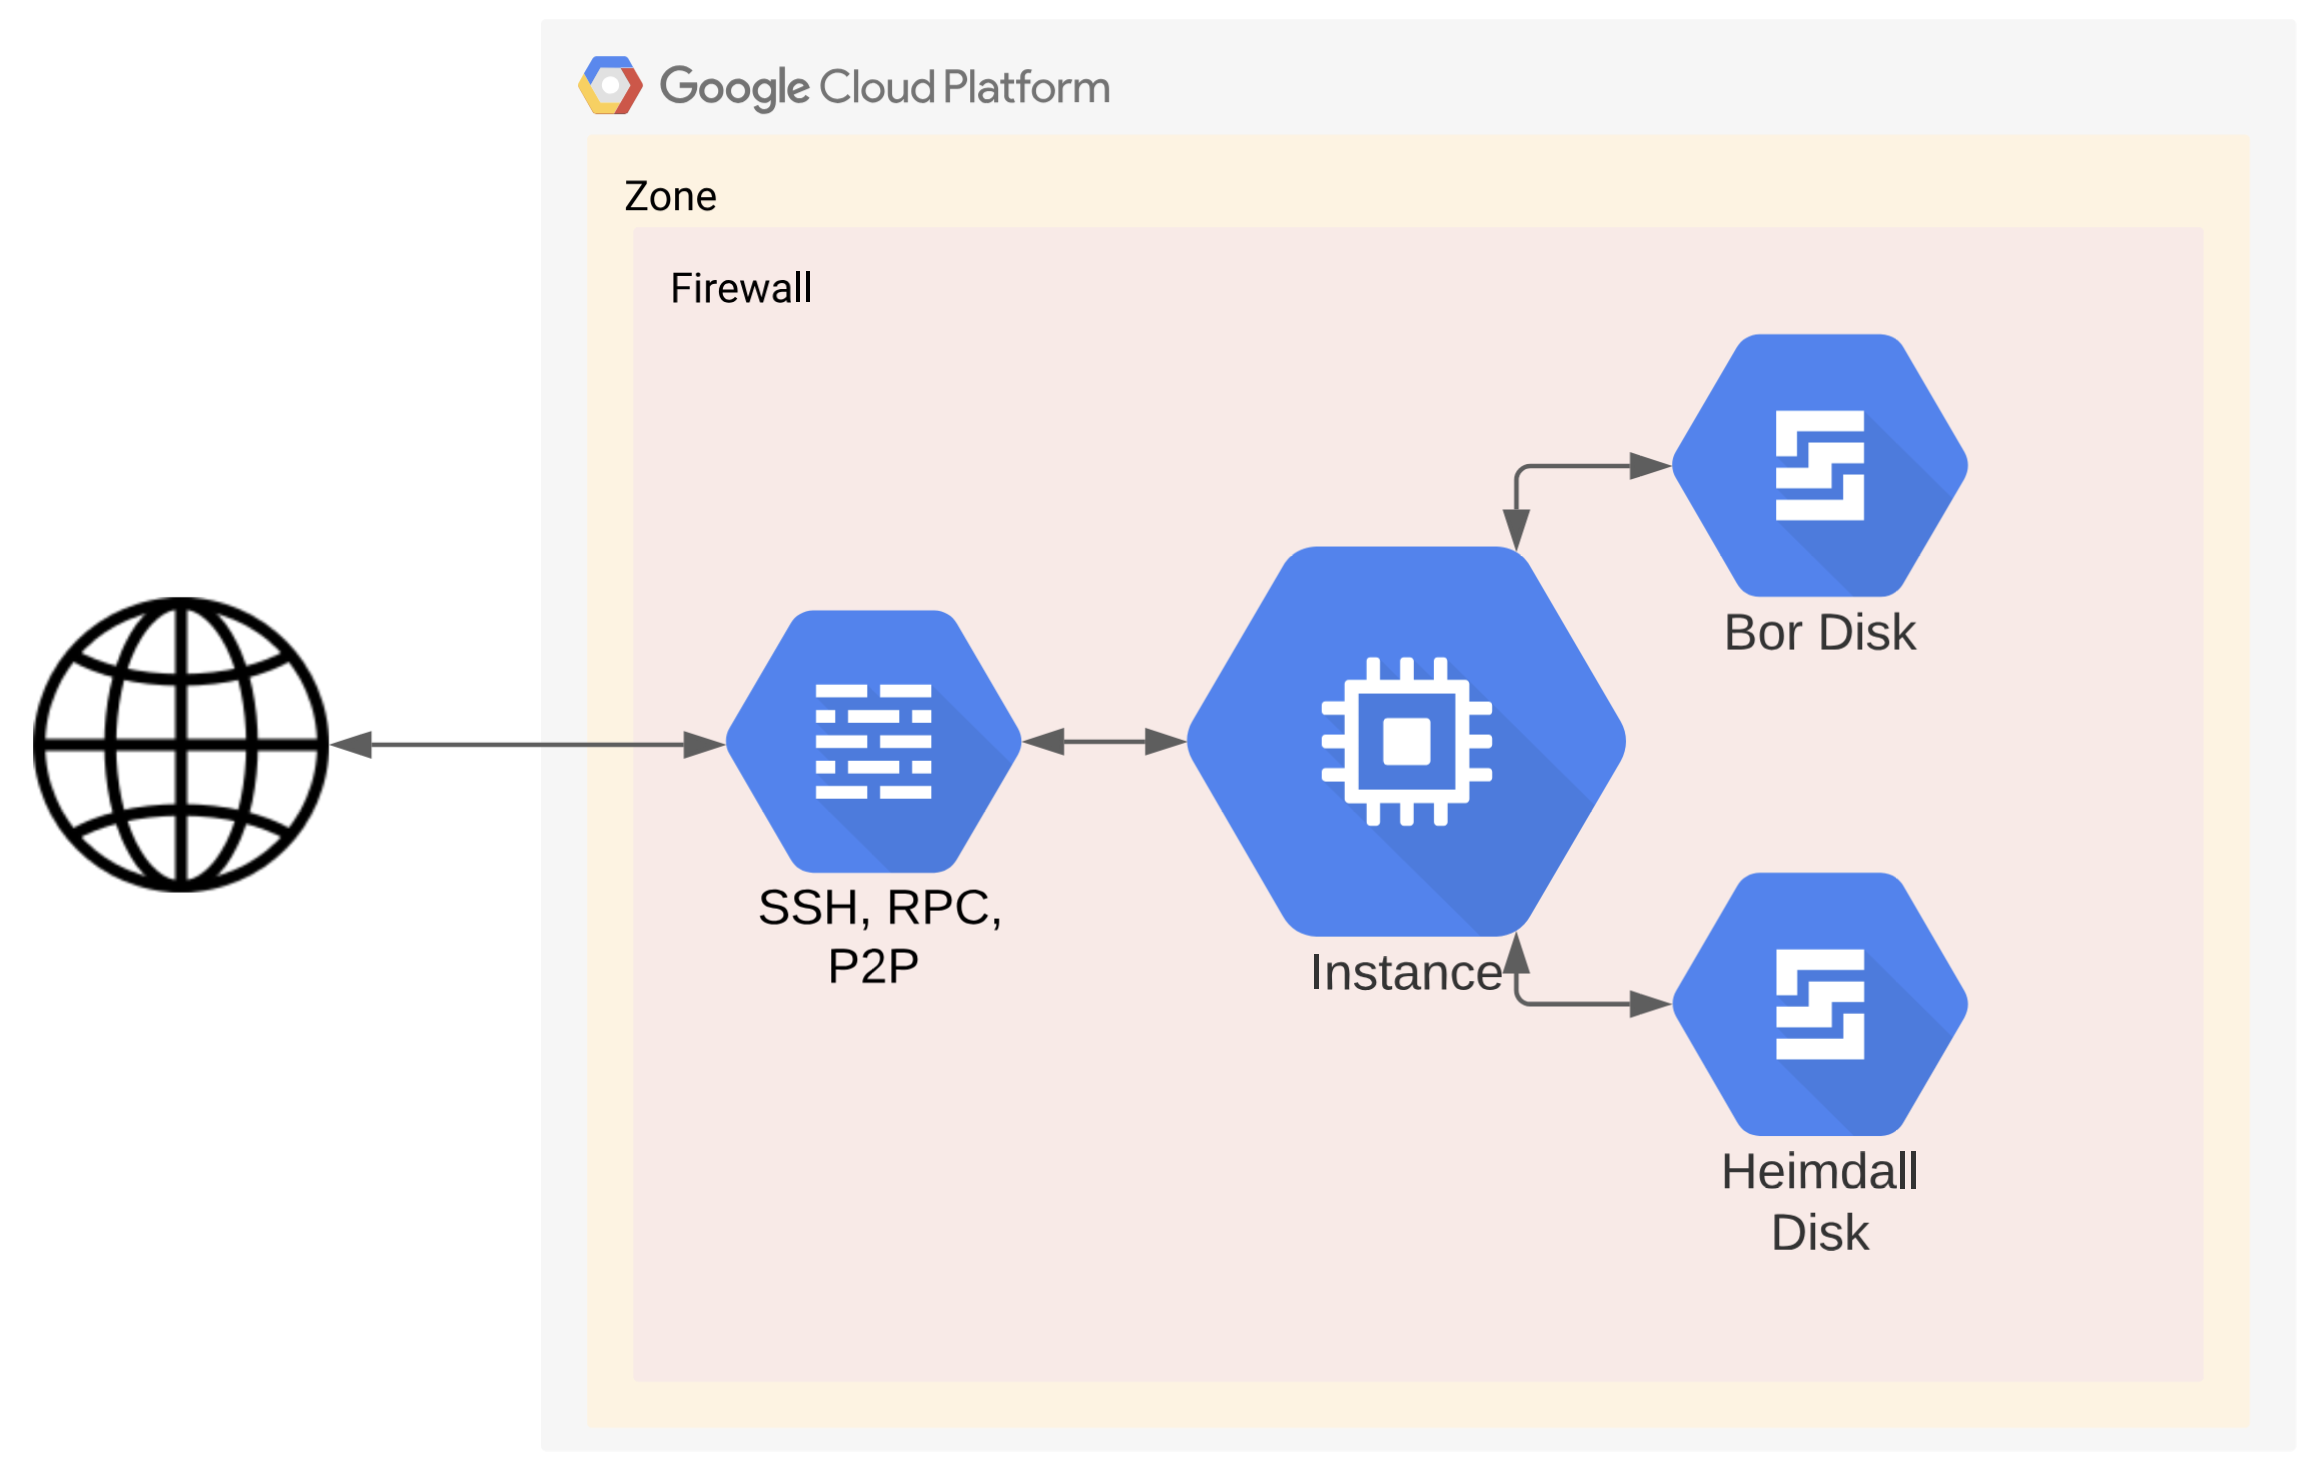
At the end, you will get an instance as shown in the diagram below.