> ## Documentation Index
> Fetch the complete documentation index at: https://docs.polygon.technology/llms.txt
> Use this file to discover all available pages before exploring further.
# Using Docker
> Steps to run a Polygon Chain full node using official Docker images, including Heimdall and Bor setup on Linux.
This guide runs a full Polygon Chain node using official Docker images. The same steps can be adapted for sentry nodes and validators.
## Initial setup
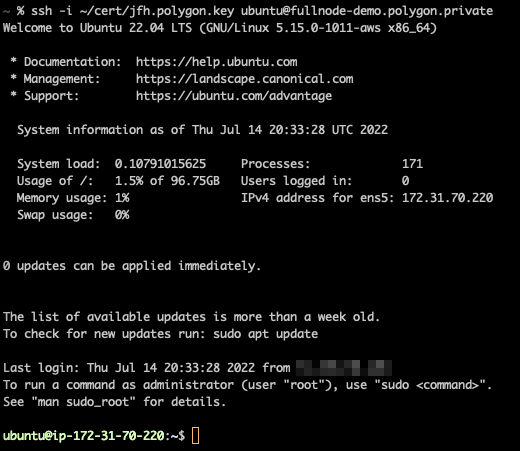
To get started, you'll need to have shell access with root privileges to a linux machine.
 ### Install Docker
It is likely that your operating system won’t have Docker installed by default. Please follow the instructions for your particular distribution found here: [https://docs.docker.com/engine/install/](https://docs.docker.com/engine/install/)
We’re following the instructions for Ubuntu. The steps are included below, but please refer to the official instructions in case they’ve been updated.
```bash theme={null}
sudo apt-get update
sudo apt-get install ca-certificates curl gnupg lsb-release
sudo mkdir -p /etc/apt/keyrings
curl -fsSL https://download.docker.com/linux/ubuntu/gpg | sudo gpg --dearmor -o /etc/apt/keyrings/docker.gpg
echo \
"deb [arch=$(dpkg --print-architecture) signed-by=/etc/apt/keyrings/docker.gpg] https://download.docker.com/linux/ubuntu \
$(lsb_release -cs) stable" | sudo tee /etc/apt/sources.list.d/docker.list > /dev/null
sudo apt-get update
sudo apt-get install docker-ce docker-ce-cli containerd.io docker-compose-plugin
```
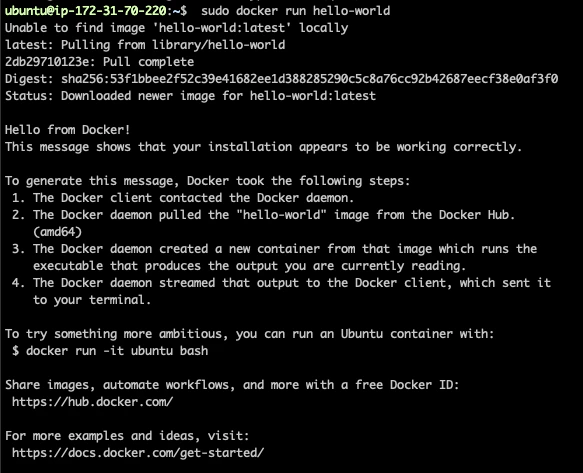
At this point you should have Docker installed. In order to verify, you should be able to run the following command successfully:
```bash theme={null}
sudo docker run hello-world
```
### Install Docker
It is likely that your operating system won’t have Docker installed by default. Please follow the instructions for your particular distribution found here: [https://docs.docker.com/engine/install/](https://docs.docker.com/engine/install/)
We’re following the instructions for Ubuntu. The steps are included below, but please refer to the official instructions in case they’ve been updated.
```bash theme={null}
sudo apt-get update
sudo apt-get install ca-certificates curl gnupg lsb-release
sudo mkdir -p /etc/apt/keyrings
curl -fsSL https://download.docker.com/linux/ubuntu/gpg | sudo gpg --dearmor -o /etc/apt/keyrings/docker.gpg
echo \
"deb [arch=$(dpkg --print-architecture) signed-by=/etc/apt/keyrings/docker.gpg] https://download.docker.com/linux/ubuntu \
$(lsb_release -cs) stable" | sudo tee /etc/apt/sources.list.d/docker.list > /dev/null
sudo apt-get update
sudo apt-get install docker-ce docker-ce-cli containerd.io docker-compose-plugin
```
At this point you should have Docker installed. In order to verify, you should be able to run the following command successfully:
```bash theme={null}
sudo docker run hello-world
```
 In many cases, it’s inconvenient to run docker as `root` user so we’ll follow the post install steps [here](https://docs.docker.com/engine/install/linux-postinstall/) in order to interact with docker without needing to be `root`:
```bash theme={null}
sudo groupadd docker
sudo usermod -aG docker $USER
```
Now you should be able to logout and log back in, and run docker commands without `sudo`.
### Disk setup
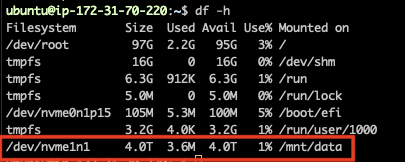
The exact steps required here may vary a lot based on your needs. Most likely you’ll have a root partition running your operating system on one device. You’ll probably want one or more devices for actually holding the blockchain data. For the rest of the walkthrough, we’re going to have that additional device mounted at `/mnt/data`.
In this example, we have a device with 4 TB of available space located at `/dev/nvme1n1`. We are going to mount that using the steps below:
```bash theme={null}
sudo mkdir /mnt/data
sudo mount /dev/nvme1n1 /mnt/data
```
We use `df -h` to make sure the mount looks good.
In many cases, it’s inconvenient to run docker as `root` user so we’ll follow the post install steps [here](https://docs.docker.com/engine/install/linux-postinstall/) in order to interact with docker without needing to be `root`:
```bash theme={null}
sudo groupadd docker
sudo usermod -aG docker $USER
```
Now you should be able to logout and log back in, and run docker commands without `sudo`.
### Disk setup
The exact steps required here may vary a lot based on your needs. Most likely you’ll have a root partition running your operating system on one device. You’ll probably want one or more devices for actually holding the blockchain data. For the rest of the walkthrough, we’re going to have that additional device mounted at `/mnt/data`.
In this example, we have a device with 4 TB of available space located at `/dev/nvme1n1`. We are going to mount that using the steps below:
```bash theme={null}
sudo mkdir /mnt/data
sudo mount /dev/nvme1n1 /mnt/data
```
We use `df -h` to make sure the mount looks good.
 Once we've verified that successfully, we might as well create the home directories on this mount for Bor and Heimdall.
```bash theme={null}
sudo mkdir /mnt/data/bor
sudo mkdir /mnt/data/heimdall
```
Depending on your use case and operating system, you’ll likely want to create an entry in `/etc/fstab` in order to make sure your device is mounted when the system reboots.
In our case we're following some steps like this:
```bash theme={null}
# Use blkid to get the UUID for the device that we're mounting
blkid
# Edit the fstab file and add a line to mount your device
# UUID={your uuid} /mnt/data {your filesystem} defaults 0 1
sudo emacs /etc/fstab
# use this to verify the fstab actually works
sudo findmnt --verify --verbose
```
At this point you should be able to reboot and confirm that the system loads your mount properly.
### Heimdall setup
At this point, we have a host with docker running on it and we have ample mounted storage to run our Polygon node software. So let’s get Heimdall configured and running.
First let’s make sure we can run Heimdall with docker. Run the following command:
```bash theme={null}
docker run -it 0xpolygon/heimdall-v2:0.2.16 heimdalld version
```
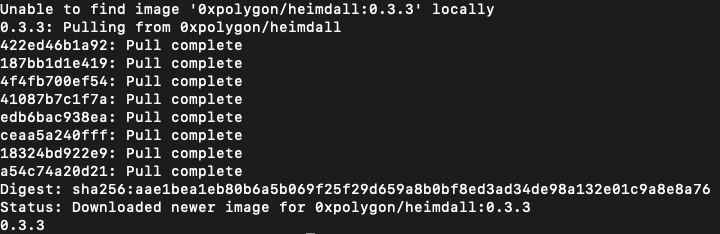
If this is the first time you’ve run Heimdall with docker, it should pull the required image automatically and output the version information.
Once we've verified that successfully, we might as well create the home directories on this mount for Bor and Heimdall.
```bash theme={null}
sudo mkdir /mnt/data/bor
sudo mkdir /mnt/data/heimdall
```
Depending on your use case and operating system, you’ll likely want to create an entry in `/etc/fstab` in order to make sure your device is mounted when the system reboots.
In our case we're following some steps like this:
```bash theme={null}
# Use blkid to get the UUID for the device that we're mounting
blkid
# Edit the fstab file and add a line to mount your device
# UUID={your uuid} /mnt/data {your filesystem} defaults 0 1
sudo emacs /etc/fstab
# use this to verify the fstab actually works
sudo findmnt --verify --verbose
```
At this point you should be able to reboot and confirm that the system loads your mount properly.
### Heimdall setup
At this point, we have a host with docker running on it and we have ample mounted storage to run our Polygon node software. So let’s get Heimdall configured and running.
First let’s make sure we can run Heimdall with docker. Run the following command:
```bash theme={null}
docker run -it 0xpolygon/heimdall-v2:0.2.16 heimdalld version
```
If this is the first time you’ve run Heimdall with docker, it should pull the required image automatically and output the version information.
 If you’d like to check the details of the Heimdall image or find a different tag, you can take a look at the repository on Docker Hub: [https://hub.docker.com/repository/docker/0xpolygon/heimdall-v2](https://hub.docker.com/repository/docker/0xpolygon/heimdall-v2)
At this point, let’s run the Heimdall `init` command to set up our home directory. Set `--chain-id` to `heimdallv2-80002` for Amoy or `heimdallv2-137` for mainnet.
```bash theme={null}
docker run -v /mnt/data/heimdall:/heimdall-home:rw --entrypoint /usr/bin/heimdalld -it 0xpolygon/heimdall-v2:0.2.16 init test-moniker --chain-id= --home=/heimdall-home
```
After running the `init` command, your `/mnt/data/heimdall` directory should have some structure.
Now we need to make a few updates before starting Heimdall.
Download the genesis file and place it under `HEIMDALL_HOME/config/genesis.json` (replacing the one potentially already present there)
```bash theme={null}
curl -L -o "/config/genesis.json"
```
where `BUCKET_URL` is [https://storage.googleapis.com/amoy-heimdallv2-genesis/migrated\_dump-genesis.json](https://storage.googleapis.com/amoy-heimdallv2-genesis/migrated_dump-genesis.json) for amoyand [https://storage.googleapis.com/mainnet-heimdallv2-genesis/migrated\_dump-genesis.json](https://storage.googleapis.com/mainnet-heimdallv2-genesis/migrated_dump-genesis.json) for mainnet
Replace `HEIMDALL_HOME` with the actual path to your Heimdall home directory.
Please note that the genesis file size is around 50MB for amoy and 3GB for mainnet.\
Hence, the download might take a while, and it’s recommended to use a stable and fast connection.
Then, you can customize the configs under `HEIMDALL_HOME/config` (`app.toml`, `client.toml`, `config.toml`), based on your setup.
Templates for each supported network are available [here](https://github.com/0xPolygon/heimdall-v2/tree/develop/packaging/templates/config)
Make sure to configure your Ethereum and Bor connection parameters based on your infrastructure.
## (Optional) Start Heimdall from snapshot
In case you want to start Heimdall from a snapshot,\
you can download it, and extract in the `data` folder.
Examples of snapshots can be found here [https://all4nodes.io/Polygon](https://all4nodes.io/Polygon), and they are managed by the community.
e.g.:
```bash theme={null}
lz4 -dc polygon-heimdall-24404501-25758577.tar.lz4 | tar -x
```
## Starting Heimdall
Before we start Heimdall, we’re going to create a docker network so that the containers can easily network with each other based on names.\
In order to create the network, run the following command:
```bash theme={null}
docker network create polygon
```
Now we’re going to start Heimdall. Run the following command:
```bash theme={null}
docker run -p 26657:26657 -p 26656:26656 -v /mnt/data/heimdall:/heimdall-home:rw --net polygon --name heimdall --entrypoint /usr/bin/heimdalld -d --restart unless-stopped 0xpolygon/heimdall-v2:0.2.16 start --home=/heimdall-home
```
Check container status and logs:
```bash theme={null}
# ps will list the running docker processes. At this point you should see one container running
docker ps
# This command will print out the logs directly from the heimdall application
docker logs -ft heimdall
```
At this point, Heimdall should start syncing. When you look at the logs, you should see a log of information being spit out that looks like this:
```
2022-12-14T19:43:23.687640820Z INFO [2022-12-14|19:43:23.687] Executed block module=state height=26079 validTxs=0 invalidTxs=0
2022-12-14T19:43:23.721220869Z INFO [2022-12-14|19:43:23.721] Committed state module=state height=26079 txs=0 appHash=CAEC4C181C9F82D7F55C4BB8A7F564D69A41295A3B62DDAA45F2BB41333DC20F
2022-12-14T19:43:23.730533414Z INFO [2022-12-14|19:43:23.730] Executed block module=state height=26080 validTxs=0 invalidTxs=0
2022-12-14T19:43:23.756646938Z INFO [2022-12-14|19:43:23.756] Committed state module=state height=26080 txs=0 appHash=CAEC4C181C9F82D7F55C4BB8A7F564D69A41295A3B62DDAA45F2BB41333DC20F
2022-12-14T19:43:23.768129711Z INFO [2022-12-14|19:43:23.767] Executed block module=state height=26081 validTxs=0 invalidTxs=0
2022-12-14T19:43:23.794323918Z INFO [2022-12-14|19:43:23.794] Committed state module=state height=26081 txs=0 appHash=CAEC4C181C9F82D7F55C4BB8A7F564D69A41295A3B62DDAA45F2BB41333DC20F
2022-12-14T19:43:23.802989809Z INFO [2022-12-14|19:43:23.802] Executed block module=state height=26082 validTxs=0 invalidTxs=0
2022-12-14T19:43:23.830960386Z INFO [2022-12-14|19:43:23.830] Committed state module=state height=26082 txs=0 appHash=CAEC4C181C9F82D7F55C4BB8A7F564D69A41295A3B62DDAA45F2BB41333DC20F
2022-12-14T19:43:23.840941976Z INFO [2022-12-14|19:43:23.840] Executed block module=state height=26083 validTxs=0 invalidTxs=0
2022-12-14T19:43:23.866564767Z INFO [2022-12-14|19:43:23.866] Committed state module=state height=26083 txs=0 appHash=CAEC4C181C9F82D7F55C4BB8A7F564D69A41295A3B62DDAA45F2BB41333DC20F
2022-12-14T19:43:23.875395744Z INFO [2022-12-14|19:43:23.875] Executed block module=state height=26084 validTxs=0 invalidTxs=0
```
If you’re not seeing any information like this, your node might not be finding enough peers. The other useful command at this point is an RPC call to check the status of Heimdall syncing:
```bash theme={null}
curl localhost:26657/status
```
This will return a response like:
```json theme={null}
{
"latest_block_hash":"6217E7BDAABE4DF58F8FCA2AAF0BD41BD93A96983F533DA7A0034E514D15BC5B",
"latest_app_hash":"BAA894A82E756A2797E3F608F6F7EED295549B8F7FB621E31542D206F5CA740C",
"latest_block_height":26191190,
"latest_block_time":"2025-08-06T12:50:35.062210407Z",
"earliest_block_hash":"14C55F6E824DD1C1D3D9AB424D0A983953F6C2BCA0C9ED692AE2C43498D870CD",
"earliest_app_hash":"E3B0C44298FC1C149AFBF4C8996FB92427AE41E4649B934CA495991B7852B855",
"earliest_block_height":24404501,
"earliest_block_time":"2025-07-10T15:20:00Z",
"catching_up":false
}
```
In this initial setup phase, it’s important to pay attention to the `catching_up` field.\
If `catching_up` is true, it means that Heimdall is not fully synced.
## Starting Bor
At this point, you should have a node that’s successfully running Heimdall. You should be ready now to run Bor.
Before we get started with Bor, we need to run the Heimdall rest server. This command will start a REST API that Bor uses to retrieve information from Heimdall. The command to start the server is:
```bash theme={null}
docker run -p 1317:1317 -v /mnt/data/heimdall:/heimdall-home:rw --net polygon --name heimdallrest --entrypoint /usr/bin/heimdalld -d --restart unless-stopped 0xpolygon/heimdall:1.0.3 rest-server --home=/heimdall-home --node "tcp://heimdall:26657"
```
If this command runs successfully, when you run `docker ps`, you should see two containers running. Verify the REST server is responding:
```bash theme={null}
curl localhost:1317/bor/span/1
```
Bor will rely on this interface. So if you don’t see JSON output, there is something wrong!
Now let’s download the `genesis` file for Bor specifically:
```bash theme={null}
sudo curl -o /mnt/data/bor/genesis.json 'https://raw.githubusercontent.com/0xPolygon/bor/master/builder/files/genesis-mainnet-v1.json'
```
Let’s verify the `sha256 sum` again for this file:
```
# sha256sum genesis.json
4bacbfbe72f0d966412bb2c19b093f34c0a1bd4bb8506629eba1c9ca8c69c778 genesis.json
```
Generate a default Bor config file, then edit it. Only the changed lines are shown below. Full image details: [https://hub.docker.com/repository/docker/0xpolygon/bor](https://hub.docker.com/repository/docker/0xpolygon/bor).
```bash theme={null}
docker run -it 0xpolygon/bor:1.1.0 dumpconfig | sudo tee /mnt/data/bor/config.toml
```
```bash theme={null}
# Similar to moniker, you might want to update this with a name of your own choosing
identity = "docker.example"
# Setting this to the location of a mount that we'll make
datadir = "/bor-home"
# We'll want to specify some boot nodes
[p2p]
[pep.discovery]
bootnodes = ["enode://0cb82b395094ee4a2915e9714894627de9ed8498fb881cec6db7c65e8b9a5bd7f2f25cc84e71e89d0947e51c76e85d0847de848c7782b13c0255247a6758178c@44.232.55.71:30303", "enode://88116f4295f5a31538ae409e4d44ad40d22e44ee9342869e7d68bdec55b0f83c1530355ce8b41fbec0928a7d75a5745d528450d30aec92066ab6ba1ee351d710@159.203.9.164:30303"]
# Because we're running inside docker, we'll likely need to change the way we connect to heimdall
[heimdall]
url = "http://heimdallrest:1317"
# Assuming you want to access the RPC, you'll need to make a change here as well
[jsonrpc]
[jsonrpc.http]
enabled = true
host = "0.0.0.0"
```
At this point, we should be ready to start Bor. We’re going to use this command:
```bash theme={null}
docker run -p 30303:30303 -p 8545:8545 -v /mnt/data/bor:/bor-home:rw --net polygon --name bor -d --restart unless-stopped 0xpolygon/bor:1.1.0 server --config /bor-home/config.toml
```
If everything goes well, you should see log entries that look like this:
```bash theme={null}
2022-12-14T19:53:51.989897291Z INFO [12-14|19:53:51.989] Fetching state updates from Heimdall fromID=4 to=2020-05-30T23:47:46Z
2022-12-14T19:53:51.989925064Z INFO [12-14|19:53:51.989] Fetching state sync events queryParams="from-id=4&to-time=1590882466&limit=50"
2022-12-14T19:53:51.997640841Z INFO [12-14|19:53:51.997] StateSyncData Gas=0 Block-number=12800 LastStateID=3 TotalRecords=0
2022-12-14T19:53:52.021990622Z INFO [12-14|19:53:52.021] Fetching state updates from Heimdall fromID=4 to=2020-05-30T23:49:58Z
2022-12-14T19:53:52.022015930Z INFO [12-14|19:53:52.021] Fetching state sync events queryParams="from-id=4&to-time=1590882598&limit=50"
2022-12-14T19:53:52.040660857Z INFO [12-14|19:53:52.040] StateSyncData Gas=0 Block-number=12864 LastStateID=3 TotalRecords=0
2022-12-14T19:53:52.064795784Z INFO [12-14|19:53:52.064] Fetching state updates from Heimdall fromID=4 to=2020-05-30T23:52:10Z
2022-12-14T19:53:52.064828634Z INFO [12-14|19:53:52.064] Fetching state sync events queryParams="from-id=4&to-time=1590882730&limit=50"
2022-12-14T19:53:52.085029612Z INFO [12-14|19:53:52.084] StateSyncData Gas=0 Block-number=12928 LastStateID=3 TotalRecords=0
2022-12-14T19:53:52.132067703Z INFO [12-14|19:53:52.131] ✅ Committing new span id=3 startBlock=13056 endBlock=19455 validatorBytes=f8b6d906822710940375b2fc7140977c9c76d45421564e354ed42277d9078227109442eefcda06ead475cde3731b8eb138e88cd0bac3d9018238a2945973918275c01f50555d44e92c9d9b353cadad54d905822710947fcd58c2d53d980b247f1612fdba93e9a76193e6d90482271094b702f1c9154ac9c08da247a8e30ee6f2f3373f41d90282271094b8bb158b93c94ed35c1970d610d1e2b34e26652cd90382271094f84c74dea96df0ec22e11e7c33996c73fcc2d822 producerBytes=f8b6d906822710940375b2fc7140977c9c76d45421564e354ed42277d9078227109442eefcda06ead475cde3731b8eb138e88cd0bac3d9018238a2945973918275c01f50555d44e92c9d9b353cadad54d905822710947fcd58c2d53d980b247f1612fdba93e9a76193e6d90482271094b702f1c9154ac9c08da247a8e30ee6f2f3373f41d90282271094b8bb158b93c94ed35c1970d610d1e2b34e26652cd90382271094f84c74dea96df0ec22e11e7c33996c73fcc2d822
2022-12-14T19:53:52.133545235Z INFO [12-14|19:53:52.133] Fetching state updates from Heimdall fromID=4 to=2020-05-30T23:54:22Z
2022-12-14T19:53:52.133578948Z INFO [12-14|19:53:52.133] Fetching state sync events queryParams="from-id=4&to-time=1590882862&limit=50"
2022-12-14T19:53:52.135049605Z INFO [12-14|19:53:52.134] StateSyncData Gas=0 Block-number=12992 LastStateID=3 TotalRecords=0
2022-12-14T19:53:52.152067646Z INFO [12-14|19:53:52.151] Fetching state updates from Heimdall fromID=4 to=2020-05-30T23:56:34Z
2022-12-14T19:53:52.152198357Z INFO [12-14|19:53:52.151] Fetching state sync events queryParams="from-id=4&to-time=1590882994&limit=50"
2022-12-14T19:53:52.176617455Z INFO [12-14|19:53:52.176] StateSyncData Gas=0 Block-number=13056 LastStateID=3 TotalRecords=0
2022-12-14T19:53:52.191060112Z INFO [12-14|19:53:52.190] Fetching state updates from Heimdall fromID=4 to=2020-05-30T23:58:46Z
2022-12-14T19:53:52.191083740Z INFO [12-14|19:53:52.190] Fetching state sync events queryParams="from-id=4&to-time=1590883126&limit=50"
2022-12-14T19:53:52.223836639Z INFO [12-14|19:53:52.223] StateSyncData Gas=0 Block-number=13120 LastStateID=3 TotalRecords=0
2022-12-14T19:53:52.236025906Z INFO [12-14|19:53:52.235] Fetching state updates from Heimdall fromID=4 to=2020-05-31T00:00:58Z
2022-12-14T19:53:52.236053406Z INFO [12-14|19:53:52.235] Fetching state sync events queryParams="from-id=4&to-time=1590883258&limit=50"
2022-12-14T19:53:52.269611566Z INFO [12-14|19:53:52.269] StateSyncData Gas=0 Block-number=13184 LastStateID=3 TotalRecords=0
2022-12-14T19:53:52.283199351Z INFO [12-14|19:53:52.283] Fetching state updates from Heimdall fromID=4 to=2020-05-31T00:03:10Z
2022-12-14T19:53:52.283737573Z INFO [12-14|19:53:52.283] Fetching state sync events queryParams="from-id=4&to-time=1590883390&limit=50"
2022-12-14T19:53:52.314141359Z INFO [12-14|19:53:52.314] StateSyncData Gas=0 Block-number=13248 LastStateID=3 TotalRecords=0
2022-12-14T19:53:52.325150782Z INFO [12-14|19:53:52.325] Fetching state updates from Heimdall fromID=4 to=2020-05-31T00:05:22Z
2022-12-14T19:53:52.325171075Z INFO [12-14|19:53:52.325] Fetching state sync events queryParams="from-id=4&to-time=1590883522&limit=50"
2022-12-14T19:53:52.354470271Z INFO [12-14|19:53:52.354] StateSyncData Gas=0 Block-number=13312 LastStateID=3 TotalRecords=0
2022-12-14T19:53:52.372354857Z INFO [12-14|19:53:52.372] Fetching state updates from Heimdall fromID=4 to=2020-05-31T00:07:34Z
2022-12-14T19:53:52.372389214Z INFO [12-14|19:53:52.372] Fetching state sync events queryParams="from-id=4&to-time=1590883654&limit=50"
2022-12-14T19:53:52.398246950Z INFO [12-14|19:53:52.398] StateSyncData Gas=0 Block-number=13376 LastStateID=3 TotalRecords=0
2022-12-14T19:53:52.413321099Z INFO [12-14|19:53:52.413] Fetching state updates from Heimdall fromID=4 to=2020-05-31T00:09:46Z
2022-12-14T19:53:52.413345355Z INFO [12-14|19:53:52.413] Fetching state sync events queryParams="from-id=4&to-time=1590883786&limit=50"
2022-12-14T19:53:52.437176855Z INFO [12-14|19:53:52.437] StateSyncData Gas=0 Block-number=13440 LastStateID=3 TotalRecords=0
2022-12-14T19:53:52.450356966Z INFO [12-14|19:53:52.450] Fetching state updates from Heimdall fromID=4 to=2020-05-31T00:11:58Z
```
There are a few ways to check the sync state of Bor. The simplest is using `curl`:
```bash theme={null}
curl 'localhost:8545/' \
--header 'Content-Type: application/json' \
-d '{
"jsonrpc":"2.0",
"method":"eth_syncing",
"params":[],
"id":1
}'
```
When you run this command, you'll see an output like this:
```json theme={null}
{
"jsonrpc": "2.0",
"id": 1,
"result": {
"currentBlock": "0x2eebf",
"healedBytecodeBytes": "0x0",
"healedBytecodes": "0x0",
"healedTrienodeBytes": "0x0",
"healedTrienodes": "0x0",
"healingBytecode": "0x0",
"healingTrienodes": "0x0",
"highestBlock": "0x1d4ee3e",
"startingBlock": "0x0",
"syncedAccountBytes": "0x0",
"syncedAccounts": "0x0",
"syncedBytecodeBytes": "0x0",
"syncedBytecodes": "0x0",
"syncedStorage": "0x0",
"syncedStorageBytes": "0x0"
}
}
```
This will indicate the `currentBlock` that’s been synced and also the `highestBlock` that we’re aware of. If the node is already synced, we should get `false`.
## Seeds and Bootnodes
The latest bor and heimdall seeds can be found [here](https://docs.polygon.technology/pos/reference/seed-and-bootnodes/). Using them will ensure that bor/heimdall is able to connect to peers quickly.
If you’d like to check the details of the Heimdall image or find a different tag, you can take a look at the repository on Docker Hub: [https://hub.docker.com/repository/docker/0xpolygon/heimdall-v2](https://hub.docker.com/repository/docker/0xpolygon/heimdall-v2)
At this point, let’s run the Heimdall `init` command to set up our home directory. Set `--chain-id` to `heimdallv2-80002` for Amoy or `heimdallv2-137` for mainnet.
```bash theme={null}
docker run -v /mnt/data/heimdall:/heimdall-home:rw --entrypoint /usr/bin/heimdalld -it 0xpolygon/heimdall-v2:0.2.16 init test-moniker --chain-id= --home=/heimdall-home
```
After running the `init` command, your `/mnt/data/heimdall` directory should have some structure.
Now we need to make a few updates before starting Heimdall.
Download the genesis file and place it under `HEIMDALL_HOME/config/genesis.json` (replacing the one potentially already present there)
```bash theme={null}
curl -L -o "/config/genesis.json"
```
where `BUCKET_URL` is [https://storage.googleapis.com/amoy-heimdallv2-genesis/migrated\_dump-genesis.json](https://storage.googleapis.com/amoy-heimdallv2-genesis/migrated_dump-genesis.json) for amoyand [https://storage.googleapis.com/mainnet-heimdallv2-genesis/migrated\_dump-genesis.json](https://storage.googleapis.com/mainnet-heimdallv2-genesis/migrated_dump-genesis.json) for mainnet
Replace `HEIMDALL_HOME` with the actual path to your Heimdall home directory.
Please note that the genesis file size is around 50MB for amoy and 3GB for mainnet.\
Hence, the download might take a while, and it’s recommended to use a stable and fast connection.
Then, you can customize the configs under `HEIMDALL_HOME/config` (`app.toml`, `client.toml`, `config.toml`), based on your setup.
Templates for each supported network are available [here](https://github.com/0xPolygon/heimdall-v2/tree/develop/packaging/templates/config)
Make sure to configure your Ethereum and Bor connection parameters based on your infrastructure.
## (Optional) Start Heimdall from snapshot
In case you want to start Heimdall from a snapshot,\
you can download it, and extract in the `data` folder.
Examples of snapshots can be found here [https://all4nodes.io/Polygon](https://all4nodes.io/Polygon), and they are managed by the community.
e.g.:
```bash theme={null}
lz4 -dc polygon-heimdall-24404501-25758577.tar.lz4 | tar -x
```
## Starting Heimdall
Before we start Heimdall, we’re going to create a docker network so that the containers can easily network with each other based on names.\
In order to create the network, run the following command:
```bash theme={null}
docker network create polygon
```
Now we’re going to start Heimdall. Run the following command:
```bash theme={null}
docker run -p 26657:26657 -p 26656:26656 -v /mnt/data/heimdall:/heimdall-home:rw --net polygon --name heimdall --entrypoint /usr/bin/heimdalld -d --restart unless-stopped 0xpolygon/heimdall-v2:0.2.16 start --home=/heimdall-home
```
Check container status and logs:
```bash theme={null}
# ps will list the running docker processes. At this point you should see one container running
docker ps
# This command will print out the logs directly from the heimdall application
docker logs -ft heimdall
```
At this point, Heimdall should start syncing. When you look at the logs, you should see a log of information being spit out that looks like this:
```
2022-12-14T19:43:23.687640820Z INFO [2022-12-14|19:43:23.687] Executed block module=state height=26079 validTxs=0 invalidTxs=0
2022-12-14T19:43:23.721220869Z INFO [2022-12-14|19:43:23.721] Committed state module=state height=26079 txs=0 appHash=CAEC4C181C9F82D7F55C4BB8A7F564D69A41295A3B62DDAA45F2BB41333DC20F
2022-12-14T19:43:23.730533414Z INFO [2022-12-14|19:43:23.730] Executed block module=state height=26080 validTxs=0 invalidTxs=0
2022-12-14T19:43:23.756646938Z INFO [2022-12-14|19:43:23.756] Committed state module=state height=26080 txs=0 appHash=CAEC4C181C9F82D7F55C4BB8A7F564D69A41295A3B62DDAA45F2BB41333DC20F
2022-12-14T19:43:23.768129711Z INFO [2022-12-14|19:43:23.767] Executed block module=state height=26081 validTxs=0 invalidTxs=0
2022-12-14T19:43:23.794323918Z INFO [2022-12-14|19:43:23.794] Committed state module=state height=26081 txs=0 appHash=CAEC4C181C9F82D7F55C4BB8A7F564D69A41295A3B62DDAA45F2BB41333DC20F
2022-12-14T19:43:23.802989809Z INFO [2022-12-14|19:43:23.802] Executed block module=state height=26082 validTxs=0 invalidTxs=0
2022-12-14T19:43:23.830960386Z INFO [2022-12-14|19:43:23.830] Committed state module=state height=26082 txs=0 appHash=CAEC4C181C9F82D7F55C4BB8A7F564D69A41295A3B62DDAA45F2BB41333DC20F
2022-12-14T19:43:23.840941976Z INFO [2022-12-14|19:43:23.840] Executed block module=state height=26083 validTxs=0 invalidTxs=0
2022-12-14T19:43:23.866564767Z INFO [2022-12-14|19:43:23.866] Committed state module=state height=26083 txs=0 appHash=CAEC4C181C9F82D7F55C4BB8A7F564D69A41295A3B62DDAA45F2BB41333DC20F
2022-12-14T19:43:23.875395744Z INFO [2022-12-14|19:43:23.875] Executed block module=state height=26084 validTxs=0 invalidTxs=0
```
If you’re not seeing any information like this, your node might not be finding enough peers. The other useful command at this point is an RPC call to check the status of Heimdall syncing:
```bash theme={null}
curl localhost:26657/status
```
This will return a response like:
```json theme={null}
{
"latest_block_hash":"6217E7BDAABE4DF58F8FCA2AAF0BD41BD93A96983F533DA7A0034E514D15BC5B",
"latest_app_hash":"BAA894A82E756A2797E3F608F6F7EED295549B8F7FB621E31542D206F5CA740C",
"latest_block_height":26191190,
"latest_block_time":"2025-08-06T12:50:35.062210407Z",
"earliest_block_hash":"14C55F6E824DD1C1D3D9AB424D0A983953F6C2BCA0C9ED692AE2C43498D870CD",
"earliest_app_hash":"E3B0C44298FC1C149AFBF4C8996FB92427AE41E4649B934CA495991B7852B855",
"earliest_block_height":24404501,
"earliest_block_time":"2025-07-10T15:20:00Z",
"catching_up":false
}
```
In this initial setup phase, it’s important to pay attention to the `catching_up` field.\
If `catching_up` is true, it means that Heimdall is not fully synced.
## Starting Bor
At this point, you should have a node that’s successfully running Heimdall. You should be ready now to run Bor.
Before we get started with Bor, we need to run the Heimdall rest server. This command will start a REST API that Bor uses to retrieve information from Heimdall. The command to start the server is:
```bash theme={null}
docker run -p 1317:1317 -v /mnt/data/heimdall:/heimdall-home:rw --net polygon --name heimdallrest --entrypoint /usr/bin/heimdalld -d --restart unless-stopped 0xpolygon/heimdall:1.0.3 rest-server --home=/heimdall-home --node "tcp://heimdall:26657"
```
If this command runs successfully, when you run `docker ps`, you should see two containers running. Verify the REST server is responding:
```bash theme={null}
curl localhost:1317/bor/span/1
```
Bor will rely on this interface. So if you don’t see JSON output, there is something wrong!
Now let’s download the `genesis` file for Bor specifically:
```bash theme={null}
sudo curl -o /mnt/data/bor/genesis.json 'https://raw.githubusercontent.com/0xPolygon/bor/master/builder/files/genesis-mainnet-v1.json'
```
Let’s verify the `sha256 sum` again for this file:
```
# sha256sum genesis.json
4bacbfbe72f0d966412bb2c19b093f34c0a1bd4bb8506629eba1c9ca8c69c778 genesis.json
```
Generate a default Bor config file, then edit it. Only the changed lines are shown below. Full image details: [https://hub.docker.com/repository/docker/0xpolygon/bor](https://hub.docker.com/repository/docker/0xpolygon/bor).
```bash theme={null}
docker run -it 0xpolygon/bor:1.1.0 dumpconfig | sudo tee /mnt/data/bor/config.toml
```
```bash theme={null}
# Similar to moniker, you might want to update this with a name of your own choosing
identity = "docker.example"
# Setting this to the location of a mount that we'll make
datadir = "/bor-home"
# We'll want to specify some boot nodes
[p2p]
[pep.discovery]
bootnodes = ["enode://0cb82b395094ee4a2915e9714894627de9ed8498fb881cec6db7c65e8b9a5bd7f2f25cc84e71e89d0947e51c76e85d0847de848c7782b13c0255247a6758178c@44.232.55.71:30303", "enode://88116f4295f5a31538ae409e4d44ad40d22e44ee9342869e7d68bdec55b0f83c1530355ce8b41fbec0928a7d75a5745d528450d30aec92066ab6ba1ee351d710@159.203.9.164:30303"]
# Because we're running inside docker, we'll likely need to change the way we connect to heimdall
[heimdall]
url = "http://heimdallrest:1317"
# Assuming you want to access the RPC, you'll need to make a change here as well
[jsonrpc]
[jsonrpc.http]
enabled = true
host = "0.0.0.0"
```
At this point, we should be ready to start Bor. We’re going to use this command:
```bash theme={null}
docker run -p 30303:30303 -p 8545:8545 -v /mnt/data/bor:/bor-home:rw --net polygon --name bor -d --restart unless-stopped 0xpolygon/bor:1.1.0 server --config /bor-home/config.toml
```
If everything goes well, you should see log entries that look like this:
```bash theme={null}
2022-12-14T19:53:51.989897291Z INFO [12-14|19:53:51.989] Fetching state updates from Heimdall fromID=4 to=2020-05-30T23:47:46Z
2022-12-14T19:53:51.989925064Z INFO [12-14|19:53:51.989] Fetching state sync events queryParams="from-id=4&to-time=1590882466&limit=50"
2022-12-14T19:53:51.997640841Z INFO [12-14|19:53:51.997] StateSyncData Gas=0 Block-number=12800 LastStateID=3 TotalRecords=0
2022-12-14T19:53:52.021990622Z INFO [12-14|19:53:52.021] Fetching state updates from Heimdall fromID=4 to=2020-05-30T23:49:58Z
2022-12-14T19:53:52.022015930Z INFO [12-14|19:53:52.021] Fetching state sync events queryParams="from-id=4&to-time=1590882598&limit=50"
2022-12-14T19:53:52.040660857Z INFO [12-14|19:53:52.040] StateSyncData Gas=0 Block-number=12864 LastStateID=3 TotalRecords=0
2022-12-14T19:53:52.064795784Z INFO [12-14|19:53:52.064] Fetching state updates from Heimdall fromID=4 to=2020-05-30T23:52:10Z
2022-12-14T19:53:52.064828634Z INFO [12-14|19:53:52.064] Fetching state sync events queryParams="from-id=4&to-time=1590882730&limit=50"
2022-12-14T19:53:52.085029612Z INFO [12-14|19:53:52.084] StateSyncData Gas=0 Block-number=12928 LastStateID=3 TotalRecords=0
2022-12-14T19:53:52.132067703Z INFO [12-14|19:53:52.131] ✅ Committing new span id=3 startBlock=13056 endBlock=19455 validatorBytes=f8b6d906822710940375b2fc7140977c9c76d45421564e354ed42277d9078227109442eefcda06ead475cde3731b8eb138e88cd0bac3d9018238a2945973918275c01f50555d44e92c9d9b353cadad54d905822710947fcd58c2d53d980b247f1612fdba93e9a76193e6d90482271094b702f1c9154ac9c08da247a8e30ee6f2f3373f41d90282271094b8bb158b93c94ed35c1970d610d1e2b34e26652cd90382271094f84c74dea96df0ec22e11e7c33996c73fcc2d822 producerBytes=f8b6d906822710940375b2fc7140977c9c76d45421564e354ed42277d9078227109442eefcda06ead475cde3731b8eb138e88cd0bac3d9018238a2945973918275c01f50555d44e92c9d9b353cadad54d905822710947fcd58c2d53d980b247f1612fdba93e9a76193e6d90482271094b702f1c9154ac9c08da247a8e30ee6f2f3373f41d90282271094b8bb158b93c94ed35c1970d610d1e2b34e26652cd90382271094f84c74dea96df0ec22e11e7c33996c73fcc2d822
2022-12-14T19:53:52.133545235Z INFO [12-14|19:53:52.133] Fetching state updates from Heimdall fromID=4 to=2020-05-30T23:54:22Z
2022-12-14T19:53:52.133578948Z INFO [12-14|19:53:52.133] Fetching state sync events queryParams="from-id=4&to-time=1590882862&limit=50"
2022-12-14T19:53:52.135049605Z INFO [12-14|19:53:52.134] StateSyncData Gas=0 Block-number=12992 LastStateID=3 TotalRecords=0
2022-12-14T19:53:52.152067646Z INFO [12-14|19:53:52.151] Fetching state updates from Heimdall fromID=4 to=2020-05-30T23:56:34Z
2022-12-14T19:53:52.152198357Z INFO [12-14|19:53:52.151] Fetching state sync events queryParams="from-id=4&to-time=1590882994&limit=50"
2022-12-14T19:53:52.176617455Z INFO [12-14|19:53:52.176] StateSyncData Gas=0 Block-number=13056 LastStateID=3 TotalRecords=0
2022-12-14T19:53:52.191060112Z INFO [12-14|19:53:52.190] Fetching state updates from Heimdall fromID=4 to=2020-05-30T23:58:46Z
2022-12-14T19:53:52.191083740Z INFO [12-14|19:53:52.190] Fetching state sync events queryParams="from-id=4&to-time=1590883126&limit=50"
2022-12-14T19:53:52.223836639Z INFO [12-14|19:53:52.223] StateSyncData Gas=0 Block-number=13120 LastStateID=3 TotalRecords=0
2022-12-14T19:53:52.236025906Z INFO [12-14|19:53:52.235] Fetching state updates from Heimdall fromID=4 to=2020-05-31T00:00:58Z
2022-12-14T19:53:52.236053406Z INFO [12-14|19:53:52.235] Fetching state sync events queryParams="from-id=4&to-time=1590883258&limit=50"
2022-12-14T19:53:52.269611566Z INFO [12-14|19:53:52.269] StateSyncData Gas=0 Block-number=13184 LastStateID=3 TotalRecords=0
2022-12-14T19:53:52.283199351Z INFO [12-14|19:53:52.283] Fetching state updates from Heimdall fromID=4 to=2020-05-31T00:03:10Z
2022-12-14T19:53:52.283737573Z INFO [12-14|19:53:52.283] Fetching state sync events queryParams="from-id=4&to-time=1590883390&limit=50"
2022-12-14T19:53:52.314141359Z INFO [12-14|19:53:52.314] StateSyncData Gas=0 Block-number=13248 LastStateID=3 TotalRecords=0
2022-12-14T19:53:52.325150782Z INFO [12-14|19:53:52.325] Fetching state updates from Heimdall fromID=4 to=2020-05-31T00:05:22Z
2022-12-14T19:53:52.325171075Z INFO [12-14|19:53:52.325] Fetching state sync events queryParams="from-id=4&to-time=1590883522&limit=50"
2022-12-14T19:53:52.354470271Z INFO [12-14|19:53:52.354] StateSyncData Gas=0 Block-number=13312 LastStateID=3 TotalRecords=0
2022-12-14T19:53:52.372354857Z INFO [12-14|19:53:52.372] Fetching state updates from Heimdall fromID=4 to=2020-05-31T00:07:34Z
2022-12-14T19:53:52.372389214Z INFO [12-14|19:53:52.372] Fetching state sync events queryParams="from-id=4&to-time=1590883654&limit=50"
2022-12-14T19:53:52.398246950Z INFO [12-14|19:53:52.398] StateSyncData Gas=0 Block-number=13376 LastStateID=3 TotalRecords=0
2022-12-14T19:53:52.413321099Z INFO [12-14|19:53:52.413] Fetching state updates from Heimdall fromID=4 to=2020-05-31T00:09:46Z
2022-12-14T19:53:52.413345355Z INFO [12-14|19:53:52.413] Fetching state sync events queryParams="from-id=4&to-time=1590883786&limit=50"
2022-12-14T19:53:52.437176855Z INFO [12-14|19:53:52.437] StateSyncData Gas=0 Block-number=13440 LastStateID=3 TotalRecords=0
2022-12-14T19:53:52.450356966Z INFO [12-14|19:53:52.450] Fetching state updates from Heimdall fromID=4 to=2020-05-31T00:11:58Z
```
There are a few ways to check the sync state of Bor. The simplest is using `curl`:
```bash theme={null}
curl 'localhost:8545/' \
--header 'Content-Type: application/json' \
-d '{
"jsonrpc":"2.0",
"method":"eth_syncing",
"params":[],
"id":1
}'
```
When you run this command, you'll see an output like this:
```json theme={null}
{
"jsonrpc": "2.0",
"id": 1,
"result": {
"currentBlock": "0x2eebf",
"healedBytecodeBytes": "0x0",
"healedBytecodes": "0x0",
"healedTrienodeBytes": "0x0",
"healedTrienodes": "0x0",
"healingBytecode": "0x0",
"healingTrienodes": "0x0",
"highestBlock": "0x1d4ee3e",
"startingBlock": "0x0",
"syncedAccountBytes": "0x0",
"syncedAccounts": "0x0",
"syncedBytecodeBytes": "0x0",
"syncedBytecodes": "0x0",
"syncedStorage": "0x0",
"syncedStorageBytes": "0x0"
}
}
```
This will indicate the `currentBlock` that’s been synced and also the `highestBlock` that we’re aware of. If the node is already synced, we should get `false`.
## Seeds and Bootnodes
The latest bor and heimdall seeds can be found [here](https://docs.polygon.technology/pos/reference/seed-and-bootnodes/). Using them will ensure that bor/heimdall is able to connect to peers quickly.